 Black Tern Hovering Vertical (Chlidonias niger, Guifette noire, BLTE) Missisquoi National Wildlife Refuge, Vermont, USA. Image Copyright ©Christopher Dodds www.chrisdoddsphoto.com All Rights Reserved. Canon EOS-1D MKII, 70-200mm F2.8L IS (version I) @200mm. ISO 400, 1/1000s F5.6. Hand-held (vertical) from kayak. Cropped slightly top & bottom to fit this aspect ratio. CLICK HERE TO PURCHASE A PRINT or LICENSE IMAGE FOR PUBLICATION.
“The past two decades have demonstrated an amazing interplay between customers who want to push the limits of their personal creativity and a passionate team of Adobe engineers who make those visions a reality,” said Kevin Connor, vice president of product management for professional digital imaging at Adobe. “We experienced this firsthand when we posted a ‘sneak peek’ video of the team’s work on the Content Aware Fill feature a few weeks ago. It quickly became the number one viral video online, with close to 2 million views and its ‘magic’ was one of the top trending Twitter topics of discussion. This version of Photoshop has some of the most innovative and extraordinary technologies to ever come from our labs and clearly customers are already clamouring for it.”
Redefining the Image-Editing Experience
Now a native 64-bit application on both Mac and Windows®, Photoshop CS5 delivers superior tools and creative control so users can perform advanced image manipulations and compositing with ease. Revolutionary image intelligence behind Content-Aware Fill magically removes any image detail or object, examines the surroundings and seamlessly fills in the space left behind. Lighting, tone and noise of the surrounding area match perfectly, looking as if the removed content never existed. New Refine Edge makes nearly-impossible image selections possible. This innovative technology precisely detects and masks the trickiest types of edges, such as hair and foliage, while eliminating background color contamination.
For photographers, Photoshop CS5 now offers next-generation high dynamic range (HDR) capabilities. When combining multiple exposures into a single HDR image, Photoshop CS5 preserves the full tonal range of a scene with unprecedented speed and accuracy. The new HDR Pro offers exceptional ghost artifact removal and greater tone mapping and adjustment control. With HDR toning, users can emulate the striking look of an HDR image with any single-exposure image. -Adobe Press Release April 12, 2010
I'm locked away having fun re-visiting and re-processing older files (this one from 2005) in PhotoShop CS5 - it’s a whole new world for some images. Truth be told; I'm always learning about Photoshop and refining my post capture workflow (usually trying to spend less time working on each image), so it's about time I revisited some older files to apply my new workflow and get the most out of the RAW capture.
While I only barely touch the surface of the plethora of tools in PhotoShop, I am somewhat disappointed with the "content aware" thing that drove their marketing campaign as a “magic eraser tool”. Got an image of a breathtaking vista that has an ugly telephone pole and electric wires across it? No problem: Content Aware to the rescue (it works with the Spot Healing Brush and is an option of the Fill tool); it fills a selected area with data from the surrounding area, so that the lighting, texture, and tonality all match the rest of the image. It didn't work as well as the video that Adobe circulated virally on the web; I had to cleanup with the Clone and Patch tools. But, overall, it is an impressive time-saving feature that will surely evolve by the next release of Photoshop.
The Refine Edge selection dialog box has been redesigned to allow more accurate selections, especially of difficult textured edges, such as a bird’s feathers or tree bark. Not to say that creating masks are now child's play, but with the Refine Radius and Erase Refinements brushes, along with Smart Radius analyzing the edges, the task of working on such difficult subjects isn't as arduous and time consuming. In addition, the Color Decontaminant option helps remove excess background that you might have mistakenly included in your mask.
CS5's HDR-Pro offers enhanced options and new algorithms. Curve tool and sliders for adjusting Vibrance, Saturation, Exposure, Detail provide more precise, highly creative control over the dynamics. The auto deghosting works well at removing artifacts caused by slight differences among the merged photos, like a leaf that might have moved between captures. You can choose which of your original images is to be used as the defining reference to resolve visual conflicts, such as a cloud that might have changed shape between frames. One of the problems with HDR is that you have to start with a series of nearly identical photos, taken at various exposures. The new HDR Toning in CS5 allows you to emulate HDR, using a single image. The controls are quite similar to HDR-Pro, and the tool provides a high degree of creative potential.
The real value to the upgrade, in my humble opinion, is the re-worked Camera Raw converter, ACR (now version 6.1). There are some great new, highly anticipated, enhancements that include the new noise reduction algorithms that now includes sliders for both luminance and color noise (this is worth the price of the upgrade alone), sharpening, grain and post-crop vignette tools. Now you can apply profile-based corrections to accommodate geometric distortions, chromatic aberration and lens vignette effects. Manual corrections for geometric distortion & vertical and horizontal perspective transforms are also available. A handful of lens profiles are included for automatic correction and more can be created by the community with the Adobe Lens Profile Creator. (http://labs.adobe.com/technologies/lensprofile_creator/)
Where to photograph the Black Tern
Black Tern is considered "species at risk" in Vermont, and "species of concern" in Ontario. There's a healthy population at Point Pelee in Ontario and Missisquoi National Wildlife Refuge in Vermont. There is also some great opportunities at L'ile Bizard in Quebec. The most accessible (without boat) are at L'ile Bizard in Quebec and then Point Pelee National Park in Ontario. Species status in Vermont has forced the authorities to increase the size of the protected nesting zone at Missisquoi National Wildlife Refuge in Vermont, but you can still shoot them from the road (there's a culvert big enough for a canoe to pass through near the fishing hole / boat ramp that they like to hang around) - it is hit, or miss, though, but there are plenty of low Osprey nests to entertain you if you aren't lucky with the Terns.
Black Tern (Chlidonias niger, Guifette noire, BLTE)
The Black Tern (Chlidonias niger, Guifette noire, BLTE) is a small tern generally found in or near inland water in Europe and North America. As its name suggests, it has predominantly dark plumage. Adult are 25 cm (9.75 in) long, with a wing span 61 cm (24 in), and weigh 62 g (2.2 oz). They have short dark legs and a short, weak-looking black bill, measuring 27-28 mm, nearly as long as the head. The bill is long, slender, and looks slightly decurved. They have a dark grey back, with a white forehead, black head, neck (occasionally suffused with gray in the adult) and belly, black or blackish-brown cap (which unites in color with the ear coverts, forming an almost complete hood), and a light brownish-grey, 'square' tail. The face is white. There is a big dark triangular patch in front of the eye, and a broadish white collar in juveniles. There are grayish-brown smudges on the ides of the white breast, a downwards extension of the plumage of the upperparts. These marks vary in size and are not conspicuous. In non-breeding plumage, most of the black, apart from the cap, is replaced by grey. The plumage of the upperparts is drab, with pale feather-edgings. The rump is brownish-gray. In flight, the build appears slim. The wing-beats are full and dynamic, and flight is often erratic as it dives to the surface for food; similar to other tern species. The Black Tern is very social. It breeds in loose colonies and usually forages, roosts, and migrates in flocks of a few to more than 100 birds, occasionally up to tens of thousands. Point Pelee National Park in Canada boasts a robust population of black terns. It is considered threatened in Vermont, though there is a thriving population at Missisquoi National Wildlife Refuge on the astern shore of Lake Champlain near the Canadian border in Franklin County, Vermont.
 Bull Elk Lookback (Wapiti, Cervus canadensis, élan) Banff National Park, Alberta, Canada. Image Copyright ©Christopher Dodds www.chrisdoddsphoto.com All Rights Reserved. Canon EOS 1DsMKIII, 70-200 F2.8 IS II @200mm. ISO 650, F5.6 1/200s Manual. CLICK HERE TO PURCHASE A PRINT or LICENSE IMAGE FOR PUBLICATION.
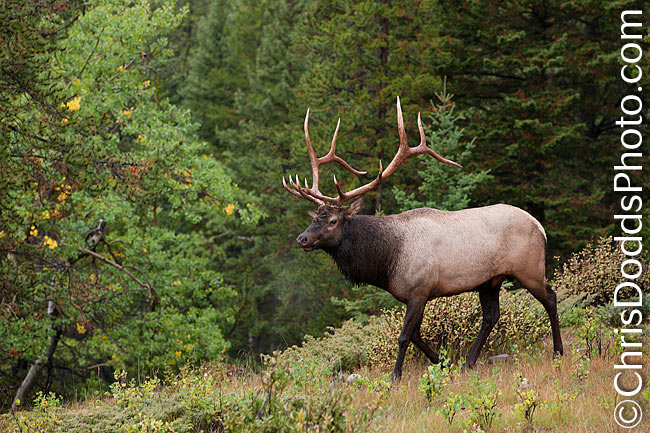 Bull Elk in the rain (Wapiti, Cervus canadensis, élan) Banff National Park, Alberta, Canada. Image Copyright ©Christopher Dodds www.chrisdoddsphoto.com All Rights Reserved. Canon EOS 1DsMKIII, 70-200 F2.8 IS II @170mm. ISO 650, F5.6 1/200s Manual. CLICK HERE TO PURCHASE A PRINT or LICENSE IMAGE FOR PUBLICATION.
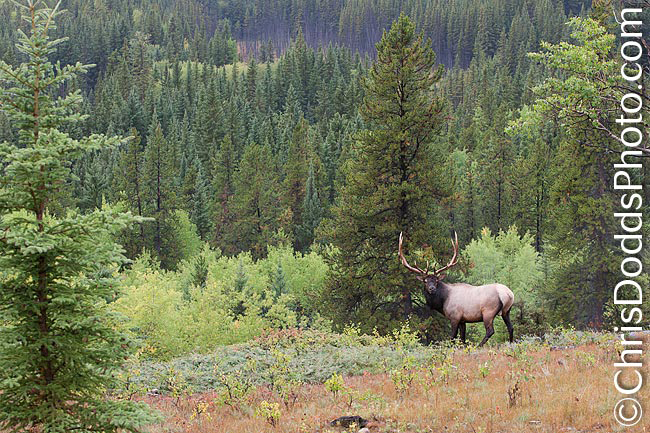 Bull Elk overlooking the Bow Valley in the rain (Wapiti, Cervus canadensis, élan) Banff National Park, Alberta, Canada. Image Copyright ©Christopher Dodds www.chrisdoddsphoto.com All Rights Reserved. Canon EOS 1DsMKIII, 70-200 F2.8 IS II @70mm. ISO 650, F5.6 1/200s Manual. CLICK HERE TO PURCHASE A PRINT or LICENSE IMAGE FOR PUBLICATION.
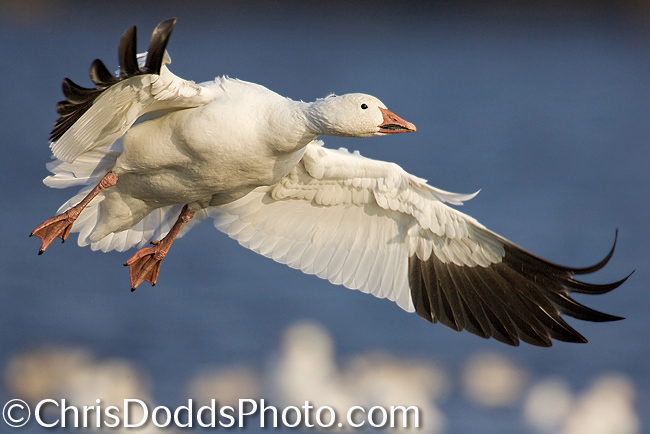
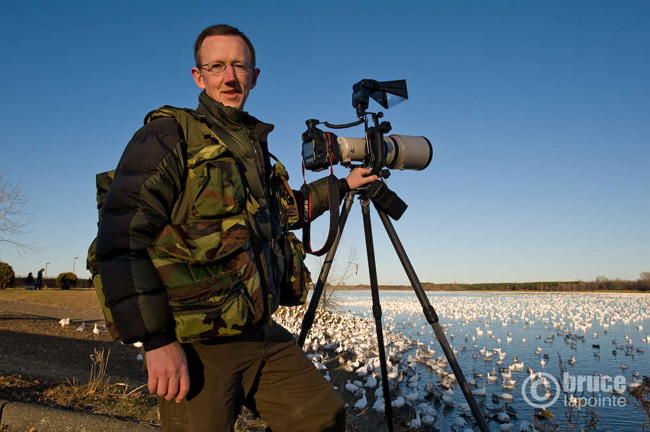 That's me, Christopher Dodds, with my Vested Interest Khumbu Photo Vest. Notice just how many pockets there are and that it fits over my down winter jacket. Image copyright & courtesy of Bruce Lapointe.


