F is for Fabulous

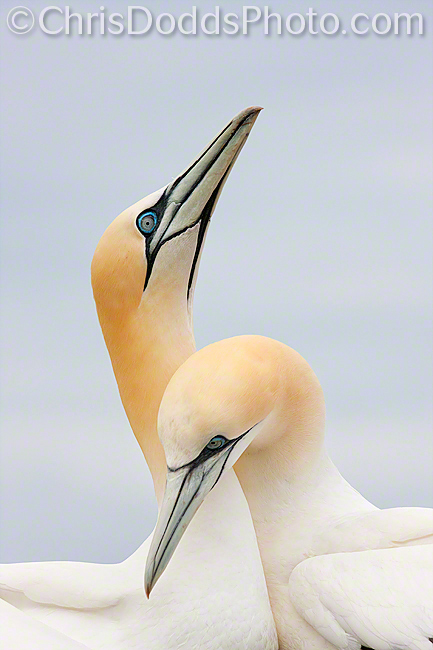
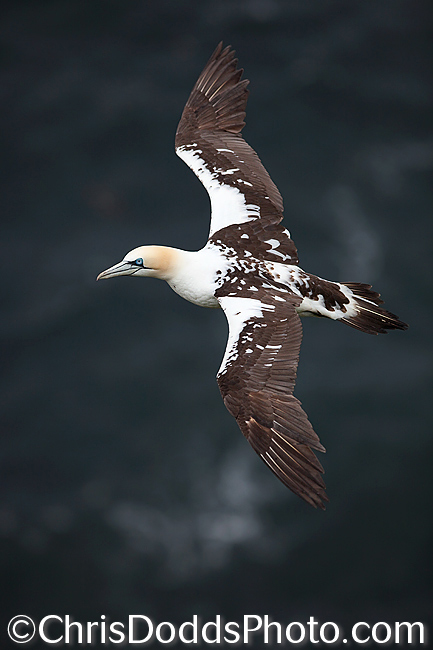
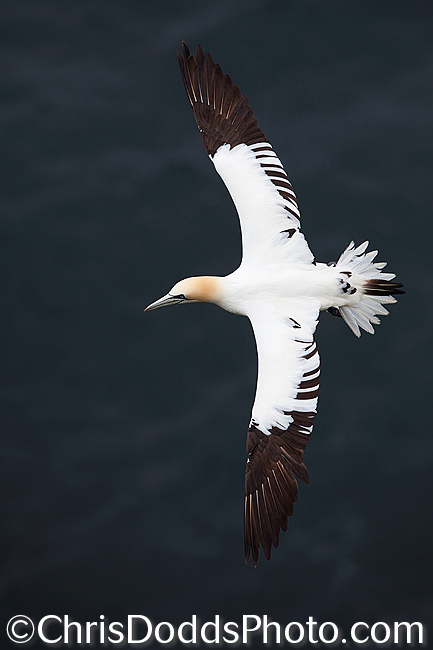
Northern Gannets SPOONING (fencing = pair bonding), Morus Bassanus, Fou de Bassan Parc national de l'Île-Bonaventure-et-du-Rocher-Percé, Bonaventure Island, Quebec. Image Copyright ©Christopher Dodds Canon EOS 1DMKIV, 500mm F4 L IS, Tripod & Wimberley Head II ISO 400, F18 1/200s Manual. Full Frame. CLICK HERE TO PURCHASE A PRINT or LICENSE IMAGE FOR PUBLICATION.

F is for FABULOUS!

I’ve been asked countless times if there is a formula to creating a great image. I’ve spent countless hours scrutinizing my favorite images to try to describe to myself why I connect with them so deeply and make such an emotional response to them. I’m far from finished, but here’s my first attempt at describing a system that may help you; it’s how I create images – in a subconscious way. It’s what makes images a success to me, and to the viewer. Keep in mind that this is a working copy, and I might elaborate more in a longer post in the future.

You have to start by understanding my three Fs of FABULOUS: Fill, Form and Feeling. Every image out there contains at least one of these three ingredients; a photojournalist’s images contain more FILL and FEELING, a fine art or abstract photographer tends to feature the FORM and greeting card photographers often capture FEELING.

Here’s the key: Your most successful images will generally contain a careful balance of all three; Fill, FORM and FEELING.  The Northern Gannet image above is a very careful balance of Fill (it’s about the Northern Gannets), Form (the composition, pose and lines) and Feeling (most images with two subjects evoke some sort of emotion or feeling).


Save 25% on your Season pass to Point Pelee National Park of Canada

Buy or renew your annual pass to Point Pelee National Park of Canada and save 25%. From February 1, until March 31, 2011, take advantage of this great offer to start your preparations for this year's spring migration. Simply call (519) 322-2365, extension 200 from Monday to Friday from 8:30 am until 4:30 pm. I always recommend the Family (or group) pass, as this let's you enter through the automated gate and skip the sometimes lengthy line-ups each morning. 

Manual Mode for More Creative Control

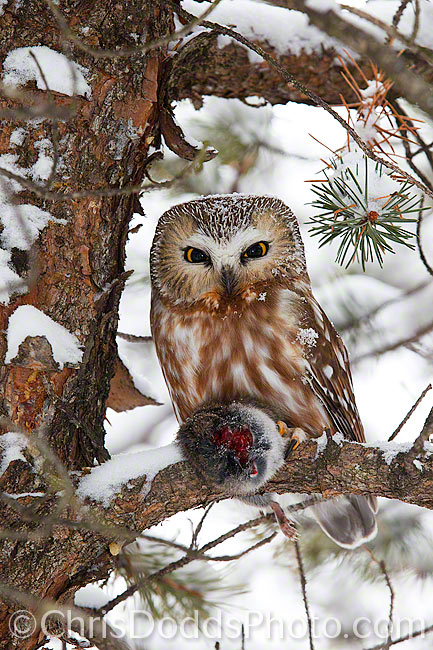
Northern Saw-Whet Owl (Aegolius acadicus, Petite Nyctale) with sprinkle of snow and Meadow Vole (Field Mouse) Lunch. Ontario. Image Copyright ©Christopher Dodds All Rights Reserved. Canon EOS-1D MKIV, 70-200 F2.8 IS II @180mm. ISO 800, 1/100s F8 Manual. Hand held.580EXII Flash manual mode. Full Frame. CLICK HERE TO PURCHASE A PRINT or LICENSE IMAGE FOR PUBLICATION.

Northern Saw-Whet Owl (Aegolius acadicus, Petite Nyctale) Portrait. Ontario. Image Copyright ©Christopher Dodds All Rights Reserved. Canon EOS-1D MKIV, 70-200 F2.8 IS II @200mm with 1.4X Teleconverter. ISO 800, 1/80s F7.1 Manual. Hand held. Full Frame. CLICK HERE TO PURCHASE A PRINT or LICENSE IMAGE FOR PUBLICATION.

Choose Manual Mode for MORE Creative Control

If you frequent this blog or my website, then you most probably know that I use MANUAL MODE most often; I expose for the ambient light and focus on making pleasing images. There is another compelling reason to choose manual mode; it makes the photographer (you) think about the three variables that lead to the correct exposure (ISO, Shutter Speed and Aperture). What is their relation to the image you are trying to make: Are you photographing a landscape and do you need a large depth of field? A bird in flight and do you need to freeze the action? would you rather create a blur? A bird on a perch and do you want a shallow depth of field? Will changing the ISO help me to achieve the desired result? I find that most photographers in my workshops who use anything other than manual mode are completely unaware of all that is available to them. If you find yourself always choosing aperture priority, shutter priority or program mode, then give manual mode a try next time you get out with your camera.

If you go out in the woods today - Think-Tank Photo Digital Holster V2.0

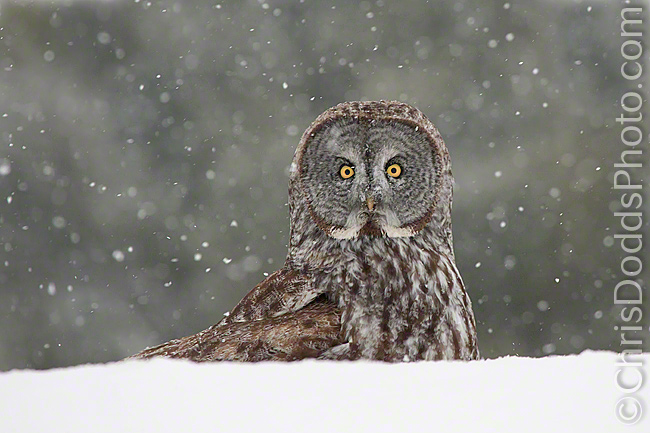
Great Grey Owl Winter (Strix nebulosa, Chouette Lapone) Bracebridge, Ontario, Canada. Image Copyright ©Christopher Dodds http://www.chrisdoddsphoto.com All Rights Reserved. Canon EOS 1D Mark II, 100-400mm @ 400mm. ISO 800, F8 1/400s Manual Exposure. Full Frame. CLICK HERE TO PURCHASE A PRINT or LICENSE AN IMAGE FOR PUBLICATION. Image presented with both a visible, and invisible digital watermark by Digimarc.

Let’s face it: digital cameras are responsible for more people being more successful at making great images than ever before. The instant feedback from the image and histogram displayed on digital camera's LCD screens has revolutionized how we take picture and is responsible for the astronomical volume of pictures captured every day – many of them great images.
The gap between the professional and amateur has narrowed. The biggest difference between a professional and amateur today, is their ability to edit down the number of similar images, and a professional's ability to leave some gear behind. If you head out into the woods to look for owls, consider packing less for speed, ease of movement, comfort and your back. You really don't need to lug around every lens you own in the biggest of camera backpacks. I’ve seen it countless times out in the field: great images missed while the photographer was selecting which lens and camera to use from the arsenal they had just hauled through waist deep snow into the woods. Imageless, out of breath, dripping sweat, shaking from the physical exertion, they are left to pack-up their photographic assets, while I quickly chimp through the images, stow my single camera and lens and carry-on looking through the woods for owls.

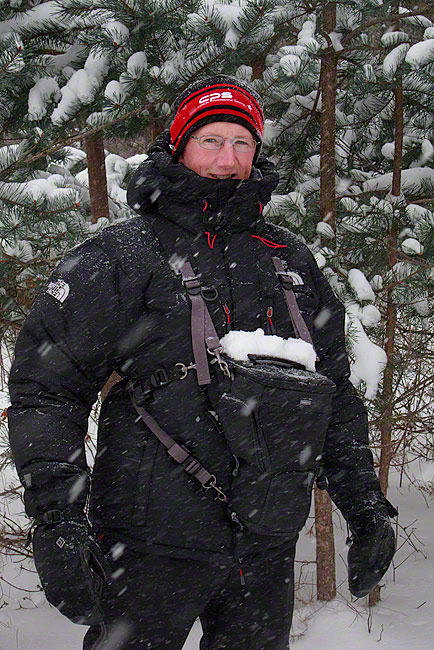
Nature Photographer Christopher Dodds with Think-Tank Photo's new Digital Holster 50 V2.0 and Digital Holster Harness V2.0 looking for owls December, 2010, Rockburn, Quebec, Canada. Image Copyright and courtesy ©Julie Morrison All Rights Reserved. Image from my Canon S-95.

Think-Tank Photo Digital Holster 50 V2.0

My friends over at Think-Tank Photo are at it again. This time, they have redesigned their Digital Holster line. I was thrilled to receive the new Digital Holster 50 V2.0 with a Digital Holster Harness V2.0 and put them to the test recently while out in the recent Canadian winter looking for owls.
I threw my 70-200mm F2.8 IS II onto my Canon 1D Mark IV, extended the hood and slid it into my new Digital Holster 50 V2.0 after un-zipping the “pop down” lens compartment extension on the case – a terrific design that reduces the holster’s size when you travel with the lens hood reversed. Next, I quickly installed and adjusted the Holster Harness (they have even found a simple way to stash the left-over ends of straps so they don’t get in the way or blow around in the wind) and quickly loaded the rig over my huge coat and onto my chest. I threw an extra battery and some extra memory cards into the built-in side pocket and was off to try my luck at finding any owls that may have been out in the fresh snow. The new version even has a built-in side attachment system compatible with modular Think-Tank Photo pouches if you need a little more room. Built materials and quality are first rate, as expected from Think-Tank Photo and there is even a built-in padded flap to cover and protect the camera’s LCD screen.
The Digital Holster 50 V2.0 and the new Digital Holster Harness V2.0 worked flawlessly and proved to be the key to mobility and agility while safely protecting my camera as I navigated around the forest in the fresh snow. As mentioned, the material is durable and it’s built well, I only wish the fine folks over at Think-Tank Photo would stop including waterproof covers that take away storage space when stowed in the bag, get in the way and then become lost, and instead produced a weatherproof line of gear for the outdoor crowd – don’t get me wrong, they are almost weatherproof now and I have yet to find a better alternative. I am just hopeful we will see an “adventurer” line from them in the future; a line designed by and for the outdoor photographer.
Order yours now and get a free bag HERE while helping to support this site.

Great FREE Gear Giveaway Continues

Sign-up for my newsletter before Dec. 15th, 2010 and you will automatically be entered to win some amazing prizes. Simply fill-in your name and email address in the form in the column to the right of this post and you are entered automatically (only sign-up once please). Tweet, Like or Share this blog entry on Facebook or Twitter, or leave a meaningful comment here for additional chances to win. Don't forget to tell your friends or fellow camera club members about the prizes.

  • WH-200 Wimberley Head version II (retail value of US$595.00)
  • Think-Tank Photo Urban Disguise 50 (retail value US$169.00)
  • Nik Software Viveza 2 (retail value US$199.95)
  • Digimarc for Images Professional Edition 1 year subscription (US$99.00)
  • One of eight Canon Long Lens Rain Covers (US$125.00 each)

Dec. 15th PHOTO GEEK CHRISTMAS PARTY

I'm hosting my first annual PHOTO GEEK CHRISTMAS PARTY at the ROCKBURN PUB 2461 Mtee Rockburn, Hinchinbrook, Quebec J0S 1E0 (450) 264-2239. All amateurs and hobbyists welcome! It's an à la carte menu and there is no fee (other than paying for your own food & drinks) - John Zimmerman (President, Montreal Camera Club) has graciously agreed to pass the hat for Missing Children's Network / Enfant-Retour Québec; donations are optional but encouraged (Tax receipts will be issued for contributions greater than $15.00). Come on out and meet me, my friends and make new contacts while networking and showing off a few of your favorite images from 2010. Feel free to bring prints, iPads or laptops with your favorite images. RSVP required - email me at chris@chrisdoddsphoto.com (please type PHOTO GEEK CHRISTMAS PARTY in the subject line) to reserve your spot. Space is limited, so be sure to reserve soon. I will be drawing some great prizes for the Great Gear Giveaway Contest and you get another name in the hat @ the party. Special thanks to Joann for opening the pub just for us!

Free Gear Giveaway - Lensmate Quick-Change Adapter - Richard Franiec S-95 Grip

Bobolink (Dolichonyx oryzivorus, Goglu des prés, BOBO) Franklin Centre, Quebec, Canada. Image Copyright ©Christopher Dodds www.chrisdoddsphoto.com All Rights Reserved. Canon EOS 1DsMKII, 500mm F4 L IS, Tripod & Wimberley Head II. ISO 400, F8 @1/250s Manual mode. CLICK HERE TO PURCHASE A PRINT or LICENSE IMAGE FOR PUBLICATION. Image presented with both a visible, and invisible digital watermark by Digimarc.

Notice how perceived sharpness is increased by moving the sun far over my right shoulder. The shadows and highlights increase depth and give each feather detail. One of the hardest things to do here was maintain detail in the yellow hood, while exposing for maximum detail in the blacks. This image is anther example of how well Nik Software's Viveza helps make targeted adjustments a breeze. I took the old master Tiff and places a U Point control point on the yellow hood - selectively lowered the brightness and ...voila! Remember to use coupon code "CDODDS" at the check-out and save 15%

Reader Q & A

Hi Chris,
Enjoy reading your blog and often spend hours gazing into your incredible images – I get lost in great adventures and see some amazing sights through your eyes and lens. I was wondering if you had or used a point & shoot camera. If you have one, then which model do you have and would you recommend it to others?
 - Savannah Capote Baton Rouge, Louisiana

Thank you Savannah. Yes, I own a Canon PowerShot S-95 point & shoot camera and feel comfortable recommending it to anyone. There are times when I don’t want to haul around my pro SLR equipment, but do want control over the creative process and the ability to shoot in manual mode. I chose the S-95 because it can shoot in RAW,  JPEG (or both at the same time) has reasonable low light capability, and still fits in my coat pocket. I like how easy it is to navigate the menu and control the manual settings (I can even program the camera to let me decide what setting is adjusted with which switch or dial). There are smaller point & shoot cameras out there, but they produce noisy images in low light situations and they are harder to control in manual mode. I also own a Canon PowerShot G10, which is a great camera, but I find it just too big to want to pick it up and bring it along everywhere I go – though it was probably the best choice when I bought it. Be sure to read David Pogue’s “A Love Letter to a Camera” from The New York Times.

There are some very useful accessories for point & shoot cameras that I use and highly recommend; I simply can’t live without them. Lensmate makes a Quick-Change Adapter Kit that consists of a tiny receiver that sticks to the front edge of the lens and allows a filter holder to be installed in a split second. This little accessory is pure genius and makes it easy to use a polarizing filter. The instructions are as well designed as the product itself, and even tell you how to remove the adhesive without leaving any residue on the camera.
One of the disadvantages of a small camera, is it’s missing grip; I often felt like I didn’t have a great grip and that I was going to drop the S-95. Richard Franiec  makes a small aluminum S-95 grip that sticks to the body of the S-95 that now gives me something to hold onto. Richard’s instructions are also well designed and easy to follow, and even show you how to remove the grip without leaving any residue.


Canon PowerShot S-95 with Richard Franiec’s  S-95 Grip and Lensmate S95 Quick-Change Adapter Kit 37mm

Great FREE Gear Giveaway Continues

Sign-up for my newsletter before Dec. 15th, 2010 and you will automatically be entered to win some amazing prizes. Simply fill-in your name and email address in the form in the column to the right of this post and you are entered automatically (only sign-up once please). Tweet, Like or Share this blog entry on Facebook or Twitter, or leave a meaningful comment here for additional chances to win. Don't forget to tell your friends or fellow camera club members about the prizes.

  • WH-200 Wimberley Head version II (retail value of US$595.00)
  • Think-Tank Photo Urban Disguise 50 (retail value US$169.00)
  • Nik Software Viveza 2 (retail value US$199.95)
  • Digimarc for Images Professional Edition 1 year subscription (US$99.00)
  • One of eight Canon Long Lens Rain Covers (US$125.00 each)

Dec. 15th PHOTO GEEK CHRISTMAS PARTY

I'm hosting my first annual PHOTO GEEK CHRISTMAS PARTY at the ROCKBURN PUB 2461 Mtee Rockburn, Hinchinbrook, Quebec J0S 1E0 (450) 264-2239. All amateurs and hobbyists welcome! It's an à la carte menu and there is no fee (other than paying for your own food & drinks) - I will pass the hat for a soon to be announced charity; donations are optional but encouraged. Come on out and meet me, my friends and make new contacts while networking and showing off a few of your favorite images from 2010. Feel free to bring prints, iPads or laptops with your favorite images. RSVP required - email me at chris@chrisdoddsphoto.com (please type PHOTO GEEK CHRISTMAS PARTY in the subject line) to reserve your spot. Space is limited, so be sure to reserve soon. I will be drawing some great prizes for the Great Gear Giveaway Contest and you get another name in the hat @ the party. Special thanks to Joann for opening the pub just for us!

ADRENALINE Coastal Brown Bear (Ursus arctos or grizzly bear) & The Hazards of Nature Photography.

Coastal Brown Bear Fishing ADRENALINE (Ursus arctos or Grizzly Bear) Hallo Bay, Katmai National Park, AK Image Copyright ©Christopher Dodds www.chrisdoddsphoto.com All Rights Reserved. Canon EOS 1DMKIV, 500mm F4 L IS, Tripod & Wimberley Head II. ISO 400, F5.6 @1/1600s Manual mode. CLICK HERE TO PURCHASE A PRINT or LICENSE IMAGE FOR PUBLICATION.

The Hazards of Nature Photography: DEHYDRATION

I have been meaning to write a bit about the importance of hydration all summer and autumn is quickly approaching. No matter, hydration is just as important in the cold winter as it is in the hot summer months. Water makes up 75% of the body weight - about 50 liters (11 gallons) for the average man. Survival is unlikely if more than one fifth of this is lost. The first signs of dehydration are thirst, vague discomfort, lack of appetite, flushed skin, impatience, sleepiness and nausea. Once fluid loss reaches 6-10%, symptoms include dizziness, headache, labored breathing, no salivation, indistinct speech and you may loose your ability to walk. By the time fluid loss reached 11-20% symptoms now include delirium, swollen tongue, unable to swallow, dim vision, numb and shriveled skin. In it's latter stages: There is gross muscular weakness and mental capacity is impaired. You must make your survival plans at the start when you can think clearly and then stick to them. Best to remember to bring along some water and avoid the headache ;)

Testimonial

The trip with Chris on the Coastal Explorer along the Katmai coast was fantastic.  Without a doubt it was one of the top photo trips I have taken over the last several years due to the amazing variety and density of wildlife in such completely unspoiled and uninhabited wilderness.  Unlike land based lodges, with the Coastal Explorer you have the opportunity to photograph in several of Katmai's secluded bays versus being limited to an area adjacent to a land-based lodge.  What helped make the trip so successful was Chris's work ethic where he is always ready to shoot in any weather conditions and will stay in the field as long as there is any possibility for high quality photography.  This is essential in a place like coastal Alaska where it can go from direct sunny conditions to heavy overcast to rain in the blink of an eye and where the sun doesn't set until the late evening.  If the best time to photograph Brown Bears chasing down salmon was after 10:00PM, you bet we'd be on the river bank waiting on the massive Brown Bear boars to make their spectacular runs--photography is top priority after safety of course.  The daily great fresh seafood didn't exactly hurt the trip either.

As I write this I've only a little over two weeks removed from returning from Katmai and I'm still having serious withdrawals--right now I really want to be on the Coastal Explorer's skiff heading to shore to photograph more bears, eagles, and wolves. - Steve Metildi Southern California | USA

BE SURE TO CHECK-OUT STEVE'S KATMAI 2010 ALBUM HERE to see images he made during the workshop.

2011 Coastal Brown Bears of Katmai Workshop/Safari Announced

Join me, Christopher Dodds, and some of the more than 2,000 Coastal Brown Bears at the best place in the world to photograph Coastal Brown Bears. Claiming the world’s highest concentration of Coastal Brown Bears, Katmai National Park in Alaska also has to be the most beautiful setting on the planet to photograph them. Truly the adventure of a lifetime, we’ll have plenty of opportunities to see, study and photograph Coastal Brown Bears in their undisturbed, natural environment without the influence or pressure that large groups and camps often cause. I have secured the much coveted dates of July 24-30, 2011; timed to coincide with the annual Salmon run. With a limit of only six participants, there will be plenty of time for instruction and personal attention from Chris. MORE INFORMATION & REGISTRATION FORM HERE.

Disclaimer

The author is not a physician. This article is for informational purposes only and it is not intended to identify, diagnose, or treat any medical condition.

Coastal Brown Bear (Ursus arctos or grizzly) wrestling. HYDROPHOBIA; the Ultimate Rain Cover & Trip Report Part III

Coastal Brown Bear males (boars) Wrestling in rain (Ursus arctos) Kukak Bay, Katmai National Park, AK Image Copyright ©Christopher Dodds www.chrisdoddsphoto.com All Rights Reserved. Canon EOS 1DMKIV, 500mm F4 L IS with 2X Teleconverter II, Tripod & Wimberley Head II. Think-Tank Photo Hydrophobia 300-600. ISO 1250, F8 @1/800s Manual mode. CLICK HERE TO PURCHASE A PRINT or LICENSE IMAGE FOR PUBLICATION.

Bear Fight

Though struggles between two juvenile bears might seem mortal, it is in fact just playful combat, designed to hone the animals skills. In later life, however, in teritorial disputes between two males, real fights can result in serious injury to the combatants, or even have a fatal outcome. Brown bears also fight to establish hierarchy and rights to prime fishing spots.

Trip Report

We had a blast watching, and photographing, four males (boar) fighting and wrestling with each other for what seemed like hours during the second afternoon of the Coastal Brown Bears of Katmai workshop/Safari. We carefully added out 2X tele-extenders to our 500mm Lenses for maximum reach, to fill the frame and to keep a safe distance between us and the battling giants. It rained much of the day, and we all put our Think-Tank Photo Hydrophobia rain covers to good use.

Do consider joining me next year, for the ultimate Coastal Brown Bears of Katmai Nature Photography Workshop / Photo Safari from July 24 to 30, 2011. MORE INFORMATION AND REGISTRATION FORM HERE.

Think-Tank Photo HYDROPHOBIA Ultimate Camera Rain Cover

I promised a review of the Think Tank Photo Hydrophobia when I got back from Bonaventure Island in June; Turns out, there's no better way to get hot, sunny and dry weather, than bringing along the very best rain gear to protect your valuable camera gear. We had day, after day, of glorious and hot, sunny weather; In fact, I only recall breaking out the rain covers once. There are now tons of reviews out there that include all of the technical specifications and videos of people spraying garden hoses onto expensive cameras sporting these covers. What I wanted to do here is give you a short, sweet, real world review of these covers when used in the very toughest conditions.

Coastal Brown Bear males (boars) Fighting in rain (Ursus arctos) Kukak Bay, Katmai National Park, AK Image Copyright ©Christopher Dodds www.chrisdoddsphoto.com All Rights Reserved. Canon EOS 1DMKIV, 500mm F4 L IS with 2X Teleconverter II, Tripod & Wimberley Head II. Think-Tank Photo Hydrophobia 300-600. ISO 1250, F8 @1/800s Manual mode. CLICK HERE TO PURCHASE A PRINT or LICENSE IMAGE FOR PUBLICATION.

Think-Tank Photo HYDROPHOBIA 300-600

Rain protection for everything between the 300 F2.8 and the 600 F4 (this even works perfectly with the Canon 800 F5.6, as I discovered). It's designed to be pre-mounted around the lens hood for easy deployment, has a pocket to store the eyepiece (Eyepieces sold separately) and includes an extension for use with the longer glass. Simply put; it's the very best option I've found out there - and I’ve tried dozens. I would love a lower profile pocket at the lens hood end, so my line of sight is not disrupted while photographing birds in flight with the rain cover in the "stored" position and having more material between ends (one piece) would mean I could actually remove the cover in it's stowed position with the lens hood for packing; something I found impossible with my 500mm F4 IS Canon lens, when installed with enough room for my 2X Tele-converter and the Canon off-camera shoe cord slid into the hot shoe. Other improvements that I quickly wished for were more clear window around the eyepiece and a flap over the eyepiece to protect it from filling with raindrops when I wasn't shooting - both of which have been incorporated into the design of the newer Hydrophobia 70-200 & Hydrophobia 70-200 Flash. I do hope there is a re-design of this model, with an option for a removable rain cover for a flash with the Better Beamer Flash Extender attached. I was able to use this cover with the Wimberley tripod head (Version I or II), and I figured out how to use my flash bracket, flash and Better Beamer, but I feel there is more than enough nature photographers out there to warrant a special "nature" edition. In the mean time, this is, without doubt, the very best option on the market now.

Think-Tank Photo Hydrophobia 70-200

Essentially the 70-200 Flash, without the clear flash pocket - do yourself a favor and spend the extra $6.00 to get the Flash version (below)

Think-Tank Photo Hydrophobia 70-200 Flash

Oh, la-la, this is the newest addition to the Hyrophobia line, and Think-Tank Photo's rapid product evolution really shines here. The clear window has been re-designed with more clear space, there's a cover over the eyepiece that flips up and out of the way when shooting, a removable front lens cover, an ingenious built-in camera strap that keeps your camera securely attached to the cover, and horizontal when slung under your shoulder - fantastic for the long days a nature photographer carries a second, shorter lens / camera. This one is evolutionary perfection and I can't think of a single thing to make it better. The clear flash pouch stows out of the way when not used, and there's even room for flash modifiers.

PRO TIPS:

Real world shooting in the rain required me to frequently remove my hands from the cover, and I found that  my hands got wet and I transferred water inside the cover; this caused the clear windows to fog up. I simply wrapped a small towel around the barrel, where the lens meets the camera body, to dry my hands and absorb any excess moisture, preventing the condensation from forming.
Don’t just use it in the rain. I found the covers to be really useful to prevent saltwater from splashing my gear while photographing from a boat, they kept my gear free of sand while getting low on a beach and I even used them as sun protection for my hands during lengthy shoots in strong sunlight.
Maintenance: For a long life, be sure to rinse after use and hang to dry; I found it practical to leave my Hydrophobia covers hanging in my car to ensure they dried thoroughly before packing into the nylon mesh pouch for storage.

BE SURE TO ORDER YOUR THINK-TANK PHOTO HYDROPHOBIA BY CLICKING THIS LINK AND RECEIVE A FREE BAG WITH EVERY ORDER OVER $50.00

Coastal Brown Bear males (boars) BEAR HUG in rain (Ursus arctos) Kukak Bay, Katmai National Park, AK Image Copyright ©Christopher Dodds www.chrisdoddsphoto.com All Rights Reserved. Canon EOS 1DMKIV, 500mm F4 L IS with 2X Teleconverter II, Tripod & Wimberley Head II. Think-Tank Photo Hydrophobia 300-600. ISO 1250, F8 @1/800s Manual mode. CLICK HERE TO PURCHASE A PRINT or LICENSE IMAGE FOR PUBLICATION.

Bonaventure Island Trip Report: Common Murre or Common Guillemot (Uria aalge, guillemot marmette, COMU)

Common Murre or Common Guillemot Flying (Uria aalge, guillemot marmette, COMU) Parc national de l'Île-Bonaventure-et-du-Rocher-Percé (Bonaventure Island and Percé Rock National Park) Bonaventure Island, Quebec. Image Copyright ©Christopher Dodds www.chrisdoddsphoto.com All Rights Reserved. Canon EOS-1D MKIV, 800mm F5.6 L IS. ISO 800, 1/2500s F5.6 Manual. Hand held from Zodiac Hurricane 733. Full Frame. CLICK HERE TO PURCHASE A PRINT or LICENSE IMAGE FOR PUBLICATION.

Common Murre or Common Guillemot Banking (Uria aalge, guillemot marmette, COMU) Parc national de l'Île-Bonaventure-et-du-Rocher-Percé (Bonaventure Island and Percé Rock National Park) Bonaventure Island, Quebec. Image Copyright ©Christopher Dodds All Rights Reserved. Canon EOS-1D MKIV, 800mm F5.6 L IS. ISO 800, 1/2500s F5.6 Manual. Hand held from Zodiac Hurricane 733. Full Frame. CLICK HERE TO PURCHASE A PRINT or LICENSE IMAGE FOR PUBLICATION.

Bonaventure Island Gannets Galore Nature Photography Photo Safari Workshop

One of the highlights of the Gannets Galore Photo Safari is the daily (weather permitting) Zodiac trips to, and around, Bonaventure Island. This year, we had two back-to-back perfect mornings with mirror-like water and virtually no swell; a perfect recipe for photography from a Zodiac Hurricane 733. There were many Common Murres, Razorbills, Black Guillemots, Black-legged Kittiwakes, and even some Puffins floating on the water around the Zodiac, but the crown jewels for the nature photographers on board are always the birds in flight shots of these birds that fly at 80km per hour. I was just thrilled to have a CPS Loaner Canon Mark IV and 800mm F5.6 IS L on loan from Canon Canada for the workshops; most everyone, who wanted, got to try this impressive bird photography rig. I must confess to have fallen in love with the lens after creating these razor sharp images on the second morning of the first (of three) workshops.

If you find yourself trying to photograph seabirds from near their cliff-edge nesting sites, it's best to skip the outbound birds and focus on the inbound birds; Razorbills, Murres, etc., typically nest under other species like Northern Gannets on the cliff face and are typically covered in bird poop when leaving the nest - inbound birds are just back from fishing, so they are all nice and clean. Try to lock onto them before they slow to land  on the water or bank for best results.

More Kudos

I just wanted to take a moment to thank you for an amazing trip. I especially enjoyed shooting from the zodiac for all kinds of great shots. You lead an outstanding tour, and I would certainly consider future trips with you. I can tell that you could be of great help as I finish off my wish list of species for the new waterbirds book, as you know many of the key spots for specific species and behavior. I also have a lot to learn about the digital process, and you are gifted in this area. Many thanks my friend!
-Middleton Evans | Baltimore | MD

Herring Gull (Larus smithsonianus, Goeland argente, HERG)

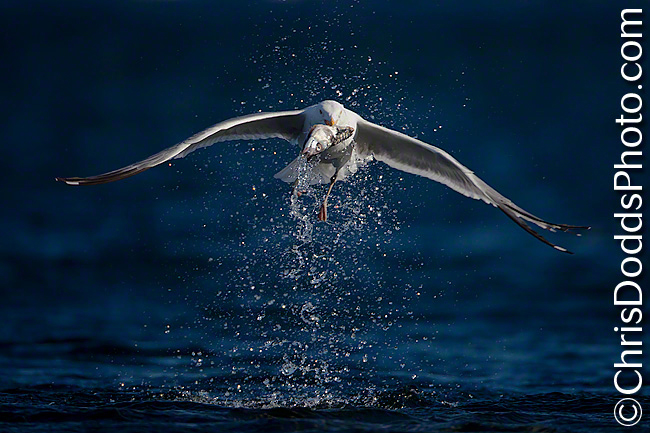
American Herring Gull Emerging with fish (Larus smithsonianus, Goeland argente, HERG) Parc national de l'Île-Bonaventure-et-du-Rocher-Percé, Bonaventure Island, Quebec. Image Copyright ©Christopher Dodds www.chrisdoddsphoto.com All Rights Reserved. Canon EOS-1D MKIV, 800mm F5.6 L IS. ISO 400, 1/2000s F5.6 Manual. 580EXII Flash manual full power . Tripod & Wimberley Head II. Full Frame. CLICK HERE TO PURCHASE A PRINT or LICENSE IMAGE FOR PUBLICATION.

A quick post today to further demonstrate the power of side light to make dramatic, action stopping images in harsh light. This is another image from a good collection produced while Bonaventure Island was closed to visitors during a recent Gannets Galore Bonaventure Island Bird Photography workshop. We made the most of the day by visiting a favorite spot for Common Eider Ducks (we had males, females and babies really close). The gulls (Herring and Great Black-backed) would harass and steal fish from the diving Eiders.

Gannets Galore August 13-15, 2010 - still space available - more information HERE

Canon 800mm F5.6 IS L First impressions....

Yowsa, what an amazing piece of glass! This lens was razor sharp, fast and snappy to acquire auto-focus when used with my EOS 1D Mark IV camera body. Special thanks to Canon Canada for the loan and for giving a chance for workshop participants a chance to "get behind the wheel" and give it a try. New coatings, IS system and design all add up to make this a must have lens - anyone wanna chip-in? (grin).

Gannets Galore Bonaventure Island Workshop Report & Side Light for Nature Photography

Great Black-backed Gull Emerging with fish (Larus marinus, Goeland marin, GBBG) Parc national de l'Île-Bonaventure-et-du-Rocher-Percé, Bonaventure Island, Quebec. Image Copyright ©Christopher Dodds www.chrisdoddsphoto.com All Rights Reserved. Canon EOS-1D MKIV, 800mm F5.6 L IS. ISO 400, 1/2000s F5.6 Manual. 580EXII Flash manual full power. Tripod & Wimberley Head II. Full Frame. CLICK HERE TO PURCHASE A PRINT or LICENSE IMAGE FOR PUBLICATION.

Gannets Galore Bonaventure Island Workshop Report I:

Julie and I made the 12 hour drive to Percé on June 8th, arriving in town early in the afternoon that day. We scrambled up to the Northern Gannet colony on Bonaventure Island the next day to see that all is well and the colony is continuing to grow as expected. Photographic conditions continue to be the very best that Bonaventure Island has to offer.
Middleton Evans (author of Rapsody in Blue: A Celebration of North American Waterbirds), Gordon Kadonoff, Pat, Stokes & Denise Fishburne, Nick Honig & Tuma Young, Provash Ganguli, Amanda Reed, Ron Kellner, Ellen Goff and Wojciech Bedkowski all were simply a pleasure to spend time with, each having great spirits and all adding to the many great memories of yet another great spring on Bonaventure Island. Photographic opportunities from the morning Zodiac outings continue to get better with every trip. Harlequin Ducks, Common Eider, Atlantic Puffins, Common Murre, Razorbill, Black-legged Kittiwake, Black Guillemots, Great Cormorants, Great Black-backed Gulls, Herring Gulls and Grey Seals all gave award winning appearances.

Side Light for Nature Photography

During the second workshop, on June 15th, Bonaventure Island was closed due to strong winds from the North that pushed big waves onto the wharf and prevented landings. This was good news as we went out and photographed Black Guillemots, Common Eiders, Herring Gulls and Black-backed Gulls from shore. With the birds doing what birds do, and flying into the wind, I seized the opportunity to make dramatic action shots of the gulls taking flight after snatching fish from the Common Eiders. Pretty amazing to see the female Eiders lunge out of the water and attack the Gulls. I knew the moment the first Gull emerged from the water that I had to use the side light, at 90 degrees off to the right, to add dimension, texture and life to the image and sparkle to the water. I caught myself, more than once, asking my groups to remember that Gulls are beautiful, and worthy photographic subjects, too.

Kudos

"Thanks for a great weekend.  I got some great shots, learned some new things and met some terrific people.  You and Julie were perfect hosts.  I really appreciated your patient, attentive instruction........ "

- Amanda Reed Cape Cod, Massachusetts

Photoshop CS5 First Impressions and Guide to Photographing the Black Tern (Chlidonias niger, Guifette noire, BLTE)

Black Tern Hovering Vertical (Chlidonias niger, Guifette noire, BLTE) Missisquoi National Wildlife Refuge, Vermont, USA. Image Copyright ©Christopher Dodds www.chrisdoddsphoto.com All Rights Reserved. Canon EOS-1D MKII, 70-200mm F2.8L IS (version I) @200mm. ISO 400, 1/1000s F5.6. Hand-held (vertical) from kayak. Cropped slightly top & bottom to fit this aspect ratio. CLICK HERE TO PURCHASE A PRINT or LICENSE IMAGE FOR PUBLICATION.

Photoshop CS5 First Impressions

“The past two decades have demonstrated an amazing interplay between customers who want to push the limits of their personal creativity and a passionate team of Adobe engineers who make those visions a reality,” said Kevin Connor, vice president of product management for professional digital imaging at Adobe. “We experienced this firsthand when we posted a ‘sneak peek’ video of the team’s work on the Content Aware Fill feature a few weeks ago. It quickly became the number one viral video online, with close to 2 million views and its ‘magic’ was one of the top trending Twitter topics of discussion. This version of Photoshop has some of the most innovative and extraordinary technologies to ever come from our labs and clearly customers are already clamouring for it.”
Redefining the Image-Editing Experience
Now a native 64-bit application on both Mac and Windows®, Photoshop CS5 delivers superior tools and creative control so users can perform advanced image manipulations and compositing with ease. Revolutionary image intelligence behind Content-Aware Fill magically removes any image detail or object, examines the surroundings and seamlessly fills in the space left behind. Lighting, tone and noise of the surrounding area match perfectly, looking as if the removed content never existed. New Refine Edge makes nearly-impossible image selections possible. This innovative technology precisely detects and masks the trickiest types of edges, such as hair and foliage, while eliminating background color contamination.
For photographers, Photoshop CS5 now offers next-generation high dynamic range (HDR) capabilities. When combining multiple exposures into a single HDR image, Photoshop CS5 preserves the full tonal range of a scene with unprecedented speed and accuracy. The new HDR Pro offers exceptional ghost artifact removal and greater tone mapping and adjustment control. With HDR toning, users can emulate the striking look of an HDR image with any single-exposure image.     -Adobe Press Release April 12, 2010

I'm locked away having fun re-visiting and re-processing older files (this one from 2005) in PhotoShop CS5 - it’s a whole new world for some images. Truth be told; I'm always learning about Photoshop and refining my post capture workflow (usually trying to spend less time working on each image), so it's about time I revisited some older files to apply my new workflow and get the most out of the RAW capture.

While I only barely touch the surface of the plethora of tools in PhotoShop, I am somewhat disappointed with the "content aware" thing that drove their marketing campaign as a “magic eraser tool”. Got an image of a breathtaking vista that has an ugly telephone pole and electric wires across it? No problem: Content Aware  to the rescue (it works with the Spot Healing Brush and is an option of the Fill tool); it fills a selected area with data from the surrounding area, so that the lighting, texture, and tonality all match the rest of the image. It didn't work as well as the video that Adobe circulated virally on the web; I had to cleanup with the Clone and Patch tools. But, overall, it is an impressive time-saving feature that will surely evolve by the next release of Photoshop.

The Refine Edge selection dialog box has been redesigned to allow more accurate selections, especially of difficult textured edges, such as a bird’s feathers or tree bark. Not to say that creating masks are now child's play, but with the Refine Radius and Erase Refinements brushes, along with Smart Radius analyzing the edges, the task of working on such difficult subjects isn't as arduous and time consuming. In addition, the Color Decontaminant option helps remove excess background that you might have mistakenly included in your mask.

CS5's HDR-Pro offers enhanced options and new algorithms. Curve tool and sliders for adjusting Vibrance, Saturation, Exposure, Detail provide more precise, highly creative control over the dynamics. The auto deghosting works well at removing artifacts caused by slight differences among the merged photos, like a leaf that might have moved between captures. You can choose which of your original images is to be used as the defining reference to resolve visual conflicts, such as a cloud that might have changed shape between frames. One of the problems with HDR is that you have to start with a series of nearly identical photos, taken at various exposures. The new HDR Toning in CS5 allows you to emulate HDR, using a single image. The controls are quite similar to HDR-Pro, and the tool provides a high degree of creative potential.

The real value to the upgrade, in my humble opinion, is the re-worked Camera Raw converter, ACR (now version 6.1). There are some great new, highly anticipated, enhancements that include the new noise reduction algorithms that now includes sliders for both luminance and color noise (this is worth the price of  the upgrade alone), sharpening, grain and post-crop vignette tools. Now you can apply profile-based corrections to accommodate geometric distortions, chromatic aberration and lens vignette effects. Manual corrections for geometric distortion & vertical and horizontal perspective transforms are also available. A handful of lens profiles are included for automatic correction and more can be created by the community with the Adobe Lens Profile Creator. (http://labs.adobe.com/technologies/lensprofile_creator/)

Where to photograph the Black Tern

Black Tern is considered "species at risk" in Vermont, and "species of concern" in Ontario. There's a healthy population at Point Pelee in Ontario and Missisquoi National Wildlife Refuge in Vermont. There is also some great opportunities at L'ile Bizard in Quebec. The most accessible (without boat) are at L'ile Bizard in Quebec and then Point Pelee National Park in Ontario. Species status in Vermont has forced the authorities to increase the size of the protected nesting zone at Missisquoi National Wildlife Refuge in Vermont, but you can still shoot them from the road (there's a culvert big enough for a canoe to pass through near the fishing hole / boat ramp that they like to hang around) - it is hit, or miss, though, but there are plenty of low Osprey nests to entertain you if you aren't lucky with the Terns.

Black Tern (Chlidonias niger, Guifette noire, BLTE)

The Black Tern (Chlidonias niger, Guifette noire, BLTE) is a small tern generally found in or near inland water in Europe and North America. As its name suggests, it has predominantly dark plumage. Adult are 25 cm (9.75 in) long, with a wing span 61 cm (24 in), and weigh 62 g (2.2 oz). They have short dark legs and a short, weak-looking black bill, measuring 27-28 mm, nearly as long as the head. The bill is long, slender, and looks slightly decurved. They have a dark grey back, with a white forehead, black head, neck (occasionally suffused with gray in the adult) and belly, black or blackish-brown cap (which unites in color with the ear coverts, forming an almost complete hood), and a light brownish-grey, 'square' tail. The face is white. There is a big dark triangular patch in front of the eye, and a broadish white collar in juveniles. There are grayish-brown smudges on the ides of the white breast, a downwards extension of the plumage of the upperparts. These marks vary in size and are not conspicuous. In non-breeding plumage, most of the black, apart from the cap, is replaced by grey. The plumage of the upperparts is drab, with pale feather-edgings. The rump is brownish-gray. In flight, the build appears slim. The wing-beats are full and dynamic, and flight is often erratic as it dives to the surface for food; similar to other tern species. The Black Tern is very social. It breeds in loose colonies and usually forages, roosts, and migrates in flocks of a few to more than 100 birds, occasionally up to tens of thousands. Point Pelee National Park in Canada boasts a robust population of black terns. It is considered threatened in Vermont, though there is a thriving population at Missisquoi National Wildlife Refuge on the astern shore of Lake Champlain near the Canadian border in Franklin County, Vermont.

Marsh Wren (Cistothorus palustris, Troglodyte des marais, MAWR) & Bokehlicious Backgrounds

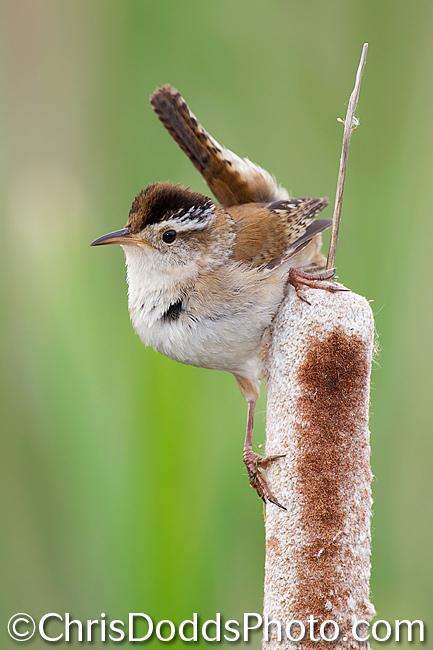
Marsh Wren vertical portrait (Cistothorus palustris, Troglodyte des marais, MAWR) Bois de I'Ile Bizard Nature Park,  L'ile Bizard, Montreal, Quebec, Canada. Image Copyright ©Christopher Dodds www.chrisdoddsphoto.com All Rights Reserved. Canon EOS-1D MKIV, 500mm F4L IS USM and 2X II Tele-extender. ISO 800, 1/320s F9. Canon 580 EX II Flash in manual mode. Tripod and Wimberley Head II. CLICK HERE TO PURCHASE A PRINT or LICENSE IMAGE FOR PUBLICATION.

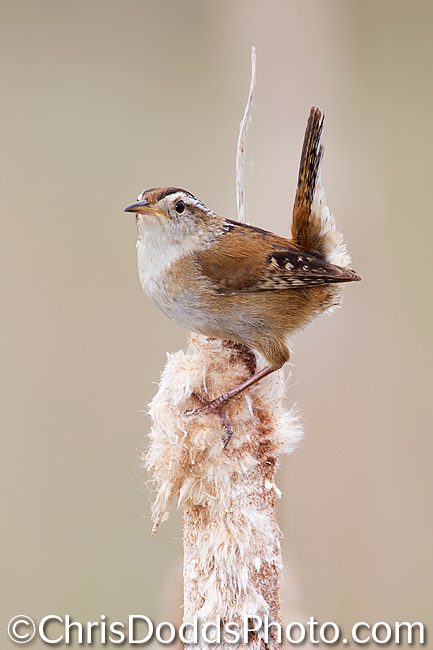
Marsh Wren vertical portrait on beige (Cistothorus palustris, Troglodyte des marais, MAWR) Bois de I'Ile Bizard Nature Park,  L'ile Bizard, Montreal, Quebec, Canada. Image Copyright ©Christopher Dodds www.chrisdoddsphoto.com All Rights Reserved. Canon EOS-1D MKIV, 500mm F4L IS USM and 2X II Tele-extender. ISO 800, 1/320s F9. Canon 580 EX II Flash in manual mode. Tripod and Wimberley Head II. CLICK HERE TO PURCHASE A PRINT or LICENSE IMAGE FOR PUBLICATION.

I enjoyed a great afternoon at Bois de I'Ile Bizard Nature Park,  L'ile Bizard (Montreal) with clients/friends Tuma Young and Nick Honig from Halifax, NS (both of whom I’ll be seeing them again very soon at my workshop on Bonaventure Island). The star performer yesterday was surly this Marsh Wren that was building it’s nest right along the boardwalk trail.

PRO TIP: Silky Smooth Bokehlicious backgrounds for Birds

Whenever I find a co-operative subject in a place where there could potentially be a distracting, cluttered background (like a marsh full of reeds and bulrushes), I almost always immediately slap a 2X tele-converter onto my 500mm lens. I do this to take advantage of a narrower field of view (less distracting elements included in the frame) and the smaller depth of field that narrows as the focal length increases; creating smooth out-of-focus backgrounds (also known as bokeh).

Canon announces firmware update Version 2.0.7 for the EOS 5D Mark II DSLR.

his firmware update (Version 2.0.7) incorporates the following improvements and fixes.

  1. Fixes a phenomenon in which the aperture exhibits abnormal movement when shooting movies in manual exposure mode and Aperture Priority AE (Av mode) using some Canon lenses (such as macro lenses).
  2. Fixes a phenomenon in which the exposure level shown in the LCD panel differs from what is shown in the viewfinder when shooting still images in manual exposure mode.
  3. Fixes a phenomenon in which the Wireless File Transmitter (WFT-E4 or WFT-E4 II) may not automatically power off when used for FTP transfers.

These phenomena only occur with the Version 2.0.4 and Version 2.0.3 firmware. The Version 2.0.7 firmware being released this time is for cameras with firmware up to Version 2.0.4. If the camera's firmware is already Version 2.0.7, it is not necessary to update the firmware.

To find out the exact download instructions and to download EOS 5D Mark II firmware Version 2.0.7 please click here. Please note that before downloading firmware Version 2.0.7 you should read the entire contents of the page linked to above.

For all current Canon EOS firmware downloads please click here.

Marsh Wren (Cistothorus palustris, Troglodyte des marais, MAWR)

The Marsh Wren (Cistothorus palustris, Troglodyte des marais, MAWR) is a small North American songbird of the wren family. It is sometimes called Long-billed Marsh Wren to distinguish it from the Sedge Wren, also known as Short-billed Marsh Wren. The Marsh Wren is a secretive bird; even when singing the territorial male remains well hidden, briefly climbing a cattail for a look at an intruder. Males destroy eggs and nestlings of neighboring birds. They will even attack their own eggs if the female is removed from the nest. This behavior reduces competition for food in their area.
Adults have brown upper-parts with a light brown belly and flanks and a white throat and breast. The back is black with white stripes. They have a dark cap with a white line over the eyes and a short thin bill. Bewick's Wren is similar but has unstreaked back. Sedge Wren has less distinct supercilium and streaked crown.
The male's song is a loud gurgle used to declare ownership of territory; western males have a more varied repertoire. Learning continues throughout their adult life; it has been shown they will imitate songs presented to them on a tape recording or by a live tudor.
Their breeding habitat is marshes with tall vegetation such as cattails across North America. In the western United States, some birds are permanent residents. Other birds migrate to marshes and salt marshes in the southern United States and Mexico.
These birds forage actively in vegetation, sometimes flying up to catch insects in flight. They mainly eat insects, also spiders and snails.
The nest is an oval lump attached to marsh vegetation, entered from the side. The clutch is normally 4–6 eggs, though the number can range from 3–10. The male builds many unused nests in his territory; he may puncture the eggs of other birds nesting nearby.
This bird is still common, although its numbers have declined with the loss of suitable wetland habitat. Wholesale draining of marshes will lead to local extinction. Still, this species is widespread enough not to qualify as threatened according to the IUCN.


Great Grey Owls IN LOVE & Canon EF 100-400mm f/4.5-5.6 L IS USM Lens saves the day

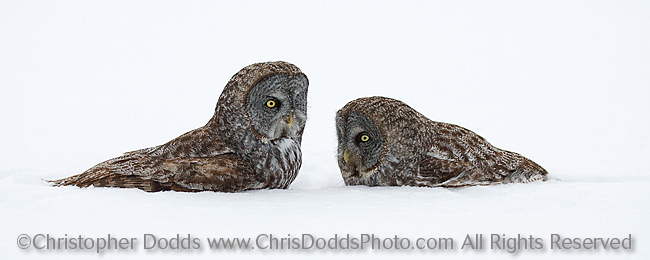
Great Grey Owls IN LOVE (Strix nebulosa Chouette Lapone) January 2005 Bracebridge, Ontario, Canada ©Christopher Dodds http://www.chrisdoddsphoto.com All Rights Reserved. Canon EOS 1D Mark II, 100-400mm @ 120mm. ISO 250, F6.3 1/800s Manual Exposure. CLICK HERE TO PURCHASE A PRINT or LICENSE IMAGE FOR PUBLICATION.
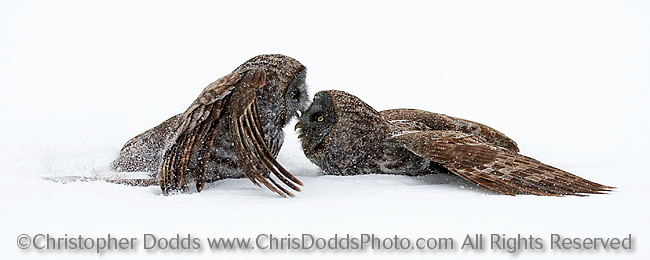
Great Grey Owls IN LOVE (Strix nebulosa Chouette Lapone) January 2005 Bracebridge, Ontario, Canada ©Christopher Dodds http://www.chrisdoddsphoto.com All Rights Reserved. Canon EOS 1D Mark II, 100-400mm @ 120mm. ISO 250, F6.3 1/800s Manual Exposure. CLICK HERE TO PURCHASE A PRINT or LICENSE IMAGE FOR PUBLICATION.
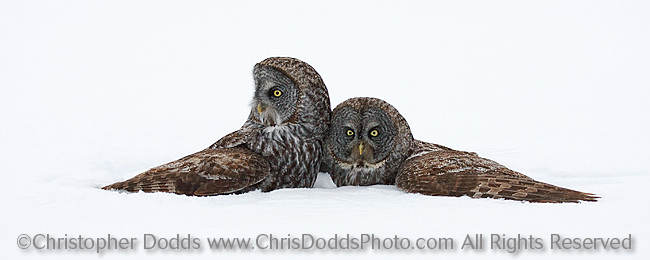
Great Grey Owls IN LOVE (Strix nebulosa Chouette Lapone) January 2005 Bracebridge, Ontario, Canada ©Christopher Dodds http://www.chrisdoddsphoto.com All Rights Reserved. Canon EOS 1D Mark II, 100-400mm @ 120mm. ISO 250, F6.3 1/800s Manual Exposure. CLICK HERE TO PURCHASE A PRINT or LICENSE IMAGE FOR PUBLICATION.
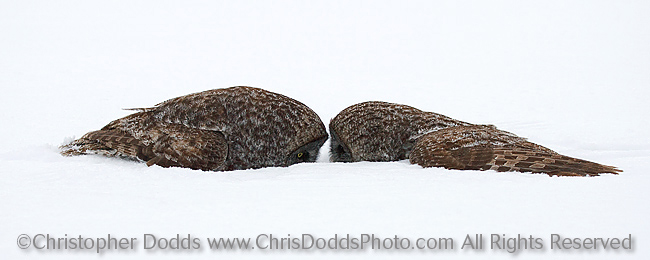
Great Grey Owls IN LOVE (Strix nebulosa Chouette Lapone) January 2005 Bracebridge, Ontario, Canada ©Christopher Dodds http://www.chrisdoddsphoto.com All Rights Reserved. Canon EOS 1D Mark II, 100-400mm @ 120mm. ISO 250, F6.3 1/800s Manual Exposure. CLICK HERE TO PURCHASE A PRINT or LICENSE IMAGE FOR PUBLICATION.
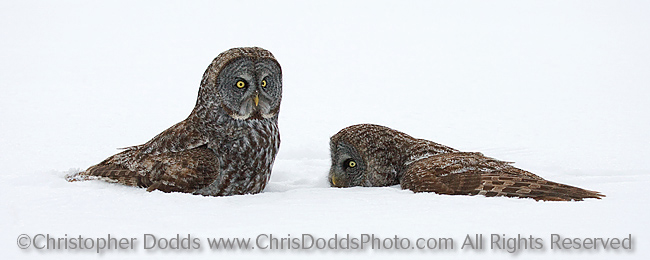
Great Grey Owls IN LOVE (Strix nebulosa Chouette Lapone) January 2005 Bracebridge, Ontario, Canada ©Christopher Dodds http://www.chrisdoddsphoto.com All Rights Reserved. Canon EOS 1D Mark II, 100-400mm @ 120mm. ISO 250, F6.3 1/800s Manual Exposure. CLICK HERE TO PURCHASE A PRINT or LICENSE IMAGE FOR PUBLICATION.
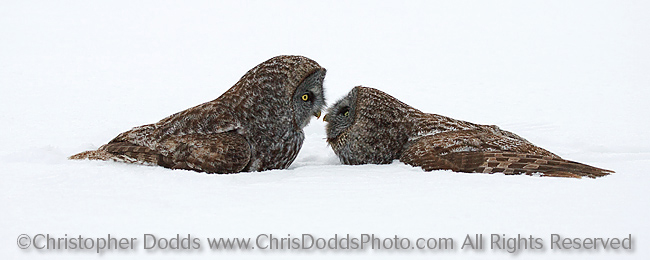
Great Grey Owls IN LOVE (Strix nebulosa Chouette Lapone) January 2005 Bracebridge, Ontario, Canada ©Christopher Dodds http://www.chrisdoddsphoto.com All Rights Reserved. Canon EOS 1D Mark II, 100-400mm @ 120mm. ISO 250, F6.3 1/800s Manual Exposure. CLICK HERE TO PURCHASE A PRINT or LICENSE IMAGE FOR PUBLICATION.
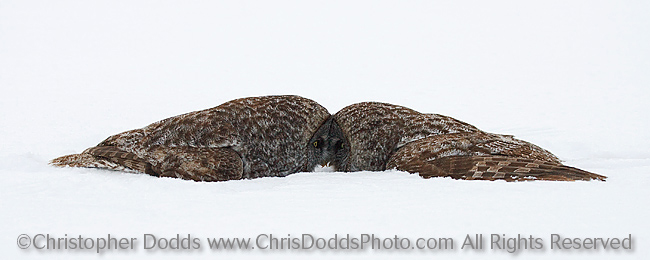
Great Grey Owls IN LOVE (Strix nebulosa Chouette Lapone) January 2005 Bracebridge, Ontario, Canada ©Christopher Dodds http://www.chrisdoddsphoto.com All Rights Reserved. Canon EOS 1D Mark II, 100-400mm @ 120mm. ISO 250, F6.3 1/800s Manual Exposure. CLICK HERE TO PURCHASE A PRINT or LICENSE IMAGE FOR PUBLICATION.
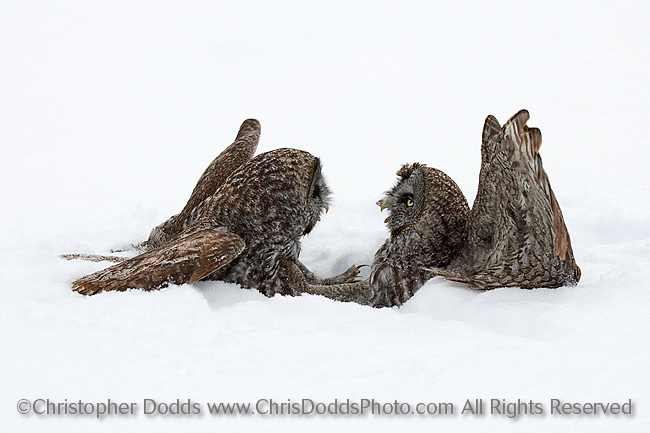
Great Grey Owls IN LOVE (Strix nebulosa Chouette Lapone) January 2005 Bracebridge, Ontario, Canada ©Christopher Dodds http://www.chrisdoddsphoto.com All Rights Reserved. Canon EOS 1D Mark II, 100-400mm @ 120mm. ISO 250, F6.3 1/800s Manual Exposure. CLICK HERE TO PURCHASE A PRINT or LICENSE IMAGE FOR PUBLICATION.
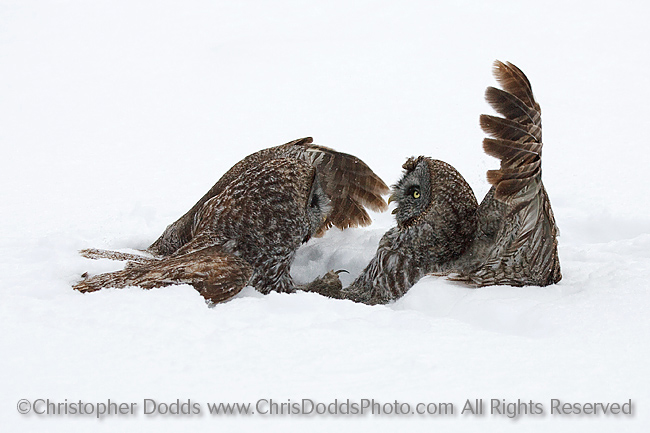
Great Grey Owls IN LOVE (Strix nebulosa Chouette Lapone) January 2005 Bracebridge, Ontario, Canada ©Christopher Dodds http://www.chrisdoddsphoto.com All Rights Reserved. Canon EOS 1D Mark II, 100-400mm @ 120mm. ISO 250, F6.3 1/800s Manual Exposure. CLICK HERE TO PURCHASE A PRINT or LICENSE IMAGE FOR PUBLICATION.

LEARN ABOUT MY WINTER SNOWY OWL WORKSHOPS HERE


Canon EF 100-400mm f/4.5-5.6 L IS USM Lens saves the day!

There’s no shortage of critics when it comes to Canon’s EF 100-400mm f/4.5-5.6 L IS USM Lens; just google it and see how many people complain about the image quality and an apparent lack of consistently sharp results from one copy to another. I’m not about to try to convince you it is as sharp as my primary telephoto 500mm F4 IS USM lens, because it isn’t! It is a sharp lens, and a very versatile one to carry over your shoulder on a second camera body.The Canon EF 100-400mm f/4.5-5.6 L IS USM Lens has, perhaps,  the most useful focal length range that includes the longest focal length found in a Canon zoom lens - 400mm. This long focal length and focal length range combine with very good image and build quality to make the 100-400 one of the most popular serious wildlife and sports lenses Canon sells

While photographing Great Grey Owls in Quebec and Ontario during the great irruption that occurred during the winter of 2004-2005, I always had my second camera body mounted on my trusty EF 100-400mm f/4.5-5.6 L IS USM lens, and many of the images I made with it have since been published around the globe and have been amongst my most successful print sales. Simply put: this is perhaps the most special moment I've witnessed in nature (and there have been many), and without the versatility of this zoom lens, it would have been missed. There are very few people on this earth that have witnessed this behaviour, and even fewer that have photographed it. You see, I was walking around with my 500mm and a 2X tele-extender, so the resulting images would have been very, very different.

In my mind, there simply is no other lens out there that offers so much versatility for your money. Canon has been busy replacing many of their lenses with new, improved optics, coatings and adding the latest image stabilizer systems; I do hope that they have a version II in the plans soon, all good things can be better, but the sequence of events recorded above (and the 51 other images in it) would not have been possible without it.

The Great Grey Owl

The Great Grey Owl or Lapland Owl (Strix nebulosa, Chouette lapone) is a very large owl, distributed across the Northern Hemisphere. In some areas it is also called the Great Gray Ghost, Phantom of the north, Cinerous Owl, Spectral Owl, Lapland Owl, Spruce Owl, Bearded Owl and Sooty Owl.
Courtship involves feeding and mutual preening between mates and begins in midwinter. The male typically approaches the female, holding food in its beak, which is passed with both birds closing their eyes. The male selects possible nest sites and attracts its mate with calls. Several sites are inspected before she chooses the nest site. The Great Gray Owl nests primarily in stick nests made by hawks, ravens, or crows, in the hollowed out top of large-diameter snags, or on the top of clumps of mistletoe, and in Europe sometimes on the forest floor. Northern Goshawks are very common providers of nest sites for Great Gray Owls. They also readily take to artificial platforms or nests placed in suitable habitat. Nests are usually in a forest, but with a large clearing or meadow located within 1.3km (0.8 miles). Unlike most other Owls, nests are usually tidied up and refurbished before use. Nest linings include conifer needles, deer hair, moss, and shredded bark. 2 to 5 (average 3) eggs are laid, each separated by 1 to 2 days. Incubation commences with the first egg laid and lasts 28 to 29 days. The female does all incubation and the male provides all food to the female and young. The female tears food into small pieces and feeds the young. Young leave the nest at 3 to 4 weeks and can climb well. Fledging occurs after about 8 weeks and young remain near the nest for several months, with the female caring for them.
Great Gray Owls are single-brooded but will readily lay replacement clutches if the first clutch or brood is lost. Males and females aggressively defend nests and have been known to drive off predators as large as black bears. Among other threats, ravens and Great Horned Owls prey on eggs and nestlings.
Great Gray Owls are semi-nomadic, with irregular site or mate fidelity between years. They tend to settle and nest in areas with high food resources and this may lead them to occupy the same nest for several years or move off to new areas. Nesting territories are defended from other Great Gray Owls, but foraging areas are widely overlapping. This leads to higher than expected densities, for a large bird of prey. In areas of good habitat this may be as high as 1 pair/58 hectares (5 pairs/square mile).
These birds wait, listen, and watch for prey, then swoop down; they also may fly low through open areas in search of prey. Their large facial disks, also known as "ruffs", focus sound, and the asymmetrical placement of their ears assists them in locating prey, because of the lack of light during the late and early hours in which they hunt. On the nesting grounds, they mainly hunt at night and near dawn and dusk; at other times, they are active mostly during the night. They have excellent hearing, and may locate (and then capture) prey moving beneath 60 cm (2 feet) of snow in a series of tunnels solely with that sense. These owls can crash through snow that could support the weight of a 180-pound person.[citation needed] Unlike the more versatile eagle and horned owls, Great Grey Owls rely almost fully upon small rodents, with voles being their most important food source. Locally, alternative prey animals (usually comprising less than 20% of prey intake) include hares, moles, shrews, weasels, thrushes, grouse, Gray Jays, small hawks and ducks. Great Grey Owl juveniles may themselves fall prey to bears, fishers, and large hawks, especially Northern Goshawks; while adults may fall prey to Bubo owls and lynxes.
Every few years, great grey owls move—usually en masse—from their boreal breeding grounds, typically in search of food. The last great irruption (as these movements are called) happened in 2004-2005. It was so large that it caught the attention of photographers, bird lovers, environmentalists, and the mainstream media from around the world.

Rhinelia margaritfera - South American Common Toad

South American Common Toad (Rhinelia margaritfera). Provincia de Colón, Panama. Image Copyright ©Christopher Dodds  www.chrisdoddsphoto.com All Rights Reserved. Canon EOS 5DMKII, Sigma 150mm F2.8 Macro, Wimberley F2 Macro Flash Bracket, Canon 580 EX II Flash with LumiQuest Softbox III Hand-held. ISO 800, F10 @ 1/80s Manual mode. Full Frame.

KUDOS & CONGRATULATIONS

"Thank you for your marvellous Gannets Galore workshop on Bonaventure Island that my husband and I attended (June '08). The course advanced my comprehension of digital photography, and taught techniques for capturing birds in flight and in varying weather conditions. I was thrilled that one of my photos from the workshop was recognized as a "photo of the week" in the 2009 National Geographic International Photography Contest (Nature, Oct. - week 3). Your instruction was invaluable!

Thanks for sharing your invaluable expertise!
"
Leslie Scopes Anderson | Arcata, CA

Thanks for writing, Leslie and congratulations! Your preening Northern Gannet portrait is well worth the honour.

How to age the Northern Gannet (Morus bassanus)


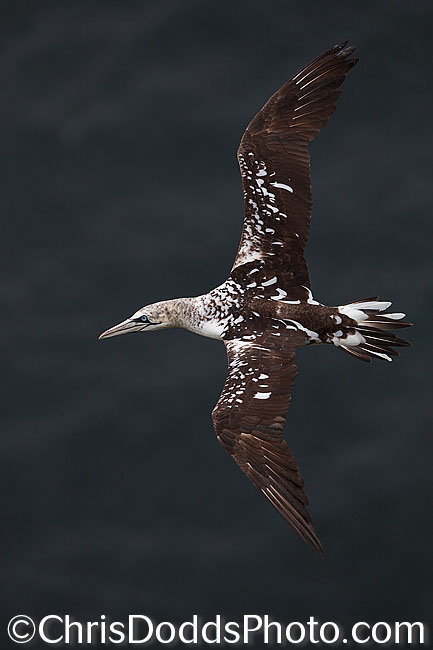
Northern Gannet second year Dorsal View, Morus Bassanus, Fou de Bassan Parc national de l'Île-Bonaventure-et-du-Rocher-Percé, Bonaventure Island, Quebec Image Copyright ©Christopher Dodds www.chrisdoddsphoto.com All Rights Reserved. Canon EOS 5D MKII, 300mm F2.8 IS Hand-held.  ISO 250, F4 1/2500s Manual. Full Frame. CLICK HERE TO PURCHASE A PRINT or LICENSE IMAGE FOR PUBLICATION.

Northern Gannet third year Dorsal View, Morus Bassanus, Fou de Bassan Parc national de l'Île-Bonaventure-et-du-Rocher-Percé, Bonaventure Island, Quebec Image Copyright ©Christopher Dodds www.chrisdoddsphoto.com All Rights Reserved. Canon EOS 5D MKII, 300mm F2.8 IS Hand-held.  ISO 250, F3.5 1/2500s Manual. Full Frame. CLICK HERE TO PURCHASE A PRINT or LICENSE IMAGE FOR PUBLICATION.

Northern Gannet fourth year Dorsal View, Morus Bassanus, Fou de Bassan Parc national de l'Île-Bonaventure-et-du-Rocher-Percé, Bonaventure Island, Quebec Image Copyright ©Christopher Dodds www.chrisdoddsphoto.com All Rights Reserved. Canon EOS 5D MKII, 300mm F2.8 IS Hand-held.  ISO 250, F4 1/2500s Manual. Full Frame. CLICK HERE TO PURCHASE A PRINT or LICENSE IMAGE FOR PUBLICATION.

Northern Gannet fifth year Mature Adult Dorsal View, Morus Bassanus, Fou de Bassan Parc national de l'Île-Bonaventure-et-du-Rocher-Percé, Bonaventure Island, Quebec Image Copyright ©Christopher Dodds www.chrisdoddsphoto.com All Rights Reserved. Canon EOS 5D MKII, 300mm F2.8 IS Hand-held.  ISO 250, F4.5 1/2500s Manual. Full Frame. CLICK HERE TO PURCHASE A PRINT or LICENSE IMAGE FOR PUBLICATION.

After spending more than 350 days ,over the years, up at the Northern Gannet colony on Bonaventure Island, I have quite a collection of images. Last year, I found a new spot to photograph vertical dorsal views of these striking seabirds. Spending time with your subject is the best way to study and learn about their every behavior. Always remember to try to cover every aspect of behavior and every age possible. Remember that you can turn your camera to vertical for a fresh perspective.

There are still a couple of spots left for the June 18-20, 2010 Gannets Galore Photo Safari Workshop

Viola Wildlife Photographer of the Year Competition

If you haven't done so already, there's still time to enter this prestigious competition. Entries can be submitted HERE until 9AM, Monday, March 8th, 2010. Be sure to read the new rules, most notably the need to submit images from a DSLR with a minimum 10 Mega pixel resolution. Why the new rules? ... Who knows? You are allowed to lightly crop your image, so perhaps the rule would have been better stated as a minimum file size, instead of making every image from the single most popular wildlife photography camera in recent history, the Canon EOS 1D Mark II (and the EOS 1D Mark IIN), ineligible.
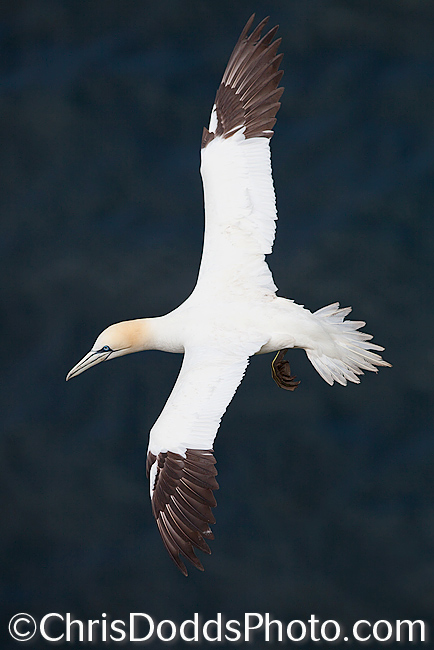
Even when this was called the BBC Wildlife Photographer of the year, I though (and still do) that this competition should be called the wildlife IMAGE of the year competition. I really do feel that such a prestigious title should be awarded to the photographer with the best portfolio of wildlife images. One lucky shot shouldn't earn the title of Nature Photographer of the year in my humble opinion.

Canon EOS 5D Mark II Firmware Update 2.0.3

Canon has announced that the long awaited, video-related firmware for its EOS 5D Mark II will be available from mid-March. Firmware version 2.0.3 enables full 1080p HD video recording at 24, 25 and 29.97fps to match the PAL and NTSC broadcast standards. It also adds a new histogram display while shooting movies and allows users to manually control sound recording levels. Audio sampling frequency has also been increased to match broadcast material standards.
Press Release:
Canon adds 24 and 25fps HD Movie recording 
to the EOS 5D Mark II with Firmware 2.0.3
London, 2nd March 2010 – Canon today pre-announces the release of a firmware update for the multiple award-winning EOS 5D Mark II. Originally announced in late 2009, the update adds 24* and 25 frames per second (fps) recording to the camera’s EOS MOVIE video function, and will be available as a free download from the middle of March.

Developed following feedback from photographers and cinematographers, Firmware 2.0.3 further enhances the EOS 5D Mark II’s excellent video performance. The addition of new frame rates expands the camera’s video potential, providing film makers with the ability to shoot 1080p Full HD footage at 24fps (actual 23.976fps) – the optimum frame rate for cinematic video. 25fps support at both 1920x1080 and 640x480 resolutions will allow users to film at the frame rate required for the PAL broadcast standard, while the new firmware will also change the 30fps option to the NTSC video standard of 29.97fps. 

A new histogram display for shooting movies in manual exposure, shutter-priority (Tv) and aperture-priority (Av) have been added, and exposure modes will also be available in movie mode. Improved audio functionality will allow users to set sound record levels manually using a sound-level meter displayed on the LCD screen. The audio sampling frequency has also been increased from 44.1KHz to 48KHz, providing the optimum audio signal typically required for professional or broadcast material.

With its full frame CMOS sensor and compatibility with Canon’s wide range of premium lenses, the EOS 5D Mark II is already recognised for its outstanding HD video performance. Launched in September 2008, the camera immediately created a wide range of new possibilities for photographers and videographers, and the addition of new frame rates and manual audio levels extends those possibilities even further – allowing movie makers to shoot stunning movies to suit practically any creative purpose.
Extreme sports photographer Richard Walch was one of the first to be given the chance to use the newly updated EOS 5D Mark II to shoot the snowboarding movie “I Love My Friends”. Commenting on the EOS 5D Mark II’s video performance, Richard said: “The addition of the new frame rates opens up a whole new range of possibilities. If you’re a cinematographer, independent film maker or just enthusiastic about making your own movies, get out there and give it a try”. 

“I Love My Friends” shot by Richard Walch on the EOS 5D Mark II with the new firmware includes a look behind the scenes video is available to view at http://www.canon-europe.com/eos5dmarkII. 

The firmware will be available to download from mid-March from the Canon website http://www.canon.com/eos-d/


American Bald Eagles Tumbling - Breaking the rules - Save 25% off Point Pelee Annual Pass

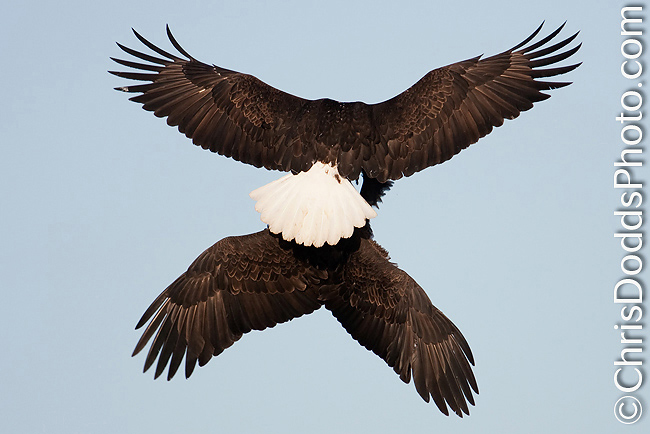
 Bald Eagle Tumble Abstract (Haliaeetus leucocephalus Pygarge à tête blanche) Kachemak Bay, Homer Alaska, USA. ©Christopher Dodds http://www.chrisdoddsphoto.com All Rights Reserved. Canon EOS 1D Mark III, 500mm F4 IS, 1.4X II Tele-converter, Gitzo tripod and Wimberley Head II. ISO 400, F5.6 1/1600s Manual Exposure. Full Frame. Cropped from left and right to 4x5 Aspect Ratio for visual impact. BUY A PRINT OR LICENCE IMAGE FOR PUBLICATION HERE.

Bald Eagle Tumble Abstract  (Haliaeetus leucocephalus Pygarge à tête blanche) Kachemak Bay, Homer Alaska, USA. ©Christopher Dodds http://www.chrisdoddsphoto.com All Rights Reserved. Canon EOS 1D Mark III, 500mm F4 IS, 1.4X II Tele-converter, Gitzo tripod and Wimberley Head II. ISO 400, F5.6 1/1600s Manual Exposure. Full Frame. Here is the original, un-cropped image. BUY A PRINT OR LICENCE IMAGE FOR PUBLICATION HERE.

Breaking the rules...

I strive to always challenge myself to break the standard rules of art, composition and photography; especially when mother nature works against me. In the case of the image above, I was simply making the most of a bad situation; the wind was blowing against the afternoon sunlight and all of the other photographers had opted to take the afternoon off to rest or edit their images. I watched and saw that I might have a chance at something artsy, or abstract, to salvage the afternoon. As I typically challenge myself to compose my images in-camera and shoot full-frame, without cropping, I thought I would include the original, un-cropped version for you to see how cropping, or changing the images aspect ratio, changes the visual impact of the image. While it's generally a good idea to include your subject's face, or eyes(preferably with good eye contact); once in a very great while you can create something nice without including either.

The broken rules:

  • Always photograph birds-in-flight with the wind and sun at your back.
  • Always include your subject's face
  • Always ensure at least one eye is critically sharp & in-focus
  • Always ensure strong eye contact between viewer and subject
  • always follow the rules

Kudos

"I wanted to thank you for a wonderful owling trip last week.  It was great to be in the field with you and I learned a great deal about the birds, environment and my camera.  Thanks so much for being such a great naturalist, photographer and trip leader.  I will go on another trip with you in the future."                                                                                                                                                         - Lynda Goff Santa Cruz, CA (Professor Emeritus Ecology & Evolutionary Biology UC Santa Cruz)

Save 25% on your Season pass to Point Pelee National Park of Canada

Buy or renew your annual pass to Point Pelee National Park of Canada and save 25%. From February 1, until March 31, 2010, take advantage of this great offer to start your preparations for this year's spring migration. Simply call (519) 322-2365, extension 200 from Monday to Friday from 8:30 am until 4:30 pm. I always recommend the Family (or group) pass, as this let's you enter through the automated gate and skip the sometimes lengthy line-ups each morning.

Photographing Frogs: Endangered Species of Panama.

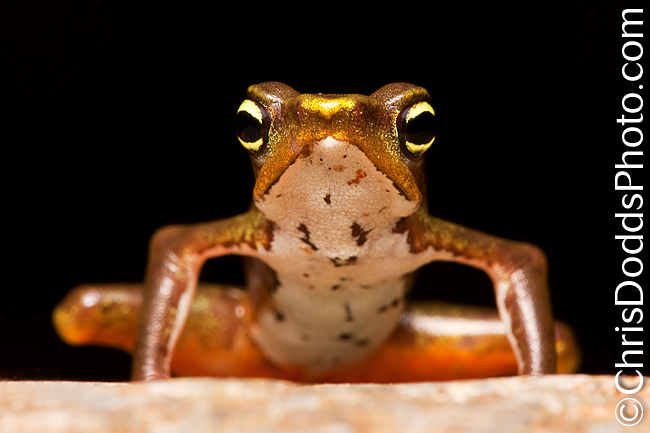
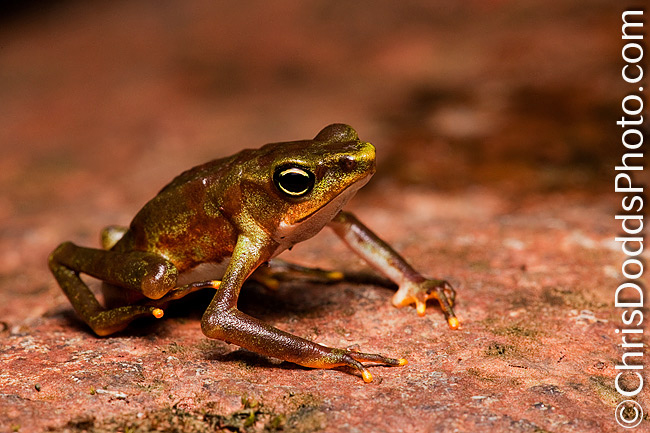
Harlequin Toad (Atelopus limosus). Provincia de Colón, Panama. Image Copyright ©Christopher Dodds  www.chrisdoddsphoto.com All Rights Reserved. Canon EOS 1DsMKIII, Sigma 150mm F2.8 Macro, Wimberley F2 Macro Flash Bracket, Canon 580 EX II Flash with LumiQuest Softbox III Hand-held. ISO 400, F16 @ 1/160s Manual mode. Full Frame. CLICK HERE TO ORDER A PRINT OR TO LICENSE IMAGE FOR PUBLICATION.
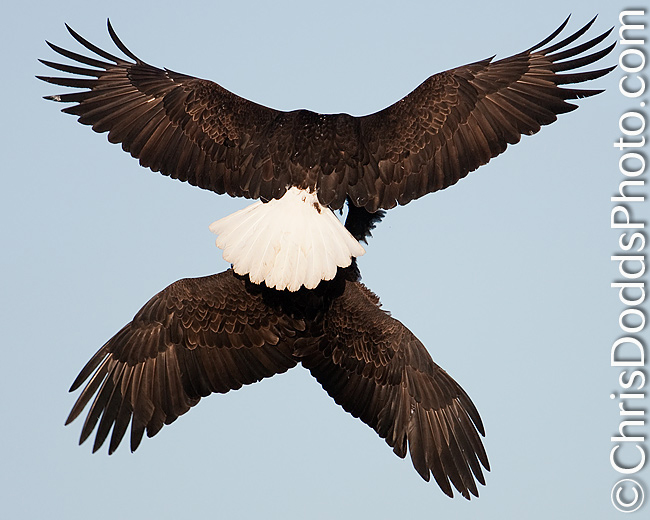
Panama: Home safe

Just home from an incredible nature photography trip to Panama. By far, the most fun, rewarding  and adventurous part was spending days deep in the jungle photographing highly endangered relatives of the, now extinct in the wild, Panamanian Golden Frog (Atelopus zeteki). Crawling around jungle streams after hiking through the jungle had me facing some of the very toughest tropical conditions. I was constantly soaking wet from sweat, and I could feel my own body heat reflect back onto my face each time I brought the camera to my eye to take a picture; only to have the viewfinder  and my glasses constantly fog-up. There was simply no escape from the heat and humidity. I chose to bring my Canon EOS 1Ds Mark III as my primary camera body and my Canon EOS 5D Mark II as my back-up; both performed flawlessly in the very toughest of conditions. I was, however, disappointed to have my Canon 580 EX II Flash fail yet again.
I have only had conjunctivitis once before, but quickly realized it's symptoms appearing on the third morning. Facing a medical situation involving my eyes in a third world country was a somewhat worrisome task; I was afraid that the medicine would do more harm than good. Turns out that my worries were unfounded and I was able to get American made medicine over the counter at a large pharmacy chain. The infection started to clear within 24 hours and all is fine now.
Enduring mosquitoes, tick and chigger bites and an ant attack were all well worth it (yes, I did use precaution), and a visit to Dr. Rashed at the Tropical Disease Centre of the Montreal General Hospital upon my return to have the various bites, blisters, welts, marks and rashes checked-out seems to have given me a clean bill of health (though I'm still waiting for the results of the three ticks that I removed from myself after my return home). Oh, the glorious & romantic life of a nature photographer (smile).
Harlequin Toad (Atelopus limosus). Provincia de Colón, Panama. Image Copyright ©Christopher Dodds  www.chrisdoddsphoto.com All Rights Reserved. Canon EOS 1DsMKIII, Sigma 150mm F2.8 Macro, Wimberley F2 Macro Flash Bracket, Canon 580 EX II Flash with LumiQuest Softbox III Hand-held. ISO 640, F16 @ 1/125s Manual mode. Full Frame. CLICK HERE TO PURCHASE A PRINT OR LICENSE AN IMAGE FOR PUBLICATION.
“Ground Beef”

After arriving in Panama City and collecting luggage, rental car and picking-up granola bars and bottles of water, I stopped for a bite at the international fast food chain symbolized by the golden arches. While waiting an unusually long time for my meal, I watched the woman at the grill drop a hamburger patty on the floor, pick it up with her spatula and replace it on the grill; I guess she thought it would sterilize it by putting it back on the heat (smile). I have always heard the rumors that there was no beef in their burgers; but now know it is, in fact, GROUND BEEF! She took a quick look around while laughing with her colleagues in the kitchen until she made eye contact with me and realized that she had been seen - then she quickly looked away and resumed making burgers. I simply walked away and decided I could wait until breakfast to eat.
Harlequin Toads Amplectant Pair (Atelopus limosus). Provincia de Colón, Panama. Image Copyright ©Christopher Dodds  www.chrisdoddsphoto.com All Rights Reserved. Canon EOS 5D mark II, Sigma 150mm F2.8 Macro, Wimberley F2 Macro Flash Bracket, Canon 580 EX II Flash with LumiQuest Softbox III Hand-held. ISO 800, F14 @ 1/160s Manual mode. Full Frame. CLICK HERE TO ORDER A PRINT OR LICENSE IMAGE FOR PUBLICATION.

Harlequin Toads (Atelopus limosus) & amphibian chytrid fungus (Batrachochytrium dendrobatidis)

amphibian chytrid fungus (Batrachochytrium dendrobatidis) is a lethal fungus spreading across Central America and wiping out entire populations of frogs. The Batrachochytrium dendrobatidis is so deadly that it kills about half of all amphibian species and reduces overall populations by about 80% after it’s arrival in any given place. One third of the known 5,743 amphibian species in the world are at risk of being wiped out! On a world scale, 122 species of amphibian species have gone extinct, compared with five bird species and no mammals in the same period.

Listed by the IUCN (Red List) as endangered, the Harlequin Toad (Atelopus limosus) is also known as the Mossy Stub-footed Toad and Limosa Stubfoot Toad. An endemic species of Panama, it’s population is limited to 5,000 square kilometer range of severely  fragmented forest and is at risk from Amphibian Chytrid Fungus and habitat loss.

Apple Announces Aperture 3 - FINALLY

Funny how critics blasted Apple for not announcing a new version of Aperture when Adobe released it's free beta version of Lightroom 3. I'm happy to report that Apple just released it's newest full version of Aperture. Unlike Adobe, Apple waited to release a full, working version available as an upgrade for only CAD$109.00. This new version has more than 200 new features, including the incorporation of Faces and Places from iPhoto. Apple included brushes, pre-sets and advanced slideshows with full multimedia support. If you're a Mac user, be sure to try the 30 day free trial here. If you're a PC user, then is is just another reason to make the switch to Apple (smile). I've only had limited time with Aperture 3, but kudos to Apple for waiting to offer a full version and skipping the "use your customer base as guinea-pigs" stage. Though, perhaps, early to offer a full review, my experience has been flawless so far.

Thanks for your concern

My last post was on January 22, 2010, so this is the longest I've gone without blogging. Many thanks to the many dozens of folks who emailed me to check-in and see if all was A-OK. As you can see, I was having a blast in Central America!

The Fundamentals of Photography: Understanding the Light Meter

Siberian (Amur) Tiger Portrait Panthera tigris altaica (Tigre de L'Amour ou Tigre de Sibérie). CAPTIVE ANIMAL. Image Copyright ©Christopher Dodds  www.chrisdoddsphoto.com All Rights Reserved. Canon EOS 1DsMKIII, 500mm F4 IS, 2X II Tele-converter Gitzo 1325 Tripod with Wimberley Head II. ISO 800, F8 @ 1/160s Manual mode. Ambient exposure using hand-held Sekonic L-358 Light Meter. Full Frame. CLICK HERE TO PURCHASE A PRINT or LICENSE IMAGE FOR PUBLICATION.
The in-Camera Light Meter:

Pretty much all digital cameras sold today include a built-in REFLECTIVE light meter. The volume of light measured by a reflective light meter varies relative to the color (or reflectance) of the subject, the background (and the subjects distance from it) and the chosen metering mode (or pattern); A Snowy Owl in a bright, snowy field reflects more light than a black bear on a dark, wet rock. Think of it this way: pure white reflects nearly all of the light that strikes it, and pure black reflects virtually none of the light that strikes it.
Left to it’s own devises, a digital camera in one of it’s automatic modes (Program, Aperture Priority or Shutter Priority) will use it’s built-in computer  processor and programmed algorithms to determine the appropriate exposure settings such as shutter speed, f-stop (or aperture) and ISO to render the scene at what it thinks should be 18% grey, or a mid-tone (exactly mid way between the blackest black and the whitest white). The problem is a simple one; most cameras assume that everything they photograph reflects 18% of the light that falls onto them. Not everything we see or photograph is a mid-tone; with this method, we need to compensate to achieve the correct exposure for anything that is not a mid-tone; The Snowy Owl in a Snowy field we talked about earlier would be about two stops under-exposed, so we need to add about two stops of light to the metered reading to achieve the correct exposure. The black bear on the dark, wet rock will be about two stops overexposed, so we have to remove about two stops of light from the metered reading to achieve the correct exposure. A picture of the green grass on your front lawn is a middle tone and requires no compensation to achieve the correct exposure.
The problem gets much bigger when your subject starts to move from one colored background to another, or, moves closer or further away; can you imagine dialing in the correct exposure compensation, on the fly, as a white bird flies from a blue sky background to a dark cliff face background as it gets bigger in the frame while flying toward you? (smile) ... I didn’t think so.

Hand-held Light Meter:

The single best teaching aid that I know of is a hand-held light meter; students wanting to learn exposure theory tend to improve the exposure accuracy of their captures almost instantly when handed a hand-held light meter.
In it’s simplest form, a light meter measures light;  We’ve discussed how your camera uses it’s meter to measure the light that is reflected from your subject, now let’s talk about how to measure the ambient light that falls onto your subject by using a hand-held light meter. If we can measure the AMBIENT light that falls onto the subject, we can successfully expose for the light (not the subject), and capture colors and tones as our eyes see them; white looks white, black looks black and middle tones still look like middle tones; just the same as our eyes see them. As long as you are in the same light as your subject, and the volume of light does not change between measurement and capture, you can take a reading and lock and load the chosen ISO, F-stop and shutter speed. Just like the sunny F/16 rule in my last post, you should still use your camera’s histogram to tweak the exact exposure to taste, and you should expose to the right and maximize that right most fifth of the histogram, as it contains 50% of the data in a digital capture. I typically add light to extract maximum detail from very dark subjects and remove light from very bright subjects, all the while ensuring I’m not clipping unrecoverable highlight detail.
On a clear day, from two hours after sunrise, until two hours before sunset, the light remains constant (provided it doesn't get cloudy, of course). If your subject flies from the blue sky to a dark cliff face, there is no need to make adjustments to your chosen exposure settings; the subject will be correctly exposed in manual mode.

A major difference between the old film days and digital is that instead of exposing for shadow detail on film, we now expose for the highlight. To ensure a correct exposure for the highlights, simply turn the meter’s dome toward the light source. To take a reading for the underside of a bird flying over your head, turn the dome toward the ground and to establish the correct reading for  a subject in the shade, point the dome toward the light source and use your hand to shade the dome. It won’t take long to learn all about light, it’s volume and the correct exposure relative to it.

There are many light meters to choose from, but I find the best value to be the Sekonic L-358 Flash Master Light Meter

Basic Exposure Theory: The Sunny F/16 Rule Explained

Snowy Owl Bubo scandiacus (Harfang des neiges) Casselman, Ontario. Image Copyright ©Christopher Dodds  www.chrisdoddsphoto.com All Rights Reserved. Canon EOS 1DsMKII, 500mm F4 IS ISO 400, F5.6 1/1600s Manual mode. Full Frame. The chart below (in the cloudy bright column) shows the correct exposure to be ISO 400 F/11 @ 1/400s. I chose to stop the action by using a higher shutter speed, so I used the equivalent exposure of ISO 400 F/5.6 @ 1/1600 second. I also knew to expect less detail in the snow and white feathers, because there are no shadows to help define them.

What you shooting at there, Dodds?” echoed across the landscape as I set-up to photograph Snow Geese and Sandhill Cranes in New Mexico about a year ago. “What exposure you at Dodds?” was the question asked by the same gifted photographer just recently. I don’t want to embarrass anyone, so I won’t mention any names here. I truly do think that he is a gifted and talented photographer. He’s widely published and is also the first person to admit that he doesn't really know all the “techie” stuff.....and he was much closer to my exposure this year, than last. 

The single most important skill a photographer should have is a basic understanding of the fundamentals of photography. The most important tool, and the least understood aspect of photography is exposure theory. I learned photography with a totally manual camera and used slide film (seems like so long ago), so a basic understanding was necessary to make successful images.

 Q: Why bother when I can just keep things simple and take a picture, check the histogram and make any adjustments necessary? 

 A: Because having an intimate knowledge of exposure theory and your cameras functions and controls helps you grow and improve as a photographer, make better decisions and better images as a result.

In it’s simplest form, the Sunny 16 rule (or Sunny F/16 rule) states: On a bright, sunny day, the correct exposure for any middle tone subject is F/16 at the shutter speed nearest to the reciprocal of the film speed. For example:

ISO 100 = 1/100 second @ F/16

ISO 200 = 1/200 second @ F/16

ISO 400 = 1/400 second @ F/16

ISO 800 = 1/800 second @ F/16

Now we have established the correct exposure, it’s time to decide if we need more depth of field or shutter speed. Each step up, or down, of one variable represents a doubling, or halving, of any other variable. If you need more shutter speed than 1/100 second @ F/16 (ISO 100), then an equivalent exposure would be ISO 100 1/1600 second @ F/4.


This chart illustrates the equivalent exposures for ISO 100 and 200. Each setting above will allow the same amount of light to fall on your digital cameras sensor, or film cameras film. The exposure is the same, with the only difference being either your shutter speed (to freeze or blur action) or the depth of field (very narrow to blur the background, or very large to capture an entire grand landscape sharp).

But wait! It got cloudy. Now what? The Sunny F/16 rule is actually the correct ambient exposure for an average subject under bright sunny conditions. If the sun goes behind a cloud, then the light falling onto your subject is decreased and you must make an adjustment to your basic exposure settings. Here are some aperture settings for some different daylight situations:


This is intended as a starting point, so there are exceptions. Backlight or sidelight both require adjustments to reach the correct exposure. It’s a good idea to expose to the right with your digital camera; 50% of the recorded data is recorded on the right fifth (or 20%) of your digital cameras histogram. With very light subjects in very bright conditions, I routinely subtract light so as not to clip the highlights. With very dark or black subjects, I tend to add light to maximize the recorded detail. Notice the technicals for the Snowy Owl in my previous post; ISO 200 F9 1/1600 second = ISO 200 F22 1/1250 second (or Sunny F/16 rule for light sand or snow) minus 1/3 stop to preserve all of the details in the whites without clipping (or loosing) any data.

Sounds complicated, but if you spend some time digesting and thinking about everything here; you'll be able to get that once in a lifetime shot accurately and consistently with confidence. Not to mention how much you will impress the boys (or girls) when you are all standing around waiting for the shot or talking shop.

If you own an iPhone or iPod touch, there's a great application available for $1.99 called Exposure Calc. I just found it while writing this blog entry and think it is a great learning aid and pocket reference.

If you don't get it, and need to take a test shot, check the histogram, make adjustments, take another test shot; that's okay too, as long as you're having fun and making the odd good image to keep you interested.

Comments welcome & appreciated.

The Business of Photography: Negotiation


Snowy Owl Blast-off Bubo scandiacus (Harfang des neiges) Quebec. Image Copyright ©Christopher Dodds www.chrisdoddsphoto.com All Rights Reserved. Canon EOS 1DsMKII, 300mm F2.8 ISO 200, F9 1/1600s Manual mode. Full Frame. CLICK HERE TO PURCHASE A PRINT or LICENSE AN IMAGE FOR PUBLICATION.

Top 10 Negotiation Tips:

To succeed in any business, particularly as a photographer, we have to compromise from time to time. The trick is to compromise without loosing what you really need to accomplish your goals.
  1. Learn to ask for what you want: We often fail to ask for a better price or better terms because we are afraid of failure. A good negotiator starts with a clear understanding of what they want, and what they don’t want. People new to negotiation feel it’s awkward to ask for a lower price or better terms. Anyone trying to buy or sell anything will be happy to consider any reasonable offer to help close the deal.
  2. Eliminate disadvantages by acting quickly and decisively. Having a plan and knowing what your goals are is the best way to react quickly to offers or counteroffers. In todays connected world, waiting to reply during negotiations allows the other party time to seek other options.
  3. Deal with the decision maker, but don’t be afraid to have someone who isn’t the decision maker negotiate for you. Use the power of your friendships with other people in the organization you are dealing with to help move the negotiations along in your favour.
  4. Learn to listen. If you are talking; then you are not listening. Good negotiators are good listeners and good communicators. Those that do all of the talking during the negotiation process are usually the ones who loose; they don’t take the time to hear the other sides needs and concerns. By learning to listen, the other side will quite often tell you everything you need to know to win.
  5. Leave your emotions out of the negotiation process and keep your cool. The moment you get angry is the moment you loose. You should not avoid discussing important issues, just avoid discussing them in a heated argument. Negotiations should not be arguments, but avoiding tough issues is not productive.
  6. Don’t make a threat unless you are ready to follow through. 
  7. Remember the power of conversation. It’s easy to misinterpret the tone of an email. Don’t be shy to pick-up the phone and make a phone call. Embrace the spoken word.
  8. Don’t negotiate away from what’s important to you. Remember rule number one.
  9. Don’t be afraid to walk away from a bad deal. Better to have no deal than one you will regret with time.
  10. Get it in writing. I find the best usage licenses are the ones I’ve written myself. Using a standard form contract is a good indication that no negotiations took place.


                         Learn it all. Learn it fast. Learn it now.


Free Site Guide: Photographing the Snow Geese of Victoriaville, Quebec

Snow Goose (Chen caerulescens, Oie des neiges) Réservoir Beaudet, Victoriaville, Quebec, Canada. Image Copyright ©Christopher Dodds http://www.chrisdoddsphoto.com All Rights Reserved. Canon EOS 1D Mark III, 500mm F4 IS, 2X II Tele-converter, Gitzo tripod and Wimberley Head II. ISO 320, 1/1250s F8 Manual Exposure. Full Frame. CLICK HERE TO BUY A PRINT or LICENSE AN IMAGE FOR PUBLICATION.

Réservoir Beaudet is immediately adjacent to the city of Victoriaville, in the Eastern Townships of southern Québec. During migration, this site harbours significant numbers of gulls and geese. Since 1996, high numbers of Greater Snow Geese have been recorded here. So far, 224 species of birds have been recorded at this site. The high concentration of waterbirds using the reservoir is probably linked to the absence of hunters. At peak times in October, ducks, geese, and gulls numbers exceed 1000,000 individuals. Several species of land birds also use the reservoir in high numbers for roosting in the fall. The following are some of the peak counts for certain species: 4,000 American Crows (1989), 17,251 European Starlings (1989), 2,500 Red-winged Blackbirds (1988), 1,000 Common Grackles (1988) and 700 Brown-headed Cowbirds (1988).

Photography is relatively easy here; only a short walk from the parking lot is a boat ramp (GPS co-ordinates: 46° 4'6.37"N , 71°58'35.94"W) that is about the best place to be when the wind is from the west in the afternoon. April-May and October-November are the best times of year for photography.


View Larger Map The green arrow indicates the exact location that I like to be in the afternoon when the wind is from the west. GPS co-ordinates are: 46° 4'6.37"N , 71°58'35.94"W

Vested Interest Photo Vests

John Storrie of The Vested Interest (a division of Storrie Parachute Works Inc.) sent me a Khumbu Photography vest and I am thrilled. True to his solid background in building safe, strong and rugged parachutes, John's The Vested Interest produces top quality photo vests. I wanted a vest, but had very specific needs that only John could address. I wanted a way to transport my camera equipment like a backpack, but allow access to camera bodies and lenses while I hiked without removing a backpack, having to lay it down and unzip it, etc.. I chose the Kumbu model because of the large padded pocket on the back that holds either my 500mm F4 IS or my 300 F2.8 IS Canon lenses. I spend a lot of time photographing from a Zodiac, and that large rear "drop-in" lens pouch on the back is perfect even if I were to take the whole kit off; I simply wrap the whole vest around the mast of the flying bridge and secure with the zipper. Unlike a photo-backpack, where the whole contents are at risk of a spill when open, this vest protects all of my gear and still allows access to each component while protecting the rest. I recently took the vest to photograph Snow Geese in Quebec where there are simply too many people to lay equipment down and not worry about it. The vest held everything I needed and still had plenty of room to spare. It's simply a study in astounding build quality, and design genius; there are even brilliantly designed padded shoulders which not only cushion the weight of your shouldered camera, lens and tripod, but they also disperse it. Built of military grade (just about bomb-proof) parachute nylon, this vest will easily outlast me; it's easy to see why the military buy these for their photographers. Be sure to visit The Vested Interest and check out the various vest designs - most of which can be customized to your specific needs.

That's me, Christopher Dodds, with my Vested Interest Khumbu Photo Vest. Notice just how many pockets there are and that it fits over my down winter jacket. Image copyright & courtesy of Bruce Lapointe.

Pro Tip: GET A GRIP!

I often have many thousands of dollars of equipment set-up on my tripod and carry it around on my shoulder while following my subjects around the wilds. From the moment I leave my car, I risk slipping on packed snow or ice. I keep a pair of MICROspikes with me at all times in the winter. It's like having the very best winter tires with studs and chains and is a relatively small investment to protect both myself and my gear. Wether I'm looking for owls in Owl Woods where it is often icy, or just walking my dog, T-Bone; MICROspikes is the product I use. A less expensive product is offered by Yak-Trax, which I used to use until I discovered MICROspikes - both are good, but MICROspikes are more aggressive, robust, long lasting and less likely to get stuck on something and lost.


Comments welcome & appreciated.