ioSafe Solo Hawk Bearproof SSD mini-review

Coastal Brown Bear Sow and Spring Cub clamming (Ursus arctos) Geographic Harbor, Katmai National Park, Alaska. Image Copyright ©Christopher DoddsSony Alpha a9 Mirrorless cameraSony FE 400mm f/2.8 G Master OSS Lens  with Sony FE 2X Teleconverter @800mm ISO 640, f/5.6 @ 1/1,000s. Manual exposure. Full frame image.

ioSafe Solo Hawk bearproof SSD mini-review

I am constantly on the go and do take the utmost care of my cameras, laptop, and other electronics while travelling, but that doesn't guarantee that my valuable images are safe from disaster. My friends over at ioSafe sent over an (almost) indestructible and waterproof external ioSafe Solo Hawk SSD drive, and I thought I would share a mini-review of it for you. I'm calling this one bearproof!


Accidents happen all the time; The ioSafe Solo Hawk is as comfortable in the desert being pelted with blowing sand, as it is on the bed of a truck in heavy freezing rain. . . . . in my case (literally), it will likely stay safe, warm and dry in my laptop case, but it will handle any hell thrown its way in an accidental emergency; If I forget to zip my laptop case closed, accidentally drop it on the floor or in the toilet (or in the ocean while boarding a boat), spill coffee, or accidentally back my truck over it my images will be safe! It is my insurance policy for my images.


The ioSafe Solo Hawk is an external solid-state storage drive that can withstand total submersion in freshwater or saltwater for 72 hours (diesel fuel, oils, hydraulic fluids, aircraft fuels, 12′ depth for 1 hour). It can be dropped from ten feet, works at up to 30,000 feet and is crush-resistant up to 2,500 pounds.


The Solo Hawk SSD, available in 500GB or 1TB capacities, combines this military-class toughness with 550 MBps data transfer rates, the fastest read/write speeds available in the industry today via the waterproof USB C (USB 3 Gen 2) port. My 1TB version tested a write speed of 494.4 MB/s and a read speed of 519.6 MB/s using Black magic designs Disk Speed Test utility. These are the fastest results I have achieved with an external SSD.


MIL-STD-810G Specs:

Crush Protection Technology: Crush resistant up to 2500 lbs.

Full Suspension Drive™ Technology: Full suspension in all six axes of motion. Optimized for data loss protection from drop and shock of 10′ per MIL-STD-810G Method 516.5.

HydroSafe™ Technology: Waterproof yet heat-conducting barrier to protect against data loss in up to 10′ for 3 days in freshwater or saltwater per IP68. Protects data even when USB plug is in. No requirement for a connector cap to retain data protection.

ChemSafe™ Technology: Full immersion in diesel fuel, oils, hydraulic fluids, aircraft fuels, 12′ depth for 1 hour with no data loss per MIL-STD-810G Method 504

EnviroSafe™ Technology: Continuous exposure to UV, blowing sand, blowing dust, rain, salt fog, icing or freezing rain, 24 hours with no data loss per MIL-STD-810G Methods 505.4, 506.4, 509.4 and 510.

AltiSafe™ Technology: High altitude operation. 15K ft. (Alum.) and 30K ft. (SSD and Ti.) rated altitudes per MIL-STD-810G Method 500.4

Theft Resistant Kensington® Lock compatible slot solid metal construction — theft protection


Great Gray Owl a la Sony a9 and 400mm f/2.8 G Master lens with 2X teleconverter

Great Grey Owl (Strix nebulosa, Chouette Lapone, GGOW) ©Christopher Dodds  Sony Alpha a9 Mirrorless Camera & Sony FE 400 f/2.8 GM OSS with Sony FE 2X Teleconverter ISO 2,000, F5.6 @ 1/5,000s Manual Exposure mode. Join me for my winter owl workshops this January/February to learn More CLICK HERE.

In case you missed it, I wrote a mini-review of the new Sony FE 400 f/2.8 GM OSS in my last blog post HERE. Here's an image of a Great Grey Owl with the Sony Alpha a9 Mirrorless Camera & Sony FE 400 f/2.8 GM OSS with Sony FE 2X Teleconverter.

I continue to be amazed by the speed and accuracy of the Sony auto-focus. It truly is unbelievable!

Join me for my winter owl workshops this January/February to learn More CLICK HERE.

Sony a9 and Sony G Master 100-400mm lens ready for bird photography

Atlantic Puffin PORTRAIT OF A CLOWN (Fratercula arctica, Macareux moine, ATPU) Mingan Archipelago National Park Reserve of Canada, Réserve de parc national du Canada de l'Archipel-de-Mingan, Quebec, Canada. Image Copyright ©Christopher Dodds. Sony Alpha a9 Mirrorless Camera & Sony FE100-400 F4.5-5.6 G Master OSS @ 400mm @ minimum focusing distance. Full frame image (top to bottom; left and right cropped to square aspect ratio). ISO 2,500, f/6.3 @ 1/1,600s Manual exposure mode.

Sony a9 and Sony FE100-400 F4.5-5.6 G Master Lens: Ready for Bird Photography?

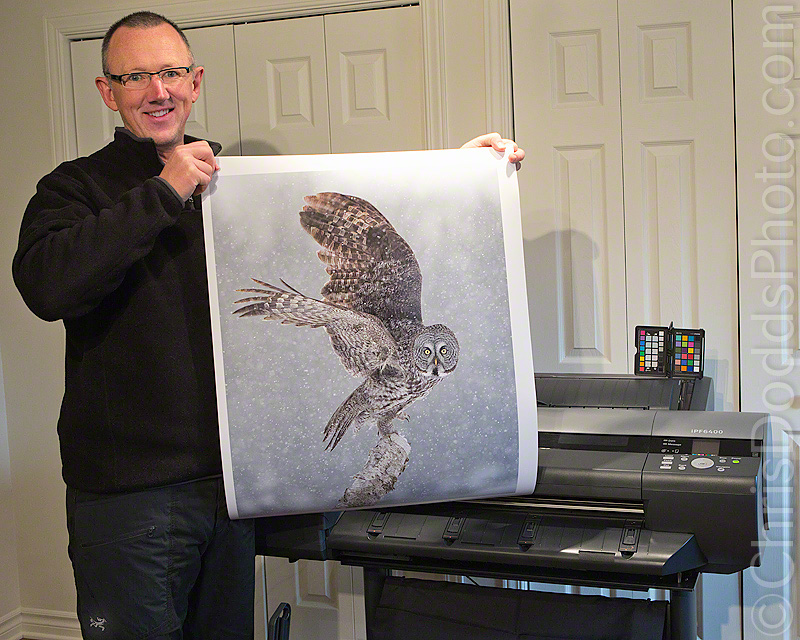
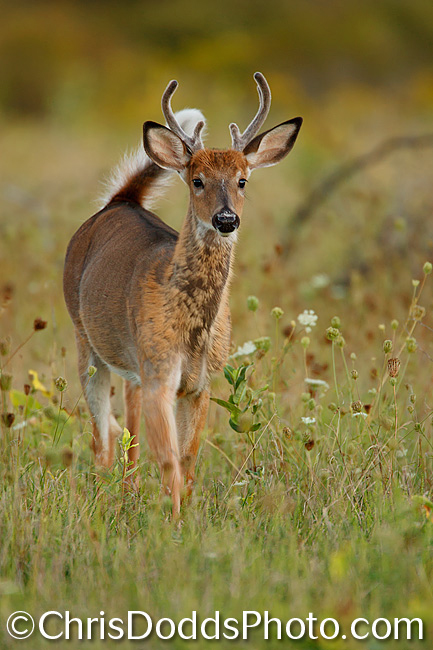
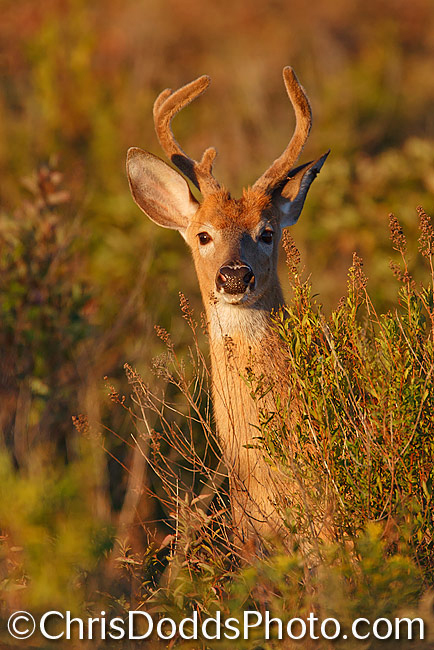
Canadian Nature and Wildlife Photographer Christopher Dodds with Sony FE 100-400 F4.5-5.6 G Master Lens

My friends over at Sony Canada sent over a Sony a9 and Sony FE100-400 F4.5-5.6 G Master Lens for me to test while leading my four consecutive Deluxe Atlantic Puffins Galore Workshops in Puffin Paradise. The workshops were a huge success, with crew after crew of wonderful participants and awesome photographers who all made boatloads of Atlantic Puffin and Razorbill images, while enjoying life on a tiny island and the ambiance of a lighthouse with gourmet meals - it was fabulous! Learn more & sign-up for my 2018 Deluxe Puffins Galore trip HERE.Deluxe Puffins Galore trip HERE.

The Sony a9 is the first mirrorless camera I have tested that is capable of replacing my current Canon 1DX mark II camera bodies. So, why did I consider adding, or moving away from my current Canon set-up in the first place? Like all of my workshop clients and friends who travel and constantly worry about getting camera gear in the cabin of the airplane as carry-on (or who may be tired of lugging all of the “big and better” stuff around), I am always on the lookout for smaller, lighter, better and more manageable cameras; In this case, the a9 offers some incredible specs. to the birds-in-flight photographer, as seen on the Sony website HERE.

The camera arrived moments before we left for the long drive, and because it uses Contrast and Phase detection autofocus points built into the sensor, I didn’t have to worry about delaying my departure and taking the time to micro-calibrate the camera and lens before leaving; My Canon SLR cameras have a separate auto-focus sensor, which requires micro-calibration (or, to be more specific; require me to go through the process of micro-calibration to make sure the camera and lens combination are producing sharp images, even if no calibration is required). Having undertaken the time-consuming task of the micro-calibration of all of my Canon cameras and lenses, and any combination possible with teleconverters countless times …… this is huge!

The Sony a9 and G Master 100-400 feel great in the hand, and seem perfectly balanced and easy to hold; a whopping two and a half pounds lighter than my Canon 1DX with Canon 100-400!

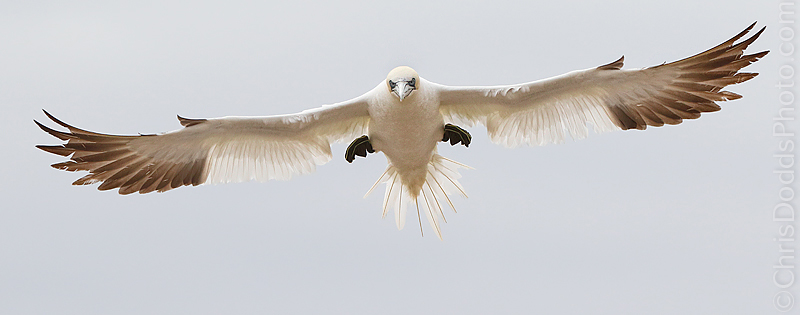
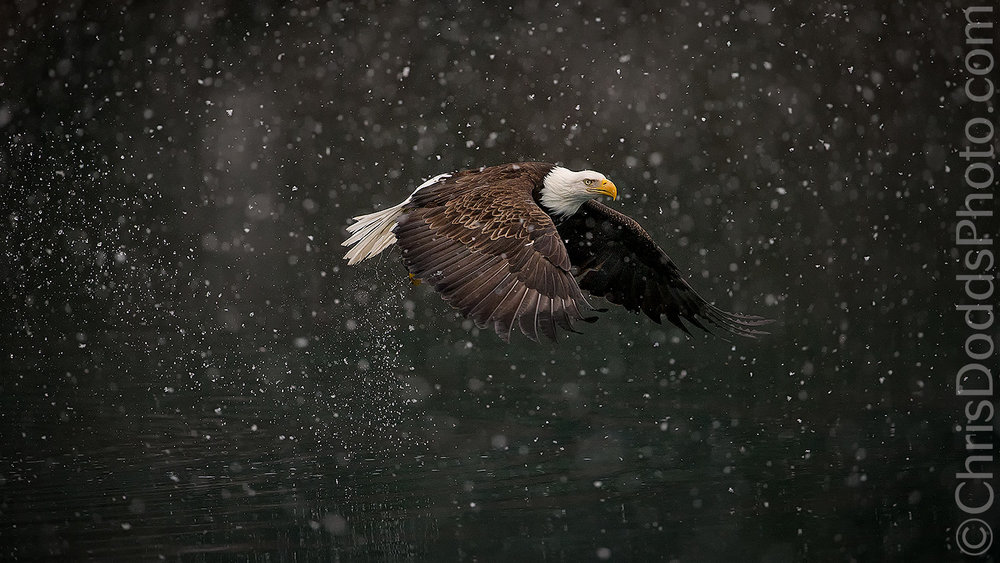
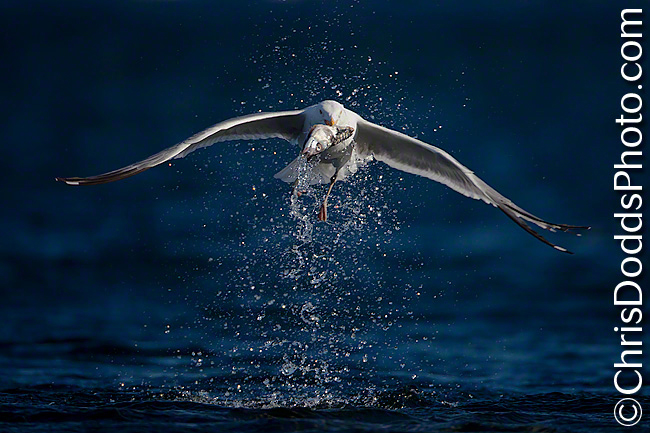
I quickly set-up the camera for birds-in-flight action photography and immediately found the autofocus to be almost a magical dream of perfection. The AF points cover 93% of the surface of the sensor; this seems to be a huge advantage for keeping really fast and erratically moving subjects in the viewfinder. Initial autofocus acquisition seems so fast with this camera, that I had absolutely no hesitation hammering away the moment I had the target in the viewfinder. The results are remarkable! I spent every moment (unfairly) trying to make the Sony a9 fail with circumstances that I know none of the other brands can keep up with; I was on a beach at low tide in low contrast light, aiming at Puffins flying low over seaweed covered rocks. All of the Canon cameras that I own, and Nikons I have owned and used would focus on the seaweed-covered rocks. I could point the camera at the Puffin while it was tiny in the frame (well before I would normally try to acquire autofocus), and the camera would pick-up, and focus on the Puffin nearly every time. It seemed like there was an algorithm in the firmware that was looking for something moving in the frame to target. It would lock-on and stay with the Puffin all the way along its flight path towards me. Autofocus systems are challenged by objects moving towards the camera at a constant rate of speed; as an object approaches a camera at a constant rate of speed, we must move the focusing ring faster to keep the object in focus (or the camera’s autofocus mechanism must accelerate its adjustment). This often proves challenging to even the best autofocus systems; the Sony a9 kept-up every time! I was blown away.

I quickly realized that there was a lag between the live view on the back of the camera, and it’s automatic switch to the EVF (electronic viewfinder) when the camera is brought up to the eye. This felt awkward and interfered with my “target acquisition”,  so I switched to EVF display only, and was surprised that there was no menu choice to use the EVF for shooting, and the rear LCD to display the menu; In other words, when the camera is set to use the EVF display, you have to use the EVF for live-view (perfect), and menu adjustments (not-so-perfect). I quickly set-up a custom menu, with it’s first option to switch back the display to the rear LCD screen for when I want to make menu changes. The EVF was remarkably good and didn’t take long to get used to. Not having to drive the rear LCD increased battery life immensely, and I regularly filled a 128GB card with 2,200 RAW images on a single charge with battery life to spare.

I installed a Black Rapid Sport strap to sling the camera (and lens) over my shoulder at my waist; I quickly adapted to partially depressing the shutter button as I lifted the camera to my eye to “wake” the sensor and EVF. Since SLR cameras don’t need to keep the sensor energized to project an image in an EVF, this is not a problem when using a traditional SLR with an optical viewfinder. This seemed a pain at first, but it really didn’t take long to develop muscle memory, and it became reflex very quickly.

I set the camera to silent mode, which seemed really strange @ 20 frames per second, but I quickly grew to love the silence and think this to be a huge bonus while photographing flighty subjects like warblers that take-off at the sound of a camera shutter.

The image files are fantastic! At first, I thought there may be a huge gain in dynamic range, but after spending time with the files, I feel it is fair to say there is about 1/3 to 1/2 stop gain in dynamic range at higher ISO, but files at lower ISO seem to compare with those from the Canon 1DX mark II. I haven’t gone to great lengths to scientifically test them, as I will leave that to others and all I am really interested in is getting the better image. Files seemed richer, sharper and more saturated than those from the Canon 1DX mark II. Although I applied the same workflow to the images from the Sony a9 as I do to images from my Canon 1DX mark II, I only needed to apply about half as much of everything to produce some extremely awesome results.

In conclusion, I fell in love with the Sony a9 and Sony FE100-400 F4.5-5.6 G Master Lens! It’s a super light and manageable combination @4.5 pounds that can be hand-held all day long. The autofocus system is second to none (that I have used), it’s silent 20 frames per second with a huge buffer will keep even the most trigger happy birds-in-flight shooters happy, and the files this camera produces are stunning. This is the perfect combination for those who don’t choose the weight or reach of a super telephoto lens (as there are none currently offered by Sony….but they would be wise to jump on a native Sony e-mount 500 or 600mm f/4 lens soon!). Paired with a second body and wider zoom, it would be the perfect kit for an African Safari!

I haven’t yet tried any of the adapters which allow you to use Canon and Nikon lenses at 10 frames per second, mostly because I don’t see an adapted lens as a long term or reliable solution. Please do take the time to make comments here if you can offer any insight from your experience with any of the adapters available; We would love to hear your thoughts.

I’ll be back shortly with more about my time with the Sony a9 soon, and will post images of birds-in-flight and some high ISO images in the coming days. I will share some of things I learned about using the camera and offer some suggestions for menu choices. I will share my thoughts on adding, or switching to Sony, and more likes and dislikes. Stay tuned!

Kudos

I’m an experienced wildlife photographer and I’ve had puffins on my bucket list for several years. Around my Colorado home, I scout my own sites and work my network of photography buddies, so I know what it takes to find good sites, get in and then have the wildlife cooperate, to get good pictures. I’ve even been a scout for a leading professional photographer, looking for superior deer and turkey subjects and locations.

Regarding puffins, I’d considered renting hide times, but most involved day-trips on boats. Most importantly, time in the hide is limited and you won’t necessarily be able to shoot when they’re feeding, nor will you likely shoot in ideal light. Angle of view is often not ideal from a hide.

I don’t know how, but I ran across Chris’ Deluxe Puffins Galore Workshop at the Mingan Archipelago National Park of Canada. It sounded too good to be true. You can shoot ALL DAY and have gourmet meals morning, noon and night. Hang on.

The “galore” part of the title is entirely true. I took over 13,000-shots in my three-days. It required merciless culling to get down to under 200 for sharing. I have many worthy of framing and the culls contain many shots that I might have been happy with, had I not had so many superior shots.

There are rules, to protect the birds, about where you can go on the islet, but that in no way excludes you from puffin activity. For example, every evening, we sat in chairs as puffin filled our frames landing, taking off, kibitzing, posing, all in ideal light. By the end of the first day, I didn’t know how I’d possibly improve my shots, but I did, indeed, add to my archive.

Importantly, Chris is an affable and professional guy, but he pays close attention to safety, respect of our subjects and comfort of his guests. Everyone in my group was experienced, with good equipment. In fact, I was the only newbie. All had shot with Chris before. Guess what, I’ve signed up for his Snowy Owl Adventure, next January. I suspect that won’t be my last.

Chris delivers a premium product, in every way. Planning information was thorough and detailed, making it crystal clear what you needed to get there, to wear, etc.. The only thing left was to take the pix.

This is a premium product and a photographer’s dream. This is THE way to shoot Atlantic puffin.

Dave StephensColorado | USA

Canon imagePROGRAF PRO-1000 Mini Review

Christopher Dodds (Nature Photographer, CANON Northern Explorer of Light and X-rite Photo & Video Coloratti) with the newly announced Canon imagePROGRAF PRO-1000 printer.

I’ve always been an advocate for the print; my favourite images are never quite finished, until I make a large print. I currently own several printers; among them are the Canon Pixma PRO-1 desktop printer for everything up to 13” wide, and a Canon imagePROGRAF iPF6400 for everything up to 24” wide. The Canon imagePROGRAF PRO-1000 will replace the Canon Pixma PRO-1.

If you have followed this blog and read my review of both the Canon Pixma PRO-1 and my Canon imagePROGRAF iPF6400, then it is no surprise that I am a perfectionist with a passion for the perfect image; it’s what keeps me out there perfecting my craft and drives my passion for the print. As a master printer, I used to have to spend countless hours pouring over printed images looking for ways to squeeze every ounce of colour gamut out of which ever printer I was using; that all changed when I switched to my Canon imagePROGRAF iPF6400, then added my Canon Pixma PRO-1, and now the imagePROGRAF PRO-1000 will replace my Canon Pixma PRO-1 for everything up to 17" wide.

Full disclosure: My introduction to the Canon line-up of printers came after my being named the very first Canon Canada ambassador, or Canon Northern Explorer of Light, some four years ago. I had been using another popular brand of LFPs (Large Format Printers) until that time. I had invested so much time figuring-out workarounds for all of their shortcomings, I was foolishly reluctant to change; Each return to the studio was almost dreaded, as I knew it might be hours before I could start printing while waiting for cleaning cycles and head alignments. Those days are all in the past, and my experience with both of my beloved Canon printers has been nothing but a delight.

Although Canon has, and does, continue to sponsor me as a Northern Explorer of Light, I am under no contractual obligation to try to sell you anything. I am simply sharing my experience and making a personal recommendation to help you avoid the frustration of choosing the right printer, and avoiding the frustration of choosing the wrong one (because, after all, I had already done that to start with - smile). This is an updated testament to the printer(s) I choose for my print production.

What is it: Canon’s latest and greatest addition to their already impressive printer line-up is the imagePROGRAF PRO-1000. I was excited to put it to the test and offer my thoughts on this new model aimed at the serious amateur, semi-professional and professional photographers who produce professional quality colour and monochrome photographs up to 17” wide.

Initial impression: The Canon imagePROGRAF PRO-1000 printer arrived and I couldn't wait to give it a try; The printer looks impressive and sports a new thin red line, which was traditionally only seen on L-series lenses and reflects their top-of-the-line quality. I was pleased to see an LCD display on the control panel; it was missed on my Pixma Pro-1. Set-up and instillation was fast and easy; remove the packaging and security tape, install the print head, then installing the new (larger) ink tanks was a breeze, thanks to the new ink tank configuration along the bottom front of the printer. One important observation was the inclusion of a full set of full 80ml inks; an important consideration while reflecting on the cost of upgrade (printers usually ship with only enough ink to prime the ink lines, the print head, preform set-up functions like head alignment and then only make a few prints. You usually never get more than half-full ink tanks).

As is typically the case with all of my reviews, I won't be listing all of the technical specs which can be found on the Canon website HERE. In a nutshell, the Canon imagePROGRAF PRO-1000 features a new design with all new specs here’s what is important to me:

NEW print head, Lucia Pro inks and image processor: The imagePROGRAF PRO-1000 combines a new print head, new inks and a new processor to achieve the highest quality prints, without compromise in performance or productivity. The new 80ml LUCIA PRO inks developed for the imagePROGRAF PRO-1000 enable photographers to reproduce their images accurately in print. The wide dynamic range of colours allow for a high colour gamut (up to 19 percent larger than the PIXMA PRO-1 printer) and rich expression of detail in darker areas, with outstanding image permanence. The Chroma Optimizer ink helps achieve uniform glossiness when printing on glossy paper. By being applied over the printed image to cover the bumps between the ink droplets, Chroma Optimizer regulates the surface reflection to deliver natural colour reproduction in the finished print. This creates images with deep black density and prevents unwanted bronzing (scratch resistant). The new print head design (50% larger than the Pixma PRO-1) utilizes a sophisticated real-time ink ejection system which helps to maintain a consistent print head temperature allowing for consistent ink droplets to help limit clogs and reduce cleaning cycles and wasted ink. The new print head helps to further reduce the amount of wasted ink through anti-clogging technologies where ink ejection conditions are precisely checked with sensors, and if a clog is detected, another nozzle automatically provides backup. The new image processor provides optimal control of the printer, maintaining high-speed, accuracy and high-resolution printing while maintaining the balance of inks and the precise placement of ink droplets, carefully calculating best results for each print mode and media using various factors including colour reproduction, tonal gradations, black density, graininess, glossiness, anti-bronzing and elimination of metamerism”

NEW Larger Print Size: “Enjoy the ability to print striking images up to A2 (and 17” x 22”) without compromising quality. Take advantage of our fast print speeds and colour collaboration: with a plethora of media types supported from gloss, matte, fine art papers and canvas, you’ll get the look and feel you desire.”

NEW The Canon imagePROGRAF PRO-1000 Is the only Canon desktop printer which incorporates the vacuum platen (formerly reserved only for Large Format Printers), it feeds paper with air suction, keeping the paper flat and preventing ‘floating’ and ‘edge-curl’ during the feeding / printing process allowing borderless printing on fine art papers.

NEW Software: Print Studio Pro v 2.0 works with Adobe Photoshop and Lightroom, and Canon’s Digital Photo Professional. “With 16-bit processing capabilities, fine details are dramatically improved, gradations are smooth and a highly accurate reproduction of the original captured image can be reproduced. Improving on the existing Print Studio Pro plug-in, the imagePROGRAF PRO-1000 utilises the updated version 2.0.0. This features a new screen layout that makes it easier for you to adjust the printer, paper, layout and colour settings to help deliver the best quality prints. You can create favourite settings that you feel comfortable with, and come back to them time and time again. Colour management is easier than ever, with a simple box to allow ICC profile selection, rendering intent and a brand new feature to enable soft proofing.”

In conclusion: After set-up, I deliberately chose to print a colour image with a lot dark colours and tones; an image I knew could test the limits, and one that could really prove if the new Canon imagePROGRAF PRO-1000 was capable of producing prints which can stand above it’s predecessor. I was immediately blown-away by the remarkable difference in colour depth and accuracy; all of the dark areas immediately opened-up and, though subtle, the difference in print quality very quickly had me making new prints of lots of older images; every one of them, to a greater, or lesser degree, was different from those I had previously printed; all of them were better.

The new Print Studio Pro V2.0 was easy to use, the printer preformed flawlessly and the prints are a testament to it’s abilities.
 

The hardest part of this review was running-out of sample ink, draining the remaining ink from the lines (to prepare for shipping) and packing the sample printer to send it back to my friends at Canon Canada. I will be placing my order to arrive when my Winter Snowy Owl Workshops finish at the end of February.

Economic Considerations: If you are wondering about the economics of investing in a Canon imagePROGRAF PRO-1000 printer, consider this (very short-sighted approach, since the printer will last for years and make many thousands of prints over it’s life):

Suggested retail price for the Canon imagePROGRAF PRO-1000 is CAD$1,600.00, but it includes a complete set of 80ml inks which, after set-up, will likely make about 50 17” x 22” prints. If you manage to sell those for more than CAD$32.00 each (plus the cost of paper), then the printer has paid for itself. Now, the first set of inks primed the print head and filled the lines that feed the print head; the second set of inks will set you back CAD$863.88 at full suggested retail, but they will make about twice as many prints … see where I am going here; It makes perfect sense to upgrade, just from the cost/copy and quality standpoint.

Canon Canada Press Release:

NEW CANON imagePROGRAF PRO-1000 PROFESSIONAL, FINE ART INKJET PRINTER CAN RECREATE POWERFULLY VIVID IMAGES THAT WILL MOVE YOU

New 17-inch Large Format Printer Can Produce Sharp Images and Astounding Image Clarity for Pro Photographers and Design Professionals

MISSISSAUGA, ON., October 21, 2015 – Canon Canada Inc., a leader in digital imaging solutions, today announced the imagePROGRAF PRO-1000 Professional Inkjet Printer, a 17-inch, large format solution packed with significant technological advancements, such as a new print head, new ink set and a new image processing engine, resulting in stunning image quality designed for photographers who are “equally obsessed" with the printed image.

This is the first in a new series of imagePROGRAF printers that are marked by the distinctive Canon red line across the body of the printer, echoing the same red line on Canon’s EF L-Series lenses. This feature-rich professional printer complements Canon’s professional line of DSLR cameras and lenses for an ideal pairing that can produce high-detail, high-quality images when printed on a variety of media, creating images that look as accurate printed as when they were captured.

“We designed a printer to give our customers incredible large-format image reproduction in a size that fits almost any home, studio, design and production departments, or in a classroom of photography students,” said Yuichi Ishizuka, president and COO, Canon U.S.A., Inc.  “Knowing how important fine details and precise colors are to professional users, this printer is designed so that the final output is exactly what they envisioned. The launch of the first printer in the new imagePROGRAF PRO Series of printers further illustrates the commitment Canon has to providing the imaging community with solutions that help deliver superb output true to a photographer’s obsession.”

New Print Head
Improving upon the specifications of the Canon PIXMA PRO-1 printer, the imagePROGRAF PRO-1000 printer features a 50 percent larger print head, which also expands the total number of nozzles to 18,432 for each of the 12 channels. The increased size of the print head helps produce faster print speeds†† while still maintaining high-resolution prints. This new print head design utilizes a sophisticated real-time ink ejection system which helps to maintain a consistent print head temperature allowing for consistent ink droplets to help limit clogs and reduce cleaning cycles and wasted ink. The new print head helps to further reduce the amount of wasted ink through anti-clogging technologies where ink ejection conditions are precisely checked with sensors, and if a clog is detected, another nozzle automatically provides backup.

New Inks
The new LUCIA PRO 11-color plus Chroma Optimizer ink system was designed specifically to meet the demands of the most critical photographer. An optimized resin-coating of each pigment allows for denser droplets to be applied to the media, resulting in an increased color gamut of up to 19 percent over the PIXMA PRO-1 printer. This dense ink-configuration also brings gloss uniformity for viewing conditions and image clarity that helps achieve anti-bronzing. The LUCIA PRO ink system also introduces an improved level of black density not only achieving deep, rich blacks but also helping to bring out incredibly fine shadow detail in the darker areas, creating works of art on fine art media. The imagePROGRAF PRO-1000 printer is designed to work seamlessly when changing media types, Photo Black and Matte Black inks have their own dedicated nozzles so no switching is necessary.  Users can print on glossy media then fine art media with no worries, no changes, and no waste. The new ink system includes matte black, photo black, gray, photo gray, red, blue, magenta, photo magenta, cyan, photo cyan, yellow and Chroma Optimizer. The size of the ink tanks is 80ml per tank, allowing for less frequent refills and reduced cost per print.

New Processing Engine & Printer Architecture
Demonstrating a rich understanding of optimum balance stemming from its expertise in camera technology, Canon offers precise placement of ink droplets ideal for vivid print results. The new processing engine, L-COA PRO, controls the balance of inks and the precise placement of ink droplets, carefully calculating best results for each print mode and media using various factors including color reproduction, tonal gradations, black density, graininess, glossiness, anti-bronzing and elimination of metamerism, all of which contribute to creating an amazing printed image. L-COA PRO, combined with an internal 1GB of memory, enables high-speed processing of massive volumes of image data for demanding workflows. To bring further accuracy to ink ejection and limitation of color unevenness, the imagePROGRAF PRO-1000 printer offers a two-way vacuum paper feeder, which keeps media flat and even, helping with accuracy of ink ejection. The imagePROGRAF PRO-1000 printer also has a built-in calibration function to help prevent variability of color output by aging changes or printer differences. This feature allows for a consistency in colors from PRO-1000 to PRO-1000 of under a Delta E of 2†††.  Reliability and quality are further maintained by the enhanced rigidity in the printer chassis allowing for even more improved dot placement, helping to produce sharper prints, including stunning borderless images.

New Software*
Enhancing the user experience with imagePROGRAF PRO-1000 printer is the intuitive software solution of Print Studio Pro v 2.0. With a focus on quality and ease of use, Print Studio Pro is a plugin for Adobe® Photoshop®, Adobe Lightroom® and Canon Digital Photo Professional software that easily exports files directly to the printer.2 With 16-bit processing capabilities, fine details are dramatically improved, gradations are smooth and a highly accurate reproduction of the original captured image can be reproduced. Also set to be included is the Media Configuration Tool (MCT)*, enabling customization of the media in both the driver and printer. Additionally, MCT can make adjustments such as print head height and vacuum strength for each media, offering the flexibility needed in order to help achieve optimal quality across a broad range of media options. Accounting Manager* is set to be included for those looking to keep track of consumable costs such as ink and media, allowing users to manually enter in their costs in order to help determine their overall printing expenses. Whether it is an individual printing in their studio, or an administrator looking to centrally manage a number of users in a multi-unit networked environment, this tool can help you keep track of printing expenses.  Device Management Console* is an administrative tool which provides users with the means to manage multiple PRO-1000 printers by helping users monitor activity such as error messages and printer information such as the execution status of calibrations.

Availability and Pricing

CANADA: The Canon imagePROGRAF PRO-1000 is scheduled to be available at the end of November 2015 for a Manufacturer's Suggested Retail Price (MSRP) of $1,599.99. MSRP of each colour ink is $71.99 and Chroma Optimizer is $65.99.**

USA:The Canon imagePROGRAF PRO-1000 is scheduled to be available end of October 2015 for a Manufacturer's Suggested Retail Price (MSRP) of $1,299.95. MSRP of each color ink is $59.99 and Chroma Optimizer is $54.99.**

For more information visit:

CANADA: http://www.canon.ca
USA: http://www.usa.canon.com.

† Based on weekly patent counts issued by United States Patent and Trademark Office.

1Wireless printing requires a working Ethernet network with wireless 802.11b/g or n capability. Wireless performance may vary based on terrain and distance between the printer and wireless network clients. Wi-Fi is a registered trademark of the Wi-Fi Alliance.

*Certain software and utilities to be released post launch:

Device Management Console for PC estimated to be available December 2015, for MAC 3rd Quarter 2016,Media Configuration Tool for MAC estimated to be available 1st quarter 2016 and

Accounting Manager for MAC and PC estimated to be available for 1st Quarter of 2016.

2 Adobe® Photoshop®, Adobe Lightroom® and Canon Digital Photo Professional software must be purchased separately.

††Photo print speeds are based on the standard mode driver setting using photo test pattern(s) and select Canon Photo Paper. Print speed is measured as soon as first page begins to feed into printer and will vary depending on system configuration, interface, software, document complexity, print mode, types of paper used and page coverage. See www.usa.canon.com/printspeed for additional information.

††† Delta E of 2 inches is guaranteed only Canon genuine media.

**Availability, specifications and pricing are subject to change without notice. Actual prices are set by individual dealers and may vary.

Canon EF 100-400mm f/4.5-5.6L IS II USM mini-review

My friends at Canon Canada have done it again; another box with a prototype inside arrived, this time it was the new, and much anticipated, Canon EF 100-400mm f/4.5-5.6L IS II USM lens. I have an "MT" sample, which basically means that it is a pre-production sample and I can't share images from this lens. I was granted permission to post a picture of the lens, so here I am in my favourite weather conditions, with the lens on a newly released EOS 7D mark II; truly a killer, and "must have", wildlife imaging combination! (Image courtesy and copyright Julie Morrison - Thank-you!)


Despite the continual debate about it's consistent sharpness, the original Canon EF 100-400mm f/4.5-5.6L IS USM lens was almost always mounted on a second camera body and slung over my shoulder for nearly a decade. The copy I had was consistently sharp and produced many "portfolio" images, which continue to sell for publication and as prints. I see history repeating itself again, as I anticipate having the new Canon EF 100-400mm f/4.5-5.6L IS II USM lens paired with the new Canon EOS 7D mark II slung over my shoulder while out with my tripod-mounted super-telephoto lens and Canon EOS 1DX in the future.

First impressions: The lens features a completely new design with the old push-pull to zoom lens barrel replaced by a much more weather resistant and user friendly turn to zoom variable torque twist ring. The new lens collar features an easy to remove lens foot and the lens is adorned by a new lens hood with a push button lock release and a sliding window to accommodate filter adjustments (mount the window on the bottom of the lens in wet or snowy weather to keep the front element clean and dry). No detail was over-looked by the Canon engineers when redesigning this beast; it even includes an improved pinch-lock style 77mm lens cap.  It is a little heavier than its predecessor, but the improvements to design, image quality and weather sealing are, in my opinion, worth every ounce....and I did get to test the weather sealing while out in the wet snow for an extended shoot as seen in the image above (but let's not tell my friends at Canon what I do to their prototypes - smile).
It's even more of a beast if you install a Canon Extender EF1.4X III between the lens and 1.6X crop factor camera (like the 7D mark II); Yes, it still auto-focuses and offers an effective focal length of 224-896mm! Image quality is still impressive with a Canon Extender EF2X III, but the lens needs to be manually focused at a mind-blowing 1280mm equivalent.

Less apparent new features are the lens now "features one fluorite and one super UD element to help provide impressive contrast and resolution with reduced chromatic aberration across the entire zoom range. Canon’s new Air Sphere Coating (ASC) helps significantly reduce backlit flaring and ghosting, while fluorine coatings on the front and rear lens surfaces help lessen smears and fingerprints. A 9-blade circular aperture renders beautiful, soft backgrounds, and a 3 mode (standard, panning and exposure only) Optical Image Stabilizer provides up to 4 steps* of image correction." - Canon product page.

Auto-focus speed and accuracy are impressive, with zippy performance only usually expected in the most expensive optics. I haven't tested the lens for birds in flight yet, but my initial impressions are that AF acquisition time and speed are remarkably good. As I discovered way back in 2011 while testing the Canon EF70-300mmL IS USM, the new optics and coatings improve resolution and contrast, which greatly improve the already impressive new auto-focus systems in the latest Canon cameras. The minimum focusing distance has been reduced to only 3.2 feet (my test unit focuses much closer than that), making it a fantastic walk around lens for details in nature too!

As always, I don't spend my time looking at specifications or MTF charts, but I do closely examine the images and evaluate image quality for my "real life" use; big prints. The results are impressive! While important to note that I have based this mini-review on a pre-production unit, it is unlikely that image quality will change with a production model; It would be hard to make it better.

In conclusion, if you are looking for an incredibly versatile wildlife, nature, birds-in-flight, sports and action set-up that won't break your back or bank account, then the new Canon EF 100-400mm f/4.5-5.6L IS II USM lens, paired with the new Canon EOS 7D mark II and a Canon Extender EF1.4X III truly are a wildlife photographer's new secret weapon! It's a relatively compact, packable and manageable kit that I won't be caught without!

From the Canon product page:
"The EF 100-400mm f/4.5-5.6L IS II USM lens delivers a superb combination of cutting-edge performance, compact construction and brilliant resolving power that’s great for sports and wildlife photography. The lens features one fluorite and one super UD element to help provide impressive contrast and resolution with reduced chromatic aberration across the entire zoom range. Canon’s new Air Sphere Coating (ASC) helps significantly reduce backlit flaring and ghosting, while fluorine coatings on the front and rear lens surfaces help lessen smears and fingerprints. A 9-blade circular aperture renders beautiful, soft backgrounds, and a 3 mode (standard, panning and exposure only) Optical Image Stabilizer provides up to 4 steps* of image correction. The new inner focusing AF system helps ensure fast and accurate focus down to 3.2 ft. with a .31x maximum magnification. Usability enhancements include a rotation-type zoom ring with adjustable zoom torque for more precise, customizable zoom performance, a redesigned tripod mount that can be attached and detached without removing the lens from the camera, and an all-new lens hood with a side window that makes it simple to adjust specialty filters-like polarizers-without the need to remove the hood. Ruggedly constructed with advanced dust and water sealing for durability in a range of environments, the EF 100-400mm f/4.5-5.6L IS II USM lens is a stellar performer with refined controls for a wide variety of situations."


Canon 7D mark II 1,600 ISO image

Northern Gannet (Morus Bassanus, Fou de Bassan, NOGA) Parc national de l'Île-Bonaventure-et-du-Rocher-Percé, Bonaventure Island, Quebec Image Copyright ©Christopher Dodds www.chrisdoddsphoto.com All Rights Reserved. Canon EOS 7D MKII, 200-400mm F4 L IS USM XT, (@400mm). ISO 1,600, F6.3 @ 1/4,000s Manual. "Photograph made with a beta (non-final) sample of Canon EOS 7D Mark II. Image quality may not represent the final output from shipping cameras but is likely to be very close." - fine print courtesy Canon Canada Inc.

Here's a full frame Northern Gannet against a dark background in light fog from my recent short trip to Bonaventure Island. There is a flurry of activity in my inbox and on the internet from folks wanting more high ISO images from the 7D mark II, so I carefully chose this one made while testing the auto focus against the dark background which would make noise more visible. While there is some noise as expected, it certainly performs amazingly well. The level of detail in the white feather is awesome and the 13" x 19" print I made with my Pro 1 printer is fabulous.

Remember to minimize noise with any digital camera by exposing properly in camera and avoiding big crops.

Kudos

A friend I meet on a photography workshop in Alaska mentioned Chris Dodds as one of his favorite photographers. After doing a little research I booked the Ospreys of Lake Blue Cypress workshop with Chris. It was an action packed three days filled with many opportunities to photograph Ospreys nesting and in-flight from a pontoon boat. The workshop was first class and well organized. Chris is a great workshop leader and has a pleasant and easy going personality with unlimited knowledge of camera equipment, technique, post processing tips and nature. I learned so much and had such a good time meeting and photographing with Chris that when I returned home I signed up for my next workshop. Now I am looking forward to seeing him again for the Winter Snowy Owls of Quebec & Ontario workshop. Thanks Chris!

Eloy Castroverde Florida USA

Canon 7D mark II hands-on mini review

Northern Gannet (Morus Bassanus, Fou de Bassan, NOGA) Parc national de l'Île-Bonaventure-et-du-Rocher-Percé, Bonaventure Island, Quebec Image Copyright ©Christopher Dodds www.chrisdoddsphoto.com All Rights Reserved. Canon EOS 7D MKII, 70-200mm F2.8L IS USM II, (@200mm). ISO 800, F5.6 1/4,000s Manual. "Photograph made with a beta (non-final) sample of Canon EOS 7D Mark II. Image quality may not represent the final output from shipping cameras but is likely to be very close." - fine print courtesy Canon Canada Inc.

Canon EOS 7D mark II review

My friends over at Canon Canada have been keeping me busy testing and trying the newly announced Canon EOS 7D Mark II. I have been busy building a portfolio of images made with the new camera that I will present at various dealer launches of the camera for Canon. In keeping with tradition, I won't list all of the features and specifications which can be found on the Canon 7D Mark II product page found HERE.

I had access to the first generation pre-production unit on Sept. 15, but didn't get my hands on it until I returned from Arizona on Sept. 23. There were rules in place to prevent images from being posted from the pre-production unit; easy to understand that Canon didn't want the critiques to get their hands on images before the firmware and hardware were tweaked enough to properly represent what the camera is capable of. To be crystal clear: I am A Canon Northern Explorer of Light, an ambassador for the brand. I am not under any obligation to mislead you or misrepresent this camera; I am not begging you to purchase through an affiliate link here which will give me any commission.  This is simply my review of this much anticipated camera.

I wanted to put the camera through it's paces at one of the best locations I know;  somewhere there are beautiful birds and lot's of them, somewhere that if the weather is right, there would be non-stop action to photograph. I jumped behind the steering wheel, set my GSP and drove the 14 hours to one of my favourite places: Bonaventure Island in the Gulf of St. Lawrence 3.5 kilometres (2.2 mi) off the southern coast of Quebec's Gaspé Peninsula.

The weather, the Northern Gannets and the new camera performed flawlessly. I was blown-away by the Dual Digic-6 processor driven auto focus system. In low contrast,  cloudy and slightly foggy conditions, shooting white birds against near white backgrounds, the auto-focus was unbeatable. I started with my Canon 70-200mm f/2.8L IS USM lens, and quickly went through all of the lenses and extender combinations to see if there were limits. Even shooting with a lens+extender combination with a maximum aperture of f/8 (600mm f/4L IS USM II and 2X III extender … yes, 600mm  with doubler =1200mm X 1.6 crop factor= 1920mm), the auto-focus proved it may even be slightly faster/better than the professional Canon 1DX. Throw in 10 frames per second capture rate and no noticeable shutter lag and this truly is a dream camera body for bird photographers and action/sports/press photographers alike.


The BIG Question: how is the noise?


Almost every single time someone on a workshop tells me that their camera is noisy at any given ISO, I can clearly show them they are constantly underexposing their images and correcting their poor  field craft via software after the fact. There are various ways to correct poor exposure mistakes; the most obvious of which is to slide the exposure slider to brighten it. Since digital cameras see and record light like our eyes see it, there is much more detail in the highlights, than the shadows. Underexposing an image limits the data captured at the time of exposure and there is no way to replace that missing information without introducing noise to the image. I see these mistakes mostly amongst photographers using some of the most expensive cameras on the market; they have paid a lot of money for a camera, but are recording about half of the data it is capable of recording had the image been properly exposed to start with.

While discussing the performance of a camera at high ISO, it is important to note that physics dictates that a smaller sensor would have more noise than a larger sensor of the same type. This is of particular importance while comparing the 7D mark II to Canon's flagship professional camera body, the 1DX. The 1DX, in my opinion, remains the very best camera money can buy for high ISO noise preformance; but at a much higher price point.

So, what about the 7D Mark II noise? Simply put: the camera produces amazing results. I used the camera at 200, 400, 800, 1,000, 1,200 and 1,600 ISO without feeling concerned at all. The files are rich and full of detail; images made at 1,600 ISO did show a little noise in the shadows, but there is a tremendous improvement over those same files from the original 7D. I have played around with ISO settings up to 16,000; impressive performance for an APS-C sensor, but I might start to reach for my 1DX if anything above 3,200 ISO is required for the task.

In conclusion

The Canon EOS 7D mark II totally rocks! If you weigh the features, file size and quality against the price, it is a worthy 1DX contender. There is little reason to own a 1DX if you regularly work below 1,600 ISO and the 7D mark II makes an awesome and economical back-up to anyone with a 1DX. I know that I will replace my second 1DX with the lighter 7D mark II. I will be keeping a 1DX in my camera bag, but will likely favour the lighter 7D mark II on most occasions; to be honest, I haven't picked-up my 1DX since getting my hands on the 7D mark II. The 1.6X crop factor was a welcome treat after using full frame cameras for so long; not having to add an extender also meant not loosing a stop from the maximum aperture of the lens I was using, which meant I didn't have to increase my ISO to maintain my desired shutter speed.
I love the weight and feel of the camera, which truly is much more rugged, weatherproof and professional feeling than the original 7D. I will have a hard time using any camera now without all of the information available through it's new viewfinder display; level, shooting mode, settings, file format, etc. are all available without taking your eye away from the viewfinder. Throw in 10 frames per second capture rate and no noticeable shutter lag and this truly is a dream camera body for bird photographers and action/sports/press photographers alike. The GPS and compass is a very welcome addition and the camera, as a whole, represents tremendous value.

Stay tuned for more about the 7D mark II in future posts.

Canon Pixma Pro-1 Review

American Bald Eagle SNOWGLOBE from my Bald Eagle Photographic Expedition (Hailiaeetus leucocephalus, Pygarge a tete blanche, BAEA) Kachemak Bay (near Homer), Alaska ©Christopher Dodds All Rights Reserved. Canon EOS 1DX, EF 200-400mm F4 L IS USM with Jobu L-Bracket  Jobu Jr.3 deluxe gimbal head and Jobu Designs Algonquin Tripod ISO 6,400, f/4 @ 1/3,200s Manual mode. Click HERE to order a print or license image for publication.


Don't just post it; Print it!

I have a mission and a message; there is nothing like the printed photograph; your images deserve to be printed and hung on your living room wall, not just posted to your Facebook wall! It is simply amazing to realize just how many pictures are taken every day, and how few of those images make it to print!

It's no secret that I'm a perfectionist; I push myself to be better at my passion and craft each and every time I am out with my camera; from capture through to the print. I don't feel the image is finished until I have experienced the big picture; my own tactile response to my own work is, perhaps, the most rewarding part of the image making process to me.

As I mentioned in my Canon IPF6400 Review HERE, as a master printer, I am continuously working to master the art of the digital print. I continue to use and love my Canon IPF6400 for prints larger than 14" wide, but have now added a Pixma Pro-1 printer to my print production regime for anything up to 14" wide.

Initial impression

The Canon Pixma Pro-1 printer arrived and I couldn't wait to give it a try; I quickly set-up the printer and grabbed a 13" x 19" sheet of Canon Pro Platinum Photo Paper. I opened a favourite Bald Eagle image with lots of blacks in the background and I selected the canned paper profile and pressed print. No head alignment, no nozzle check, no custom paper profile: WOW, what a print! I was so impressed with the first print, I grabbed it and brought it to my Canon presentations at the Henry's show in Toronto; it blew everyone away! I was, and continue to be wowed by this printer!

As is typically the case with my reviews, I won't be listing all of the technical specs which can be found on the Canon website HERE. I will simply try to highlight my favourite features and the reasons I have added this printer  to my studio, and why I feel this is the very best printer in it's class. I will try to keep it short.

Full disclosure

My introduction to the Canon line-up of printers came after my being named the very first Canon Canada ambassador, or Canon Northern Explorer of Light, some two and a half years ago. I had been using another popular brand of LFPs (Large Format Printers). I had invested so much time figuring-out workarounds for all of their shortcomings, I was foolishly reluctant to change. Although Canon has, and does, continue to sponsor me as a Northern Explorer of Light, I am under no contractual obligation to try to sell you anything. I am simply sharing my experience and making a personal recommendation to help you avoid the frustration of choosing the right printer, and avoiding the frustration of choosing the wrong one (because, after all, I had already done that to start with - smile). This is a testament to the printer I chose for my print production.

Designed for production priced for play

The Canon Pixma Pro-1 Printer is a heavy and solid machine; it is designed to be used for production, but priced within reach of any amateur. The most important cost-saving features are that this baby has the largest ink cartridges (36ml) in its class (which lowers the cost per drop), and it doesn't need to pump gallons of ink to clean the print head every single time you go to make a print; something I had hated with my old printers. The plain truth of the matter is that I have yet to have any problems with this printer or clean the print heads; even after leaving the printer idle while away on my frequent workshops. If you are looking for a way to justify investing in this printer, it's quick, easy and simple: I seem to be averaging about CAD$2.73 per 13" x 19" print for ink plus the cost of the paper; in my case, my preferred paper is the Canon Platinum Pro Photo Paper which lists for CAD$4.00 per 13" x 19" (CAD$39.99/10 sheets). So, with a cost per print of about CAD$6.73, it doesn't take many print sales for this printer to pay for itself. By the way, for those who claim the photographic print business is dead, here's a free tip; make a few prints of your favourite images and always have them around your home and office - it is much easier to sell a print if people can see it live, and not have to wait for it.

The very best Black & White printer on the market

After carefully examining a series of black & white prints that I produced; I feel this is, by far, the very best black & white printer on the market. There are four resident black grey ink cartridges and a clear Chroma Optimizer to smooth-out the differential gloss (evens out the surface for viewing under different lighting sources and controls the amount of light reflected on your prints so your blacks appear richer, deeper, and truer). This printer produces the closest thing to an old-fashioned black & white print that I have ever seen! If you need more convincing that this is, in fact, the best black & white printer on the market, have a look at what Henry Wilhelm had to say HERE. Who is Henry Wilhelm? He and his company conducts research on the stability and preservation of traditional and digital color photographs and motion pictures. His company publishes brand name-specific permanence data for desktop and large-format inkjet printers and other digital printing devices. Wilhelm Imaging Research also provides consulting services to museums, archives, and commercial collections on sub-zero cold storage for the very long term preservation of still photographs and motion pictures. Read more about Henry Wilhelm HERE.

Immense colour gamut

The Canon Pixma Pro-1 uses the 12 ink Lucia system and those four black grey colours aren't just for black & white printing; they provide a massive boost to the overall colour gamut of the printer. I can't say I have ever seen a finer digital print!
 

The most nozzles

The print head contains over 12,000 nozzles, or 1,024 nozzles per colour. This is about five times more nozzles than it's closest competitor. Why is this important? Simply because it means that you can still produce perfect prints if some of the nozzles are clogged! Print Heads are consumables, so they do eventually start to clog; having so many nozzles means that you are still in business making awesome prints as some start to clog. More print heads equates to less clogging, less cleaning and faster printing.

Biggest ICC colour profile collection

Rather than convince you that you should only buy Canon papers, Canon has taken the high road and encourage you to try different papers with a massive array of ICC profiles for a growing collection of papers. Take a look at the largest selection of third party ICC profiles recognized by the provided printer software HERE.


Print speed

As I found with the IPF6400, the Pro-1 produces prints much faster than anything else I have found on the market.


Saves time and money

The ink travels from the cartridge to the print head in a dedicated tube which eliminates the need to flush expensive ink when switching between matte and glossy ink and back again. This feature saves time and money.

Conclusion

In conclusion, The Canon Pixma Pro-1 printer produces, in my opinion, industry leading print quality at blazing speed at a cost effective price. The colours are true, rich and vibrant and the black & white images are the best that can be produced with this technology. No matter what genre you pursue, this printer will not disappoint. The Pro-1 has earned it's place in my studio and impresses me every time I use it!

Jobu Designs Algonquin Tripod Announced and mini review

Canadian Wildlife and Nature Photographer and Canon Northern Explorer of Light Christopher Dodds photographing owls in the Canadian winter (Feb,. 2014). Photographed with a prototype of the new Jobu Designs Algonquin tripod, Jobu Jr.3 deluxe gimbal head, Canon 200-400mm f/4-5.6 with built-in tele-extender, 600mm f/4 IS L II, Tamrac Expedition 9X camera bag and two Canon EOS 1DX camera bodies. Photo copyright and courtesy of Michael J. Lang (thanks, Michael)

Jobu Designs Algonquin Tripod

I have spent the better part of the winter testing prototypes of the new Jobu Designs Algonquin tripod and am thoroughly impressed with it's solid and reliable design. I make no secret of the frustrations that I have felt working with a variety of very expensive carbon fiber tripods over the years. None of the ones I have used worked reliably in the extreme temperature fluctuations and harsh conditions that I often subject them to. The weak point often being the collar that tightens and locks the leg at the chosen height. I have even experienced one manufacturer throw my tripod in the trash when it was still covered under warranty, stating it was abused and therefore not covered under warranty; not bad for a $1000.00 tripod!

Finally a tripod that is designed for nature photography! The Jobu Algonquin tripod has worked flawlessly during my extreme testing in the winter conditions in temperatures as low as -34℃ (-29℉). When I was sent the first prototype, I was warned it would be a rough, mill finish sample and asked to "give it hell". When I received the prototype, it was a beauty; much, much nicer than I had expected. After just one session in the cold with the new tripod, I was impressed and hooked! After most of the winter working with it, I can endorse it! Paired with my beloved Jobu Jr. 3 Deluxe Gimbal head, it is one killer rig! I am proud to have been part of it's design and testing.

The tripod adjusts from 3-3/4" (9.5cm) to 62" (157.5cm) and is 27.7" (70.6cm) long when collapsed. It's current weight is 4 pounds (1.81kg) , but this may change slightly during production. The leg sections are made of 100% carbon fibre without the usual filler or cosmetic wrap (which actually weakens the integrity of the tube) and each of the legs has a foam leg cover built-in. The leg collars (the knobs that tighten to secure each leg section at the desired length) are made of Aluminum without the rubber grips that often spin endlessly in the cold. The feet are stainless steel snow/ice spikes with a rubber foot cap that stays securely in place when the spikes aren't necessary; a great design advantage.

Be amongst the first to order your Jobu Design Algonquin tripod and get a special introductory price is $600.00 with an expected delivery of 4-6 weeks. Order yours here: http://jobu-design.3dcartstores.com/product.asp?itemid=122

Canadian Wildlife and Nature Photographer and Canon Northern Explorer of Light Christopher Dodds photographing owls in the Canadian winter (Feb,. 2014). Photographed with a prototype of the new Jobu Designs Algonquin tripod, Jobu Jr.3 deluxe gimbal head, Canon 200-400mm f/4-5.6 with built-in tele-extender and Canon EOS 1DX. Photo copyright and courtesy of Michael J. Lang (thanks, Michael).

Canon imagePROGRAF iPF6400 review

World Wildlife Photographer and Canon Northern Explorer of Light Christopher Dodds with Canon imagePROGRAF iPF6400. There's nothing like seeing a big print of one of your favorite images! Notice the X-Rite Colorchecker Passport in the background to help with color accuracy.

Canon IPF6400 Review

As a master printer in the traditional darkroom, I've been working hard over the last decade to master the art of the digital print; often struggling to squeeze every ounce of colour gamut out of the printer and paper I was using. I have owned more inkjet printers than I care to admit, and have spent an inordinate amount of time finding workarounds to each of their weaknesses. My quest to make the very best print has been a very long and often  frustrating journey.

It's no secret that I'm a perfectionist; I push myself to be better at my passion and craft each and every time I am out with my camera; from capture through to the print. I don't feel the image is finished until I have experienced the big picture; my own tactile response to my own work is, perhaps, the most rewarding part of the image making process to me.

Canon Canada sent me their flagship 24" Image PROGRAF IPF6400 printer back in August and I have been to the Canon LFP (Large Format Printing) Lab in Toronto for some training and product familiarization by some of the best in the business. I want to share a little about the printer with you, without re-writing the technical specification sheet (which can be found HERE); I wanted to write a hands-on review of the printer, it's extraordinary colour gamut, ease of use and the masterful prints it creates; Let's just say I have been blown-away by my first Canon LFP; this is an industry changing printer that truly is a turn-key solution for excellent prints without needing to be an expert print maker. I have finally found the perfect printer!

The unboxing and set-up was quick and easy, thanks to the single page set-up instructions. The included stand with built-in wheels makes it easy to move out of the way when not in use. The design is well though-out, with built-in paper bin and it certainly looks great in the studio/office.

The included software is, quite frankly, brilliant and easy to install and use; Canon was wise to develop a dedicated plug-in for Photoshop to facilitate easy 16 bit printing and a stand-alone software to manage print media called the MCT (Media Configuration Tool). The MCT allows you to add both custom and Canon paper types which will appear on the printer's LCD display when loading new media. Canon has made it easy to find profiles for their media HERE and compatible third party papers HERE.

The included ImagePROGRAF Layout Plug-in includes some pretty useful tools to minimize paper waste. If you print canvas and make gallery wraps, then the image expansion tool does a fabulous job of easily extending the edge of the image along the sides with choices that include black border, soft (or blurred) reflection; minimizing image loss during the wrapping process.

As a Mac user, I was disappointed to learn that the Accounting Manager was only available for the Windows platform; though more out of curiosity than needing to know the exact job cost (ink & media). This is much more useful to a print production house than a fine art studio - If you are a photographer trying to calculate exact print costs, then you are most likely not charging enough for your work!

The industry leading 12-color Lucia EX ink offers the widest colour gamut, finest detail and best print quality I have ever seen. The built-in sub-ink tanks built into the printer allow you to change ink tanks without interrupting printing and the new 330ml replacement tanks are a welcome change when doing large print runs.

The new PF-05 printheads have eliminated both clogging and banding; this, alone, is worth the investment. Optimized for speed and ink savings, the driver maintains the highest print quality while reducing ink use by ensuring fewer print head passes; resulting in a much faster print time.

Available features, upgrades and other models:

iPF 6450 - 24" Printer with built-in hard drive and optional X-Rite SU-21 spectrophotometer with automatic colour calibration and colour accuracy across multiple printers and multiple geographic locations.


iPF 8400 - 44" Printer


iPF 9400 - 60" Printer

Because these printers all use the same ink, print heads and mechanics; this review is relevant to them all.

Here is an overview of the printer from the Canon website:

The imagePROGRAF iPF6400, 24-inch large format printer was designed for professionals in the graphic, fine art, photography and proofing markets that seek the highest possible standards for quality-control and image reproduction. An incredibly large color spectrum is produced by the 12-Color LUCIA EX pigment ink set, which also provides better scratch resistance and smoother gradations. The new Multi-sensor included with this printer provides improved color density detection and allows for a full calibration to be completed within 15 minutes, with the ability to use non-Canon branded media. A new Color Calibration Management System allows for color calibration targets to be created using the iPF6450 with optional spectrophotometer and shared across all new iPFX400 12-color printers, and the included software allows for all printers on the network to be monitored from one central location. The printer supports ink tank sizes of 130ml and for the first time, 300ml, and the new sub-ink tank keeps some ink in reserve to allow for tanks to be changed without interrupting a print. In highest print mode, the order of ink application and layering is optimized to maintain the highest print quality with fewer passes, making this mode twice as fast compared to previous models.

To expand printing options and capabilities, the iPF6400 printer comes bundled with a Print Plug-in for Adobe Photoshop, Digital Photo Professional, and Microsoft Office. The enhanced Print Plug-in for Adobe Photoshop includes a new Adjustment Pattern Setting which allows for multiples of an image to be printed at once with different color values implemented and displayed. Gallery wraps for canvas prints can now be created using the new Gallery Wrap Feature. To improve versatility, the iPF6400 has a media configuration tool which allows customers to not only utilize existing Canon-branded media, but also with third party media. Designed for efficiency, reliability, and above all quality, the iPF6400 is the professionals answer to superior quality large format prints.

Disclaimer: I am a Canon Northern Explorer of Light; paid and sponsored by Canon Canada. I do not write reviews of products that I do not use every day, and do not endorse products in lieu of sponsorship or payment. This review and endorsement is strictly my personal view.

LensCoat RainCoat Pro2 mini-review & Black Guillemot with meal

Black Guillemot with dinner (Cepphus grille, Guillemot à miroir, BLGU) Mingan Archipelago National Park Reserve of Canada, Réserve de parc national du Canada de l'Archipel-de-Mingan, Quebec, Canada. Image Copyright ©Christopher Dodds. Canon EOS Canon EOS 1DX, 600mm F4 L IS II, 2X Extender III, Tripod & Jobu Jr. 3 ISO 3,200s, f/9 @ 1/2,000s Manual mode. PURCHASE A PRINT or LICENSE IMAGE FOR PUBLICATION HERE.

Getting close enough for head shots of Black Guillemots was a ton of fun each morning during my Atlantic Puffins & more workshop. We had a few hick-ups with wind and waves which forced us to evacuate the island early on the first two days, but we all came away with some great images. I would be eternally grateful if anyone can help identify this fish or eel.


LensCoat® RainCoat 2 Pro

Canadian Nature Photographer Christopher Dodds using LensCoat RainCoat Pro 2 in South Texas. Image Copyright & courtesy Jory Griesman (thanks, Jory!) Canon S-95 in Program mode.

Mini Review: I have been using my new LensCoat RainCoat Pro 2 since I first started to test it in April. I was using a very complex raincoat that required a dedicated eyepiece for each camera body and became quite a nuance to use; it was bulky and the clear window often fogged-up after placing my wet hand inside the cover. Changing tele-converters or adding extension tubes was nearly impossible with the rain cover physically attached to the camera via the dedicated eyepiece. It did the job and was the best I used until discovering the LensCoat RainCoat Pro2.

Installation of the
LensCoat RainCoat Pro2 is a breeze and being able to quickly flip the cover out of the way when adding, or changing, extension tubes or tele-converters (Extenders) is a huge selling point. The whole deal takes just about 10 seconds for me to install, folds into a small pouch and makes the whole process much simpler and appealing to use - even when I would skip the complex set-up of my old cover during light drizzle. I must admit that I am also thrilled with the design with the added foldaway left sleeve which makes it easier to keep your left hand on the lens and focus manually; both "sleeves" are long enough to slide over your rain jacket's arms to keep water out of your elbow when standing in the rain all day.

Finally a rain cover for my camera that is easy to use, keeps my gear dry and doesn't interfere with camera function or operator dexterity!

Description from the LensCoat site: LensCoat® RainCoat 2 provides protection for your camera and lens from the elements like rain, snow, salt spray, dirt, sand and dust while allowing you easy access to the camera and lens controls. It has all same great features as the original RainCoat but adds an additional integrated pocket with foldaway arm sleeve on the left side for easier access to zoom and focus. The RainCoat 2 comes in two sizes Pro (for DSLRs with lenses from 200-400/300mm 2.8 - 800mm) and Standard (for DSLRs with small lenses up to 100-400/400mm f5.6). The RainCoat 2 is constructed from a lightweight waterproof, breathable poly tricot material. Available in Black, Green, Navy, Realtree® Max4, Realtree AP Snow, Digital Camo, and Forest Green camouflage pattern. The seams are tape sealed for maximum protection. NO dedicated eyepiece required. The RainCoat 2 goes on quickly and easily. Its versatility through the use of the cinch straps allows you to adjust the length of the cover and to keep it snug around your lens. It has 2 fold out arm sleeves from its integrated pockets for access to the camera and lens controls. You can also access the camera through the rear opening and the lens through the hook & loop bottom closure.

Please support this site and order yours by clicking on the banner below.
 

Leaderboard_728x90_v1.jpg

Color management & i1 Photo Pro mini-review

Atlantic Puffin Portrait (Fratercula arctica, Macareux moine, ATPU) île aux Perroquets, Réserve de parc national du Canada de l'Archipel-de-Mingan, Quebec, Canada. Image Copyright ©Christopher Dodds All Rights Reserved. Canon EOS 1DMKIV, 800mm f/5.6 L IS, Canon Extension Tube EF 12 II & Canon Extension Tube EF 25 II Tripod & Jobu Jr. 3. Think-Tank Photo Hydrophobia 300-600. ISO 800, f/5.6 @1/500s Manual mode. Full Frame. CLICK HERE TO PURCHASE A PRINT or LICENSE IMAGE FOR PUBLICATION.

Color Management & i1 Photo Pro Mini-review

Achieving consistent color from camera to monitor to print and projector is easier than ever with X-Rite's new and improved X-Rite i1Photo Pro . I have owned a GretagMacbeth Eye One Photo since I switched to digital with the purchase of my Nikon D1X (2001). It seems like a lifetime ago now. I realized that I wanted my prints to mach my screen, and my projected images to match my prints. So much has changed since then; I switched to Canon when they released the EOS 1D Mark II and GretagMacbeth was bought by X-Rite.

I was thrilled to learn recently that X-Rite had released the all-new X-Rite i1Photo Pro and was offering upgrade kits to existing users. I quickly got an upgrade for review and am delighted. The heart of the system; the spectrophotometer remains best in class, so it's easy to see why you need only upgrade the software, a few accessories and the bonus is finally having a proper case to keep everything together and safe.

With X-Rite i1Photo Pro you can quickly and easily create custom profiles for cameras, monitors, digital projectors and RGB printers, ensuring color accuracy from capture to output. With the new i1Profiler software, which combines the best features of its predecessors i1Match, ProfileMaker and MonacoPROFILER software, users can choose between a 'basic', wizard-driven interface, or an 'advanced' user-driven interface to create high quality, precise, custom color profiles.

With an all-new user interface, i1Profiler offers an unprecedented level of flexibility to address the needs of a photographer's workflow. i1Profiler seamlessly combines the ease of use of the wizard driven interface found in the basic mode, and the flexibility of the menu driven user interface found in the advanced mode. Whether a novice, expert or somewhere in between, i1Profiler easily adapts to any skill level and workflow needs, while maintaining the ability to produce outstanding profile quality results.

All-in-all, I don't think there is a better color management solution on the market for a photographer wanting to deliver consistent color results over various output mediums and devices.

Be sure to support this site and order yours here: X-Rite i1Photo Pro Professional Color Management for Photographers

Canon 1.4x EF Extender III (Teleconverter) Northern Hawk Owl


Northern Hawk-Owl (Surnia ulula, Chouette épervière) Low, Quebec. Image Copyright ©Christopher Dodds  All Rights Reserved. Canon EOS 1DMKIV, 300mm F2.8 IS, 1.4X Extender III, Tripod & Wimberley Head II ISO 500, F5.6 1/2500s Manual. Full Frame. CLICK HERE TO PURCHASE A PRINT or LICENSE IMAGE FOR PUBLICATION.

Canon 1.4x EF Extender III (Teleconverter)

As usual, B & H Photo in the USA has had stock of the new Canon 1.4X and 2X Extender III (Teleconverters) for well over two months, and there is no sign of any arriving in Canada anytime soon. I did manage to get my hands on a 1.4X III a little over a week ago through Canon Canada (who always seem last to get new products from Canon headquarters), and am still waiting for my 2X to arrive in Canada (without an expected delivery date).

The two new EF extenders are direct replacements of the current extenders offered by Canon as essential accessories for professionals. These new extenders have been designed to provide faster autofocusing and improved autofocus precision with compatible EF lenses. Each extender includes an anomalous dispersion lens element for reduced chromatic aberration and enhanced optical image quality. Each extender also features a newly developed microcomputer that increases AF precision when the extenders are used with a IS Series II EF super-telephoto lens. Both extenders are equipped with rubber gaskets and seals to enhance weather resistance. A new fluorine anti-smear coating is applied to the front and rear elements of both extenders.        -CANON PRESS RELEASE

After only a few uses, I find the new coatings increase contrast, and therefore increase the acquisition speed and accuracy of the 1D Mark IV's auto-focus system. I also see a significant reduction in chromatic aberration (especially when stacked with a 2X). My initial testing is limited to the 70-200 F2.8 IS II, 300mm F2.8 IS and 500mm F4 IS and so far, it's looking like they are well worth the upgrade.

Here's something a little off-topic and different from a recent Owl Prowl. The ice that was lining the shore one morning was simply too good to pass-up. It ain't all just Owls - smile.

Shoreline Ice from Amherst Island (Stella) in Lake Ontario near Millhaven, Ontario. Image Copyright ©Christopher Dodds All Rights Reserved Canon EOS 1Ds Mark III, 24-70mm F2.8L, Tripod & Wimberley Head II ISO 200, F11 1/100s Manual. Full Frame. CLICK HERE TO PURCHASE A PRINT or LICENSE IMAGE FOR PUBLICATION.

White-Tailed Deer Buck in Velvet & Spider Holster Review

Eastern White-tailed Deer Buck in velvet (Odocoileus virginianus, Cerf de Virginie) Amherst Island, Ontario, Canada. Image Copyright ©Christopher Dodds www.chrisdoddsphoto.com All Rights Reserved. Canon EOS 1D Mark IV, 500mm F4, 1.4X II Tele-converter Tripod and Wimberley Head II. ISO 400, F5.6 1/40s Manual mode. BUY A PRINT OR LICENSE IMAGE FOR PUBLICATION HERE.

Eastern White-tailed Deer Buck in velvet (Odocoileus virginianus, Cerf de Virginie) Amherst Island, Ontario, Canada. Image Copyright ©Christopher Dodds www.chrisdoddsphoto.com All Rights Reserved. Canon EOS 1D Mark IV, 500mm F4, 1.4X II Tele-converter Tripod and Wimberley Head II. ISO 400, F5.6 1/60s Manual mode. BUY A PRINT OR LICENSE IMAGE FOR PUBLICATION HERE.

Eastern White-tailed Deer Buck in velvet (Odocoileus virginianus, Cerf de Virginie) Amherst Island, Ontario, Canada. Image Copyright ©Christopher Dodds www.chrisdoddsphoto.com All Rights Reserved. Canon EOS 1D Mark IV, 500mm F4, 1.4X II Tele-converter Tripod and Wimberley Head II. ISO 400, F5.6 1/640s Manual mode. BUY A PRINT OR LICENSE IMAGE FOR PUBLICATION HERE.

SpiderPro Holster Review

I've been hanging my heavy 1D Mark IV with 70-200F2.8 IS II lens over my shoulder, or around my neck for years, and with a bad neck and back; I've had enough. I set out on a quest; find a simple, but efficient way to hold my second camera while working with a tripod mounted primary long lens. Let’s face it; we all spend a lot of time waiting for the right “moment”, and don’t want anything in our way when it presents itself.

Shai Eynav just sent me a review sample of the SpiderPro System, and I love it; in fact, this may be my favorite new photography accessory. The SpiderPro System is a remarkable new way to carry your camera. I got the whole kit and caboodle; a nylon belt (Spider Holster Belt) with a holster shaped flap  (Spider pad) to protect your camera from any metal studs in your jeans, and provide a little comfort cushion between your hip and your camera. The belt buckle even requires two hands to release, making it impossible to accidentally come undone. When secured around your waist, with the holster shaped flap (Spider pad) on your side, there's an ingenious cast aluminum/stainless steel slotted holder (SpiderPro) which receives the metal pin (Spider pin) that attaches to the Spider plate, which, in turn, is securely fastened to your camera. There’s even a safety latch, which you decide weather to engage, or not. The unique design ensures the camera and lens stay in the horizontal position; this keeps the lens from touching the ground when crouching or kneeling, as it would if the lens was pointing down. Shai has thought of everything; he's even placed four threaded holes in the Spider plate for easy quick-release plate attachment.

With the Spider Holster, my camera now hangs comfortably by my side ready for action. There’s no better way to get the weight of my neck, shoulders and back than this! When the “moment” presents, I’m ready; thanks to Shai Eynav and his marvelous invention, the Spider Holster. In the wilds of Alaska or Tanzania, at a press event in the city, or in the home studio, the Spider Holster will prove invaluable to any photographer. Find out more, or order yours at www.spiderholster.com

Herring Gull (Larus smithsonianus, Goeland argente, HERG)

American Herring Gull Emerging with fish (Larus smithsonianus, Goeland argente, HERG) Parc national de l'Île-Bonaventure-et-du-Rocher-Percé, Bonaventure Island, Quebec. Image Copyright ©Christopher Dodds www.chrisdoddsphoto.com All Rights Reserved. Canon EOS-1D MKIV, 800mm F5.6 L IS. ISO 400, 1/2000s F5.6 Manual. 580EXII Flash manual full power . Tripod & Wimberley Head II. Full Frame. CLICK HERE TO PURCHASE A PRINT or LICENSE IMAGE FOR PUBLICATION.

A quick post today to further demonstrate the power of side light to make dramatic, action stopping images in harsh light. This is another image from a good collection produced while Bonaventure Island was closed to visitors during a recent Gannets Galore Bonaventure Island Bird Photography workshop. We made the most of the day by visiting a favorite spot for Common Eider Ducks (we had males, females and babies really close). The gulls (Herring and Great Black-backed) would harass and steal fish from the diving Eiders.

Gannets Galore August 13-15, 2010 - still space available - more information HERE

Canon 800mm F5.6 IS L First impressions....

Yowsa, what an amazing piece of glass! This lens was razor sharp, fast and snappy to acquire auto-focus when used with my EOS 1D Mark IV camera body. Special thanks to Canon Canada for the loan and for giving a chance for workshop participants a chance to "get behind the wheel" and give it a try. New coatings, IS system and design all add up to make this a must have lens - anyone wanna chip-in? (grin).