Social Media for Photographers

Fallow Deer BREATH (Dama dama, Daim) Quebec ©Christopher Dodds All Rights Reserved. Canon EOS Canon EOS 1DsMKIII, 500mm F4 L IS ,Tripod & Jobu Jr. 3 with Think-Tank Photo Hydrophobia 300-600 ISO 400, f/7.1 @ 1/200s Manual mode. Full Frame. Click HERE to order a print or license image for publication.

Fallow Deer WINTER'S CHILD (Dama dama, Daim) Quebec ©Christopher Dodds All Rights Reserved. Canon EOS Canon EOS 1DsMKIII, 500mm F4 L IS ,Tripod & Jobu Jr. 3 with Think-Tank Photo Hydrophobia 300-600 ISO 200, f/5.6 @ 1/200s Manual mode. Full Frame. Click HERE to order a print or license image for publication.

Social Media for Photographers

 It's no secret; the key to many photographer's success has been social networking. Even long before the internet, it wasn't necessarily how good your photography was; your success depended on how well connected you were. There are a few lingering professional photographers who's work rarely comes close to the plethora of simply breathtaking images from hard working amateurs seen every day on the web; they were widely published because they were among an elite circle of people who knew about some amazing locations which consistently produced amazing opportunity - and they were connected to the image buyers.
Today, thanks to the internet, those locations are widely known and image buyers are easy to find. Many argue the merits and the shortcomings of social media, and I don't want to write a book about it, but I've pretty much come to the conclusion that any effort I invest into any one of a number of social outlets I use is rewarded handsomely. Print sales and workshop bookings are up every time I am active online. Why not join the fun and connect with me:

Facebook Fan Page

Google+

Twitter

500px


Second Annual Photo Geek Christmas Party

More prizes have arrived from these great sponsors! Jobu Designs (makers of my favorite Gimbal Head - the Jobu Jr. 3), FirstPass Image downloader & Editor, Think-Tank Photo, Cotton Carrier, DigiMarc for Images and Tiffen have all jumped on-board and offered tons of prizes to show their suppoort for my Second Annual Photo Geek Christmas Party.

Join me, Canadian nature photographer Christopher Dodds, on November 30, 2011 at 7:30 PM at the Hudson Village Theatre (28 Wharf Road, Hudson, QC   J0P 1H0) for an hour and a half long slideshow presentation to benefit this great cause which is so close to my heart. The show is designed to be entertaining and informative to all; nature lovers and photographers alike. Stories of adventure, natural history facts and information are all on the menu and this show is designed to offer helpful tips & techniques sure to improve your photography efforts with everything from a camera phone, point & shoot camera or professional SLR camera system. Over one hundred of my images will be projected, many unseen.  Everyone is welcome!
Hurry! Only 148 seats. Tickets are only $15.00 each and are available for advance purchase only - every penny is collected by, and goes to Le Nichoir. Please call or email Le Nichoir (communication@lenichoir.org 450-458-2809) to secure your tickets, or make a donation if you can't make it (be sure to tell them it's on behalf of Chris' Photo Geek Christmas Party) Major credit cards and cheques accepted. Finger food and hors d'oeuvres are included and there will be a cash bar (please drink responsibly).
There will be ample time to mingle, meet my friends and contacts and share some of your images with others, so feel free to bring prints, iPads or laptops with your favourite images to share. I hope to see you there and PLEASE SPREAD THE WORD!

Read more about it HERE

Histogram, Details and Viveza 2.0

Northern Gannets PREENING (Morus Bassanus, Fou de Bassan, NOGA) Parc national de l'Île-Bonaventure-et-du-Rocher-Percé, Bonaventure Island, Quebec. Image Copyright ©Christopher Dodds All Rights Reserved. Canon EOS 1DsMKIII, 500mm F4 L IS,  Tripod & Wimberley Head II. ISO 250, F20 @1/320s Manual mode. CLICK HERE TO PURCHASE A PRINT or LICENSE IMAGE FOR PUBLICATION

Chris, I am a huge fan of your work and consider it the very best bird photography out there; bar none! I have been a photographer for 30 years, and wonder if you would share how you achieve such amazing details in the whitest feathers; the details that seem impossible for me to capture. I am always blown-away when I visit your works, and I delight in every moment on your site. Many thanks and keep up the great work - Art W.

Art, thank you for your kind words. I will try to keep my answer simple.

The key to getting the most out of your digital camera is exposing the image correctly, as you probably know. I expose “to the right”, but make a huge effort not to have any data touching the right side of the histogram.

With only a little experience, a quick glance at the histogram can tell you if the exposure is correct, and give you and idea of the general appearance of the image; are the highlights blown? Is there enough shadow detail? – It’s all in the histogram.

 The histogram is a tool available on most digital cameras. It is a graph, which maps the luminosity (or brightness) values of your image, from black at left to white at right. The number of pixels at any given value are represented by the height of that value’s column. Once accustomed to reviewing the histogram, analyzing the data contained in it becomes second nature. It is the only way to know if you have exposed your image properly.

I’ll save you the boring science and details, but the idea of exposing to the right is a theory that capitalizes on the fact that the right side of the histogram contains more data than the left; there is more data in the whites, than in the blacks – much more. By overexposing the image slightly, and adjusting its brightness (or exposure) while converting the RAW image after capture, there is more data or details in the image. Conversely, if you were to underexpose an image and try to brighten the image after capture, then you would introduce noise, rather than detail, which was not captured in your RAW file. You have to be very careful not to push the whites up against the right of the histogram, or you risk loosing detail.

A good workflow post capture is another critical key to maximizing any detail contained in the RAW image. I typically use Photoshop to adjust contrast, boost saturation and add a little sharpness. My master .tiff is not created until I use Nik Software's Viveza 2. Viveza 2 is powerful engine that (among other things) adds targeted tonal contrast to any whites via the structure slider – be careful, it’s easy to overdo the adjustment.


Image of Histogram of the PROPERLY EXPOSED image above on the camera's LCD screen - The data is to the right of the histogram, but does not show any sign of over-exposure; there is no data touching the right edge of the graph. 


Histogram of the same image when opened in Adobe Camera Raw for conversion without any adjustments.


White-Tailed Deer Buck in Velvet & Spider Holster Review

Eastern White-tailed Deer Buck in velvet (Odocoileus virginianus, Cerf de Virginie) Amherst Island, Ontario, Canada. Image Copyright ©Christopher Dodds www.chrisdoddsphoto.com All Rights Reserved. Canon EOS 1D Mark IV, 500mm F4, 1.4X II Tele-converter Tripod and Wimberley Head II. ISO 400, F5.6 1/40s Manual mode. BUY A PRINT OR LICENSE IMAGE FOR PUBLICATION HERE.

Eastern White-tailed Deer Buck in velvet (Odocoileus virginianus, Cerf de Virginie) Amherst Island, Ontario, Canada. Image Copyright ©Christopher Dodds www.chrisdoddsphoto.com All Rights Reserved. Canon EOS 1D Mark IV, 500mm F4, 1.4X II Tele-converter Tripod and Wimberley Head II. ISO 400, F5.6 1/60s Manual mode. BUY A PRINT OR LICENSE IMAGE FOR PUBLICATION HERE.

Eastern White-tailed Deer Buck in velvet (Odocoileus virginianus, Cerf de Virginie) Amherst Island, Ontario, Canada. Image Copyright ©Christopher Dodds www.chrisdoddsphoto.com All Rights Reserved. Canon EOS 1D Mark IV, 500mm F4, 1.4X II Tele-converter Tripod and Wimberley Head II. ISO 400, F5.6 1/640s Manual mode. BUY A PRINT OR LICENSE IMAGE FOR PUBLICATION HERE.

SpiderPro Holster Review

I've been hanging my heavy 1D Mark IV with 70-200F2.8 IS II lens over my shoulder, or around my neck for years, and with a bad neck and back; I've had enough. I set out on a quest; find a simple, but efficient way to hold my second camera while working with a tripod mounted primary long lens. Let’s face it; we all spend a lot of time waiting for the right “moment”, and don’t want anything in our way when it presents itself.

Shai Eynav just sent me a review sample of the SpiderPro System, and I love it; in fact, this may be my favorite new photography accessory. The SpiderPro System is a remarkable new way to carry your camera. I got the whole kit and caboodle; a nylon belt (Spider Holster Belt) with a holster shaped flap  (Spider pad) to protect your camera from any metal studs in your jeans, and provide a little comfort cushion between your hip and your camera. The belt buckle even requires two hands to release, making it impossible to accidentally come undone. When secured around your waist, with the holster shaped flap (Spider pad) on your side, there's an ingenious cast aluminum/stainless steel slotted holder (SpiderPro) which receives the metal pin (Spider pin) that attaches to the Spider plate, which, in turn, is securely fastened to your camera. There’s even a safety latch, which you decide weather to engage, or not. The unique design ensures the camera and lens stay in the horizontal position; this keeps the lens from touching the ground when crouching or kneeling, as it would if the lens was pointing down. Shai has thought of everything; he's even placed four threaded holes in the Spider plate for easy quick-release plate attachment.

With the Spider Holster, my camera now hangs comfortably by my side ready for action. There’s no better way to get the weight of my neck, shoulders and back than this! When the “moment” presents, I’m ready; thanks to Shai Eynav and his marvelous invention, the Spider Holster. In the wilds of Alaska or Tanzania, at a press event in the city, or in the home studio, the Spider Holster will prove invaluable to any photographer. Find out more, or order yours at www.spiderholster.com

Red-Tailed Hawk (Buteo jamaicensis) & POGOPLUG Review

Red-tailed Hawk (Buteo jamaicensis, Buse a queue rousse, RTHA)  Ontario, Canada. Image Copyright ©Christopher Dodds www.chrisdoddsphoto.com All Rights Reserved. Canon EOS 1DsMKIII, 500mm F4 IS, 1.4 X II Tele-converter, Tripod & Wimberley Head II.  ISO 1000, F5.6 1/500s Manual mode. CLICK HERE TO ORDER A PRINT OR LICENSE IMAGE FOR PUBLICATION.

 A red-Tailed Hawk (Buteo jamaicensis, Buse a queue rousse) was a surprise visitor during a winter owl prowl last year. If you want to make compelling winter owl images in Southern Ontario and Quebec, then these private, or semi-private owl excursions are the best way to escape the large and crowded workshops offered by others. Still some space available in January, 2011 - read more HERE.

Pogoplug Review


The Pogoplug Multimedia Sharing Device connects external hard drives to the internet so you can easily share and access your files from anywhere. It gives even novice computer users the chance to set up their own cloud server in less than five minutes.

Compatible with NTFS, FAT32, Mac OS Extended Journaled and non-Journaled (HFS+), and EXT-2/EXT-3 formats, the Pogoplug Multimedia Sharing Device covers most bases for nearly any hard drives. Connecting a drive is as simple as plugging it into the Pogoplug Multimedia Sharing Device after plugging the Pogoplug Multimedia Sharing Device to a router via Ethernet and a power socket. The whole system recognizes itself and is ready to go, as advertised, after logging in to Pogoplug Multimedia Sharing Device 's Web site and registering.

There are three ways of interfacing the drives connected to Pogoplug Multimedia Sharing Device : directly through a Web browser via the my.pogoplug.com Web site; via a downloadable software client for Mac, PC, and Linux that shows the Pogoplug Multimedia Sharing Device -connected drives directly on the desktop; and via mobile phone apps. The downloadable client offers the greatest flexibility, allowing drag-and-drop uploading and downloading of files.

After getting over the initial shock of it’s brilliant pink case, I set-up my review unit; I connected three old, unused 1TB external drives and instantly had a 3TB personal server (with a spare USB port on the front). I installed the Mac client, and the three drives were instantly recognized and appear as three folders inside a Pogoplug folder on my desktop. The unit works perfectly for throwing a huge collection of images into a internet accessible drive, in the event I need an image, or document while on the road. Don’t confuse it with a premium on-line storage or back-up service with the security of multiple redundant off-site back-ups in multiple geographical areas that incurs, sometimes hefty, monthly charges. This is, however, a perfect device for a self-employed photographer who needs access to files while out of the office or to share with clients and/or friends. It is also another level of back-up if my laptop gets lost or stolen while on route to a presentation, lecture or workshop. Pogoplug is also a cheap and easy way to boost the limited storage of your MacBook Air or iPad.

Snowy Owl Silhouette & The Amazing Monarch: The Secret Wintering Grounds of an Endangered Butterfly

 Snowy Owl DAWN SILHOUETTE Bubo scandiacus (Harfang des neiges) Quebec. Image Copyright ©Christopher Dodds All Rights Reserved. Canon EOS 1DsMKII, 500mm F4 IS ISO 250, F7.1 1/1600s Manual mode. CLICK HERE TO ORDER A PRINT OR LICENSE IMAGE FOR PUBLICATION.

Private Winter Owl Prowls

The private winter owl safari/workshop series has proven to be a huge success with people from around the world booking days, or weeks. There are still some dates available, so do consider joining me for a private winter owl prowl. Find out more HERE.

Testimonial

"Hi Chris. The September 2010 Moose and Fall Colors Photo Workshop has been a fantastic experience for me in many aspects. I want to thank you warmly for everything you have done for me, not only with respect to photography but in every respect, such as wildlife and nature, the English language, travel tips, etc. You never hesitated to share your knowledge with the group in general and with me in particular. You amazed me more than one time with your wide array of knowledge. Furthermore, you have been a very pleasant companion all along. I would not hesitate to book another workshop with you, which I intend to do later, depending on my budget and schedule possibilities. I already told you that you are a real gentleman, and I just want to tell you again." Serge Gagné L’Île-Bizard (QC) Canada

Q & A

How do I activate auto focus (AF), when using 1.4x or 2.0x teleconverters with f/5.6 or slower lenses with Canon cameras other than the EOS 1D series? Serge Gagné L’Île-Bizard (QC) Canada.

It is simple. Just place a small transparent piece of tape on the last 3 pins of the converter. The tape should be placed on the left hand side of the converter when looking at it from the lens connection side with the electrical contacts on top. With these three left pins covered, the auto-focus continues to operate on the Rebel and D series Canon cameras with the AF activated. It also works great with the Canon 100-400mm f/4.5-5.6L IS.

The Amazing Monarch: The Secret Wintering Grounds of an Endangered Butterfly

The Amazing Monarch: The Secret Wintering Grounds of an Endangered Butterfly is a new book written and photographed by wildlife photographer and trial attorney Windle Turley. In the book, Turley captures amazing images in the rarely photographed wintering grounds of the monarch butterfly, in the Transverse Neovolcanic Mountains in Mexico. Granted almost-unprecedented access, Turley documents the final destination of this migration that only takes place every four to five generations with vivid, full-colour photographs.

It's easier than ever to publish your own book full of your amazing images, but it's no secret that a book full of only images will end-up on the discount table at your local book store. If you have ever thought of publishing your own book, and wondered how to tell your story, then this is a must have; no only for the story of the Monarch, but because the story is well presented and well told. Turley supplements the images with scientific-based text detailing the migration with complimentary quotations and poems that make a multifaceted book about one of the most engaging and mysterious species know to man.

LEAVE A COMMENT - WIN A BOOK: Leave a meaningful comment and I will randomly choose three lucky folks to receive one of three copies of The Amazing Monarch: The Secret Wintering Grounds of an Endangered Butterfly that I have to give away. The enterprising photographer will also include a link to a photo of a Monarch, or a blog entry about the Monarch. I'll randomly choose the winners and I'll even pay for surface mail anywhere in the world. I won't pay customs, brokerage, taxes or duties, though there shouldn't be any payable.

Where to photograph Elk (Wapiti, Cervus canadensis) around Banff National Park, Alberta

Bull Elk  Lookback (Wapiti, Cervus canadensis, élan) Banff National Park, Alberta, Canada. Image Copyright ©Christopher Dodds www.chrisdoddsphoto.com All Rights Reserved. Canon EOS 1DsMKIII, 70-200 F2.8 IS II @200mm. ISO 650, F5.6 1/200s Manual. CLICK HERE TO PURCHASE A PRINT or LICENSE IMAGE FOR PUBLICATION.

I'm just back from a great two week vacation with family in Calgary, Alberta. While it was meant as an "unplugged" getaway, I did manage to scan all of our old family photographs (some 2,500 images) and sneak away to Banff National Park on two occasions for some photography with Julie. Here's a few images from one of many encounters with bull Elks during what became the most successful trip there so far.

Bull Elk in the rain (Wapiti, Cervus canadensis, élan) Banff National Park, Alberta, Canada. Image Copyright ©Christopher Dodds www.chrisdoddsphoto.com All Rights Reserved. Canon EOS 1DsMKIII, 70-200 F2.8 IS II @170mm. ISO 650, F5.6 1/200s Manual. CLICK HERE TO PURCHASE A PRINT or LICENSE IMAGE FOR PUBLICATION.

Bull Elk overlooking the Bow Valley in the rain (Wapiti, Cervus canadensis, élan) Banff National Park, Alberta, Canada. Image Copyright ©Christopher Dodds www.chrisdoddsphoto.com All Rights Reserved. Canon EOS 1DsMKIII, 70-200 F2.8 IS II @70mm. ISO 650, F5.6 1/200s Manual. CLICK HERE TO PURCHASE A PRINT or LICENSE IMAGE FOR PUBLICATION.

Where to photograph Elk around Banff

If you find yourself visiting Calgary with a spare day for photography, then be sure to head West on the Trans-Canada Highway to Banff National Park and the Canadian Rocky Mountains. I'd leave around 04:30 and drive  directly to the Bow Valley Parkway (slowly) until you reach the Moose Meadows area (It dosen't happen often, but we photographed a beautiful Bull Moose here, and it is certainly worth a look); at which point I'd turn around and head back to Banff.  Once you exit for Banff, instead of following the sign for the town, go the opposite direction and slowly follow the switchbacks of Mt. Norquay Scenic Drive; make a u-turn in the ski area parking lot at the top and head back down for a second look for the Mountain Sheep that live here.  Now follow the Trans-Canada Highway East for a short while and take the exit for Lake Minnewanka; follow the lake Minnewanka loop road and explore the dead-end roads that branch from it. This might be the best, most scenic location for Elk around. Figure driving about 300km and spend the whole day enjoying the sights. Best time of year for bull Elk is the rut during September and October. Here's the route on Google Maps:


View Banff Wildlife Drive in a larger map

September 11 Tribute

American Bald Eagle MOURNING SONG , Haliaeetus leucocephalus (Pygargue à tête blanche) Homer, AK ©Christopher Dodds www.chrisdoddsphoto.com Canon EOS 1D MKII, 500mm F4IS ISO 400, F4 1/250s Manual mode. Gitzo 1325 tripod and Wimberley Head. Click HERE to order a print or license image for publication.

The world changed nine years ago on September 11, 2001. This image is my tribute to that tragic day.


LCDVF Digital Viewfinder / Magnifier Review & Maine Moose; it's not too late

Bull Moose Giant of the Northwoods (Alces, Elan, Orignal) Baxter State Park, Maine Image Copyright ©Christopher Dodds www.chrisdoddsphoto.com All Rights Reserved. Canon EOS 1DsMKIII, 500mm F4 and 2XII tele-converter Gitzo 1325 Tripod and Wimberley Head II. ISO 400, F8 1/160s Manual. CLICK HERE TO PURCHASE A PRINT or LICENSE IMAGE FOR PUBLICATION.

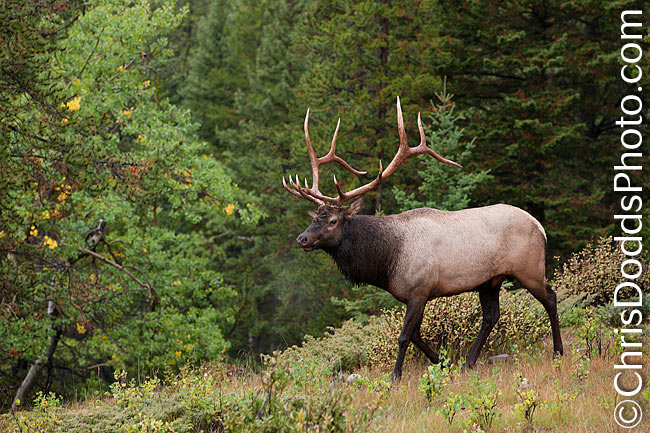
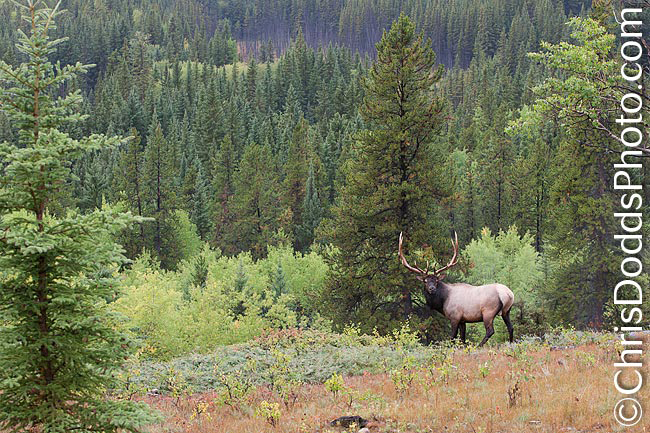
Moose & Fall Colors of Maine September 27 to October 1, 2010; It's not too late

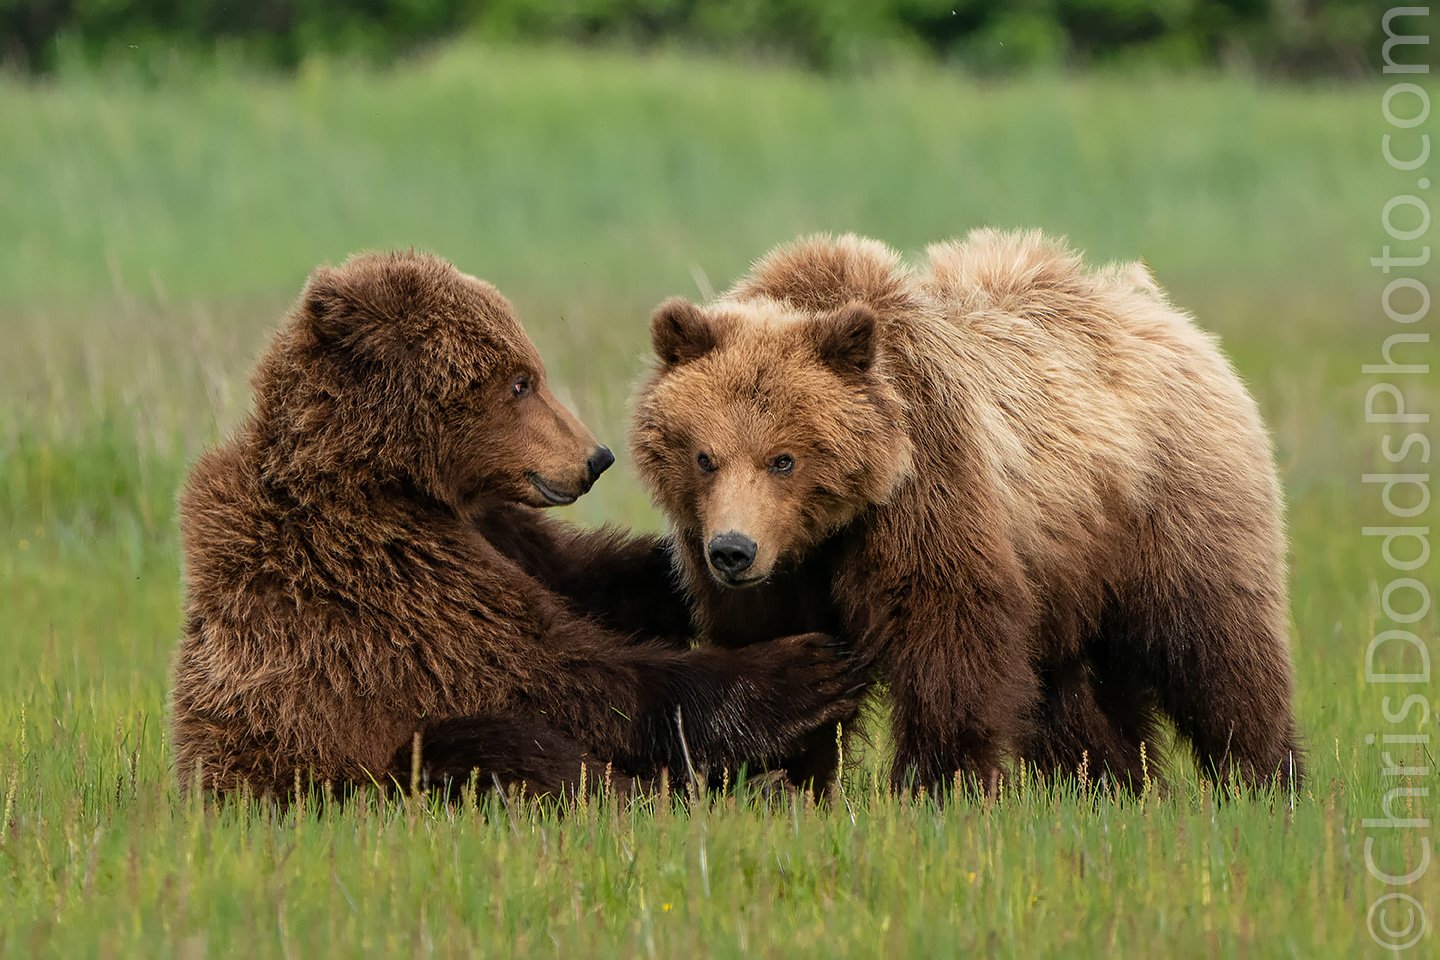
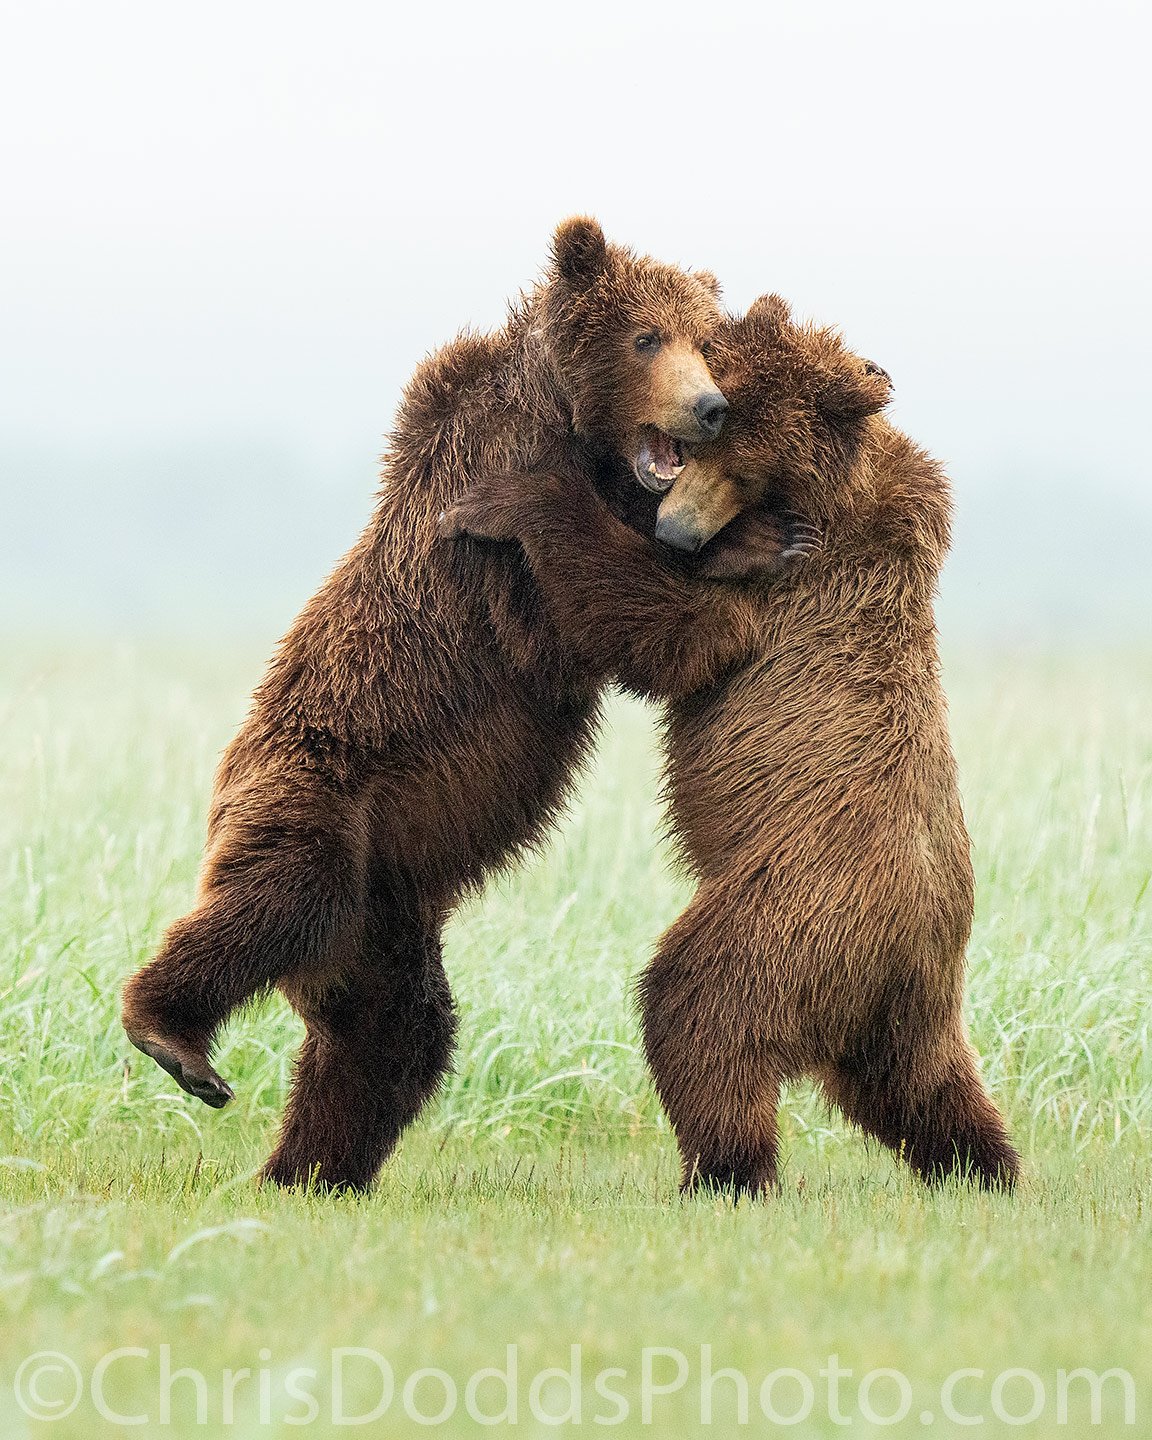
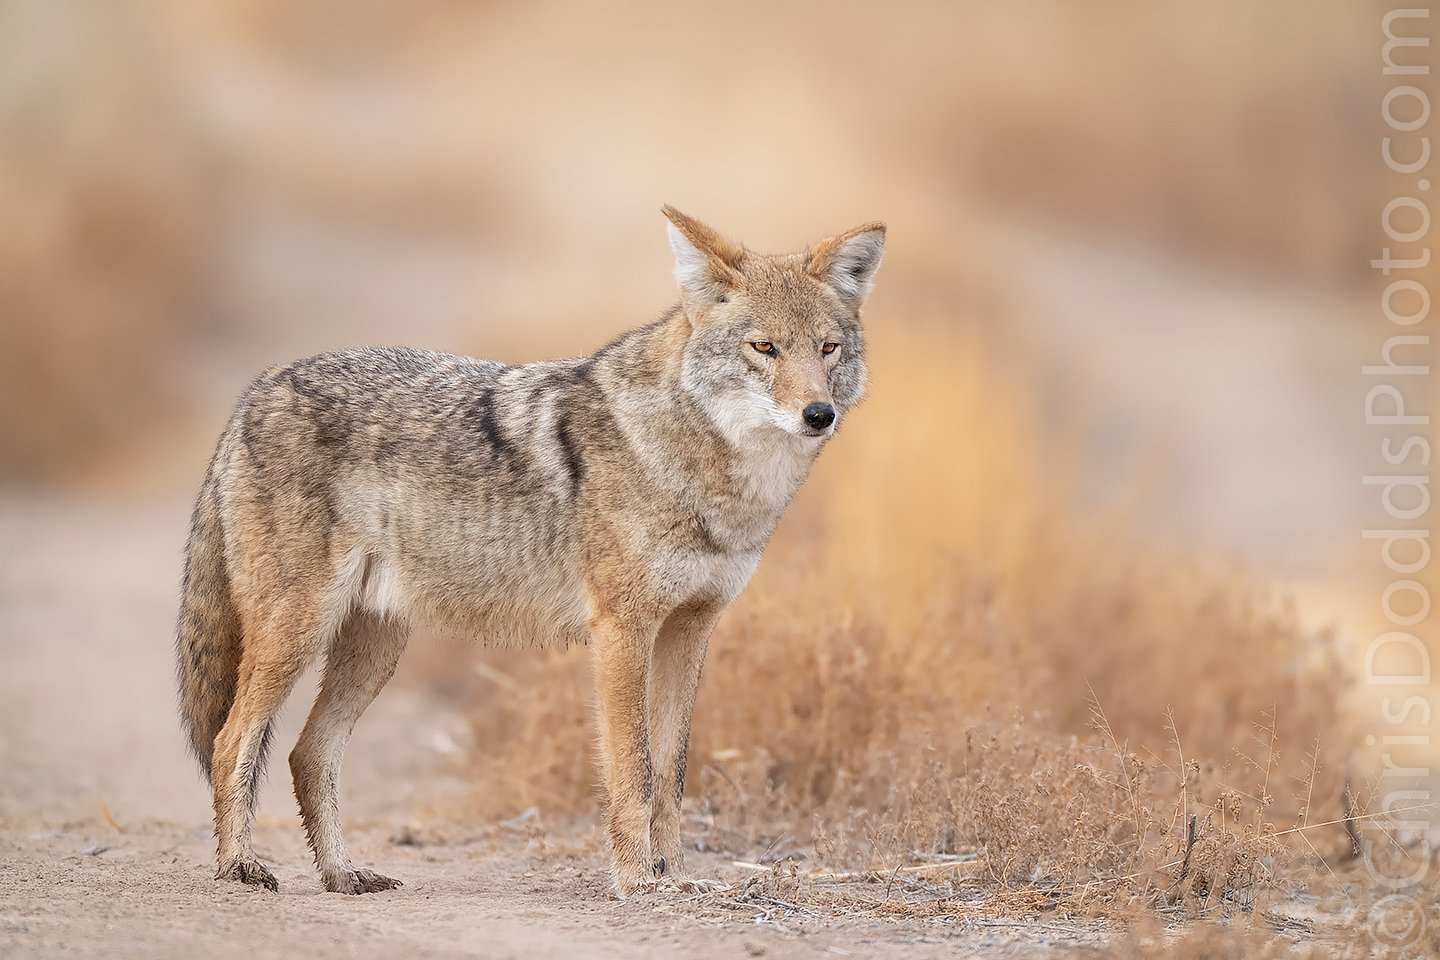
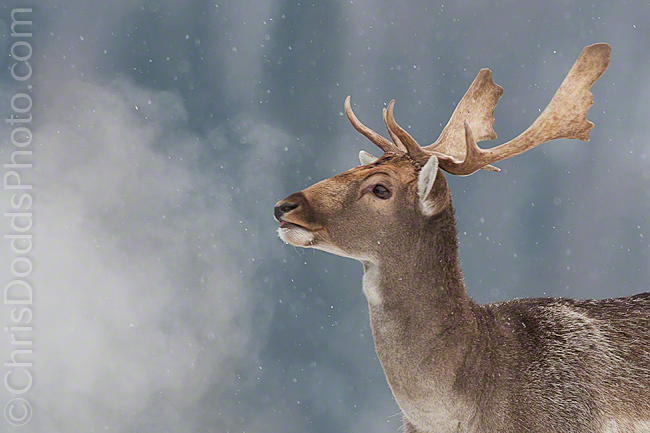
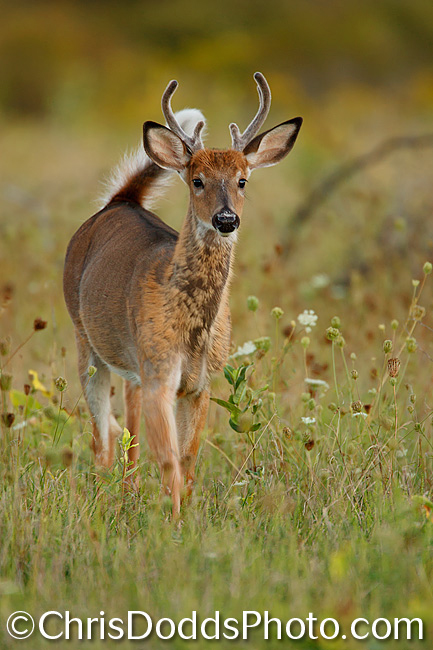
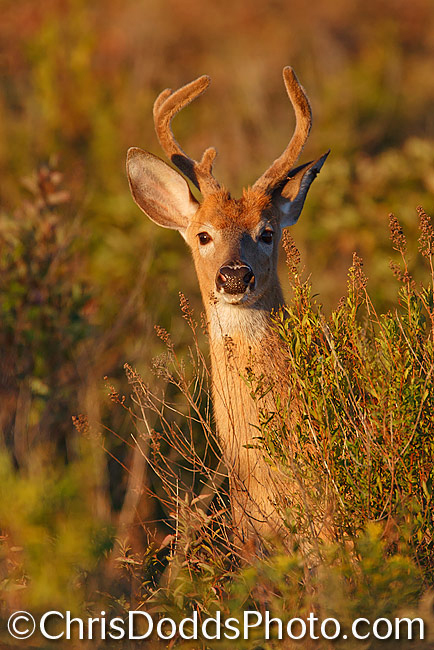
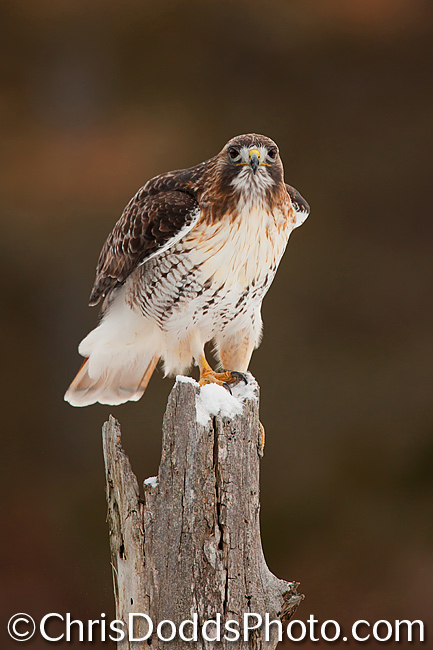
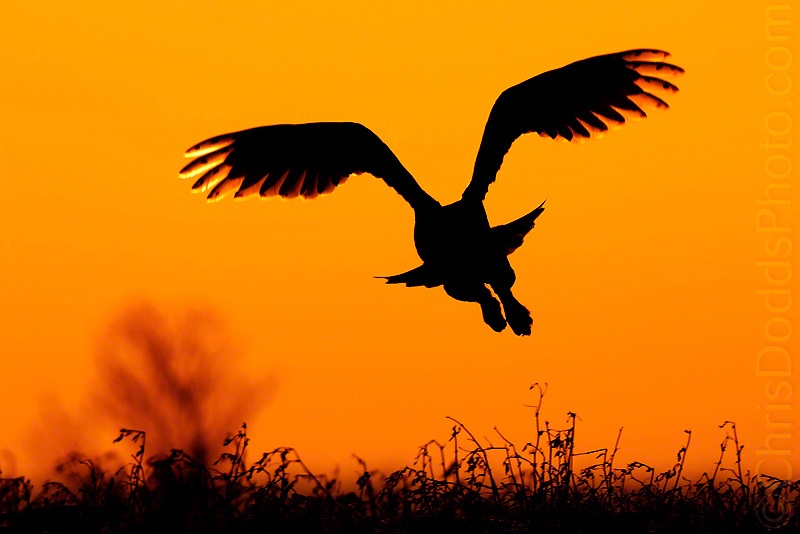
Only two spots left, so it's not too late to join Christopher Dodds in Baxter State Park and surrounding areas (near Millinocket, Maine) for a truly unique workshop. Our primary focus will be the Moose that are renowned for allowing close human approach. Our trip is also timed to coincide with the amazing fall colors that illuminate Baxter State Park every fall. Though not guaranteed (Moose are wild and free, after all), I often have Moose walking so close to us that we can feel their warm breath in the cool, fall, Maine air. We have traveled far to photograph these majestic giants of the Northern forest, so we won't be spending much time indoors at the computer (like many other photography groups); this trip is all about being out there with the Moose - seeing, being and documenting their behavior during the annual Rut. Other subjects may include White-Tailed Deer, Black Bear, fox and various birds. SEE MORE INFORMATION HERE.

See the blog entries from the 2009 Moose & Fall Colors Workshop / Safari:

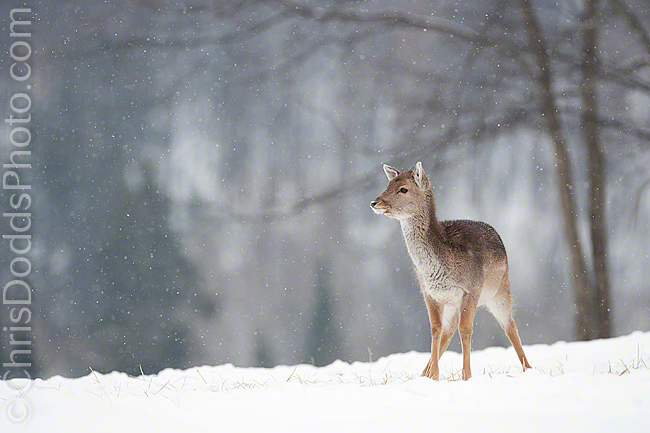
The White-Tailed Deer of Baxter State Park Trip Report Part I

American Black Bears of Baxter State Park Trip Report Part II

The Many Moose of Baxter State Park Trip Report Part III

Testimonial

"I was impressed on how much Chris cared about making sure everyone was learning, engaged, and getting the most out of the trip. I look forward to my next workshop with Chris!" Michael Lyncheski Gladstone, NJ


LCDVF Digital SLR Viewfinder / Magnifier Review

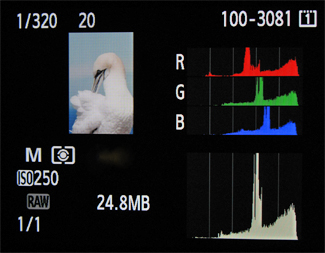
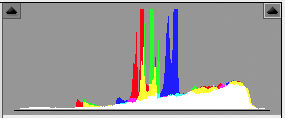
The LCDVF is a 2X loupe that is designed as a LCD viewfinder for video-enabled digital SLR’s. Not only for the video enthusiast, the LCDVF is an invaluable aide to achieve more accurate and precise focus for the still photographer. The loupe also acts to block ambient light while shooting outdoors in live-view mode, or reviewing images on the LCD screen for sharpness and the histogram for exposure accuracy. The LCD ViewFinder turns your DSLR LCD screen into a huge electronic viewfinder for precise image evaluation - it’s like viewing a 42" screen from 140cm (4.6 feet).

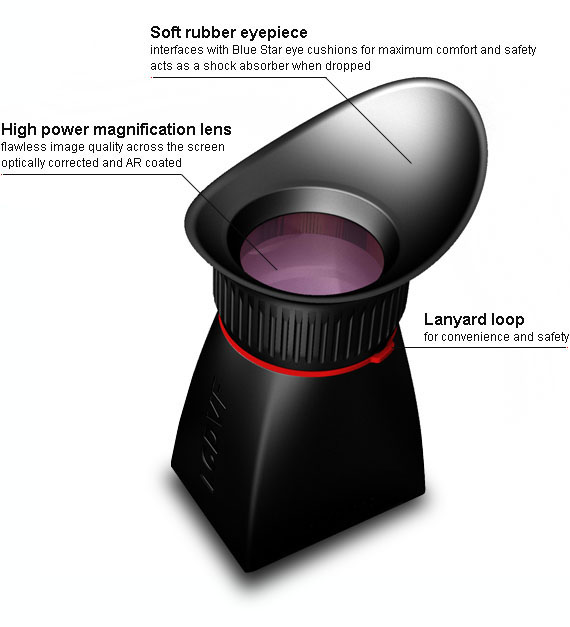
The part I like most about the LCDVF, is it’s ingenious adhesive ultra-slim metal frame that secures the LCDVF to your camera using four small magnets (located at the camera end of the loupe frame). The LCDVF ships with two magnetic/adhesive frames; only one frame is needed, the extra one is a spare or could be used on a second camera. The magnets are strong enough to securely hold the LCDVF against your camera, but weak enough to break-away if you forget that the lanyard is around your neck and walk away from your expensive camera set-up with a long lens on a tripod; preventing a possible disaster. The company promises these four magnets aren’t strong enough to damage your camera, it’s electronics or the data on your memory card.

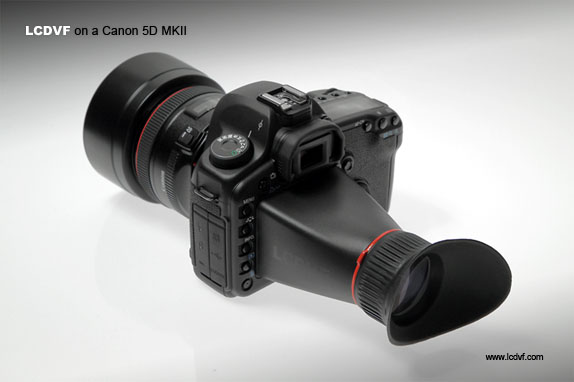
There are two models available; the LCDVF for most cameras with a 3” LCD screen, and the LCDVF 3/2 which is custom fit to the Canon 550D, Rebel T2i and the Kiss X4.

The LCDVF has a removable, rotating rubber eye-cup, and was shipped with a foam/microfiber eye cushion that I found useful and comfortable, it includes are a neck strap with quick release buckle and a neoprene pouch (which is well built, but could be about 20% bigger, in my opinion).

I spend an enormous amount of time reviewing images in the field while photographing and teaching outdoor nature photography workshops. The LCDVF has already proven itself to be durable and water resistant and I already can’t imagine shooting without it. The optics are bright and crisp and the LCDVF offers a great view of the whole 3” screen without loosing sight of the corners.

Help support this site and Purches the LCDVF HERE or LCDVF 3/2 HERE

Visit the LCDVF website HERE.

Adobe PHOTOSHOP CS5; A New Life for Old Images & Bald Eagle Reflection

Bald Eagle REFLECTION (Haliaeetus leucocephalus, Pygarge à tête blanche) Kachemak Bay, Homer, Alaska, USA. ©Christopher Dodds http://www.chrisdoddsphoto.com All Rights Reserved. Canon EOS 1D Mark II, 100-400mm F4-F5.6 @ 260mm . ISO 400, F7.1 1/260s Manual Exposure. Full Frame. Click HERE to order a print or license image for publication.

Bald Eagle REFLECTION was captured when I saw this Eagle in the fog drinking from a thin layer of water covering an ice-covered parking lot just after a somewhat mild and rainy morning in February, 2005. Rather than take the chance and spook the Eagle, I used my rental SUV to, ever so slowly, approach. Rather than drive directly toward it, I instead circled around, slowly reducing the circumference until I was close enough to get the image I had in mind. I positioned the SUV close enough to fill the frame, but more importantly, close enough to get a steep enough angle to include the reflection and eliminate some distracting buildings, stones and dark asphalt patches in the background.

I've just completed a submission which included some old favourites from 2005. Not all that long ago, really, but seems like a lifetime ago in terms of my post capture workflow and software. Photoshop CS5, with it's newly tweaked noise reduction algorithms, has certainly brought a new life to some old favourites. If you think the noise reduction works wonders on the files from recent cameras; go back through your archives and re-work some of your favourites from the past. It's not only the noise reduction that's new; there's a plethora of new tools and algorithms in Adobe's latest offering, not to mention what you have learned, and how you have grown as an artist, along the way. I always say that every image in my collection has a story; so it's been fun looking through the memories - give it a try.

Testimonial

I have known Chris for a few years and in July 2010 I attended Chris’s workshop for Coastal Brown Bears. The trip will always hold very special memories for me as I can honestly say it was the most enjoyable and productive trip I have ever made, and the most exhausting :o))   As a professional photographer I tend to try and put together my own trips but when I heard Chris was organizing this trip I had no hesitating in contacting Chris and booking. I would advise anyone else to do the same.

From the moment I landed at Kodiak airport we were out shooting literally within a few hours. Everyday we made the most of early morning and late evening light. Photographing some days till 11pm.  The amount of subjects we captured was unbelievable: Fox Cubs, Song Birds, Eagles, Seals, Sea Otters, Wolves and…  BEARS! 

After spending three days on Kodiak Island we headed for the Katmai coast by float plane and stayed on the Coastal Explorer, which was our home for a week.  Almost everyday we had a different location to go to and made the most of the weather. At times it rained non-stop and at others I was walking around in just a t-shirt.  Getting up close and personal with the bears was the ultimate thrill and having an enormous boar run, at what seemed directly at me whilst chasing salmon, was a heart thumping moment I will never forget; Though our safety was Chris' primary concern.

Life on the Coastal explorer was fun and we were all well looked after with meals ready for us at all times.  Downtime was relaxed and we watched movies and even spent one afternoon fishing where I caught Halibut and a silver salmon. Plus I landed the biggest Halibut, don’t let Chris tell you otherwise :o))   As you can tell even when we were not photographing we were having fun.

If you are considering such a trip or one of Chris’s other workshops my advice is not to hesitate and to book straight away.  You will be guaranteed a good time and have plenty of photos and memories to take home with you after the trip.

Thanks for a great time Chris and I look forward to the next one!!

Best Wishes- Darren Holloway (FMPA FBIPP QEP) Smallfield | Surrey | UK

Lens Align Pro; the real secret to sharp images & Winter Owl Workshops / Safaris Announced.

Great Grey Owl Blizzard in White (Strix nebulosa, Chouette Lapone, GGOW) Bracebridge, Ontario, Canada. Image Copyright ©Christopher Dodds. All Rights Reserved. Canon EOS 1D Mark II, 100-400mm @ 105mm. ISO 800, F8 1/640s Manual Exposure. Full Frame. CLICK HERE TO PURCHASE A PRINT or LICENSE AN IMAGE FOR PUBLICATION.

Private Winter Owl Safari / Workshops Announced

Join Canadian Wildlife photographer Christopher Dodds for the ultimate private, or semi-private, winter owl photography trip. Our target subjects include (but are not limited to) The Snowy Owl, Boreal Owl, Great Grey Owl, Northern Hawk Owl, Barred Owl, Long-eared Owl, Short-eared Owl and the Saw-Whet Owl. Our base of operations will be near Montreal Pierre-Elliot Trudeau Airoprt (YUL) and Ottawa International Airport (YOW). Our travels could include Southern Ontario and Quebec.

Book a single day or a whole week to maximize your experience, capture multiple species in different settings and in different weather conditions (always hoping for snow). I can customize your itinerary to include the  owls of Ontario and Quebec that you most want to photograph. Avoid the headache and impact of large group tours; wintering owls are often found on private property and land owners (many of them I know personally) are much more receptive to allowing just two, or three, photographers on their property, than a large workshop group. Gain access to the places I've been photographing these Northern beauties for years.

MORE INFORMATION HERE

Testimonial

I fell in love with Northern Gannets when I saw them fishing off the north coast of Florida many years ago during migration.  What beautiful birds!
 Researching where to see them best included Bonaventure Island in Quebec, Canada.  When I saw Chris Dodds' photos I was smitten.  The workshop experience was far better.  Chris is a terrific person, and a great teacher.  Eastern Quebec is charming and Chris knows all the folks and all the ropes to get the photographer to the best sites for shooting both on the island and on the waters surrounding the island.  The birds and their behavior are unquestionably amazing to observe and record.  Chris shared his strategies and shooting techniques freely.  He is laid back and we who attended his photo-op had the very best time. I was pleased to have learned more about flight photography with this experience.  If you have the opportunity and are interested in bird(flight) photography, this is a best experience.

Paul Herd Atlanta, Georgia, USA

Lens Align Pro; the real secret to sharp images

My life is full of moments; some lasting longer than others. I work tirelessly at honing my craft to capture the essence of those moments; some static and some explosive, some lasting hours, others only a fraction of a second. There is no real secret to learning how to capture action; it is an acquired skill, one that can be learned, one that requires practice. Weather your subject is a static bird sitting on a pretty perch, or a Great Grey Owl flying silently through a gorgeous blanket of softly falling snow; all the practice in the world, great technique and the very best tripod and head can’t help you make sharp images if your camera’s autofocus system is not adjusted, or tuned,  properly. I recently received a LensAlign Pro from Michael Tapes and was blown away when I discovered that all of my lenses needed adjustment.

There are many ways of calibrating your camera’s autofocus system available on-line; some as simple as a test chart you can print and glue to a stiff piece of card-stock, others involve moire patterns on your computer's screen. Most methods are far from scientific, and you could’t duplicate the same results twice; due mostly to the lack of a good target that is aligned parallel to the camera’s sensor, and another that can accurately allow you to see exactly where the focal plain lies and measure it’s distance from the intended target.

The LensAlign Pro is a brilliant device and the only affordable tool capable of calibrating your cameras autofocus system to the level needed to consistently and repeatably create sharp images. By first aligning the LensAlign Pro to your camera, and it’s sensor,  then micro-adjusting for each lens and teleconverter in your kit, Lens Align Pro will improve your picture-taking skills and bring them to the next level of really sharp images.

PRO TIP: Be sure to remember that Canon recommends micro-adjustment calibration in the same light that you will be shooting in; that’s easy for a studio photographer, but a bit more complicated for wildlife photographers. I went through the process several times, each in different light, and noticed quite a difference between bright overcast and bright sunny conditions. I made a small business card sized printout with the different calibration settings given the light conditions and  keep it in my compact flash card wallet; there was only a few differences, so it doesn't take much effort to re-configure for different light conditions.

Cameras that can be user calibrated include:
Canon 1D Mark IV, 1Ds Mark III, 1D MArk III, 5D Mark II, 7D and 50D
Nikon D3, D3X, D3S, D300, D300s, D700
Sony A900 and A850
Olympus E-30 and E-620
Pentax K20D and K7D

ADRENALINE Coastal Brown Bear (Ursus arctos or grizzly bear) & The Hazards of Nature Photography.

Coastal Brown Bear Fishing ADRENALINE (Ursus arctos or Grizzly Bear) Hallo Bay, Katmai National Park, AK Image Copyright ©Christopher Dodds www.chrisdoddsphoto.com All Rights Reserved. Canon EOS 1DMKIV, 500mm F4 L IS, Tripod & Wimberley Head II. ISO 400, F5.6 @1/1600s Manual mode. CLICK HERE TO PURCHASE A PRINT or LICENSE IMAGE FOR PUBLICATION.

The Hazards of Nature Photography: DEHYDRATION

I have been meaning to write a bit about the importance of hydration all summer and autumn is quickly approaching. No matter, hydration is just as important in the cold winter as it is in the hot summer months. Water makes up 75% of the body weight - about 50 liters (11 gallons) for the average man. Survival is unlikely if more than one fifth of this is lost. The first signs of dehydration are thirst, vague discomfort, lack of appetite, flushed skin, impatience, sleepiness and nausea. Once fluid loss reaches 6-10%, symptoms include dizziness, headache, labored breathing, no salivation, indistinct speech and you may loose your ability to walk. By the time fluid loss reached 11-20% symptoms now include delirium, swollen tongue, unable to swallow, dim vision, numb and shriveled skin. In it's latter stages: There is gross muscular weakness and mental capacity is impaired. You must make your survival plans at the start when you can think clearly and then stick to them. Best to remember to bring along some water and avoid the headache ;)

Testimonial

The trip with Chris on the Coastal Explorer along the Katmai coast was fantastic.  Without a doubt it was one of the top photo trips I have taken over the last several years due to the amazing variety and density of wildlife in such completely unspoiled and uninhabited wilderness.  Unlike land based lodges, with the Coastal Explorer you have the opportunity to photograph in several of Katmai's secluded bays versus being limited to an area adjacent to a land-based lodge.  What helped make the trip so successful was Chris's work ethic where he is always ready to shoot in any weather conditions and will stay in the field as long as there is any possibility for high quality photography.  This is essential in a place like coastal Alaska where it can go from direct sunny conditions to heavy overcast to rain in the blink of an eye and where the sun doesn't set until the late evening.  If the best time to photograph Brown Bears chasing down salmon was after 10:00PM, you bet we'd be on the river bank waiting on the massive Brown Bear boars to make their spectacular runs--photography is top priority after safety of course.  The daily great fresh seafood didn't exactly hurt the trip either.

As I write this I've only a little over two weeks removed from returning from Katmai and I'm still having serious withdrawals--right now I really want to be on the Coastal Explorer's skiff heading to shore to photograph more bears, eagles, and wolves. - Steve Metildi Southern California | USA

BE SURE TO CHECK-OUT STEVE'S KATMAI 2010 ALBUM HERE to see images he made during the workshop.

2011 Coastal Brown Bears of Katmai Workshop/Safari Announced

Join me, Christopher Dodds, and some of the more than 2,000 Coastal Brown Bears at the best place in the world to photograph Coastal Brown Bears. Claiming the world’s highest concentration of Coastal Brown Bears, Katmai National Park in Alaska also has to be the most beautiful setting on the planet to photograph them. Truly the adventure of a lifetime, we’ll have plenty of opportunities to see, study and photograph Coastal Brown Bears in their undisturbed, natural environment without the influence or pressure that large groups and camps often cause. I have secured the much coveted dates of July 24-30, 2011; timed to coincide with the annual Salmon run. With a limit of only six participants, there will be plenty of time for instruction and personal attention from Chris. MORE INFORMATION & REGISTRATION FORM HERE.

Disclaimer

The author is not a physician. This article is for informational purposes only and it is not intended to identify, diagnose, or treat any medical condition.