Savannah Sparrow with Caterpillar Mind the Background

Savannah Sparrow with Caterpillar (Passerculus sandwichensis, Bruand des prés, SASP) From my DELUXE PUFFIN WORLKSHOP in Mingan Archipelago National Park Reserve of Canada, Réserve de parc national du Canada de l'Archipel-de-Mingan, Quebec, Canada. Image Copyright ©Christopher Dodds. Sony Alpha a9 Mirrorless Camera & Sony FE100-400 F4.5-5.6 G Master OSS @ 400mm @ minimum focusing distance. Full frame image. ISO 640, f/8 @ 1/640s Manual exposure mode.

Mind the background

Aside from getting close to your subject, one of the more difficult things to accomplish is aligning the subject with the light source (The Sun) and a pleasing background. All too often I see photographers fill albums of photos of the same subject with the same backgrounds. The key to achieving a complete portfolio of a particular subject is to include many backgrounds and poses. Here I carefully manoeuvred myself so the sundried seaweed on the rocks below at low tide became my background of choice.

Brandt's Cormorant Portrait a la Sony a9 100-400 and 2X Extender

Brandt's Cormorant Portrait (Phalacrocorax penicillatus, Cormoran de Brandt, BRAC) La Jolla, California ©Christopher Dodds All Rights Reserved. Sony Alpha a9 Mirrorless camera & Sony FE100-400mm F4.5-5.6 G Master OSS Lens with Sony 2X tele-extender @ 800mm Full Frame image. ISO 800 f/11 @ 1/640s Manual mode.

Q&A

Hi Chris,

I'm a huge fan of your work and have been following your transition to the Sony mirrorless system since your first post about it from your Puffin Workshop last August. It seems that you have sold all of your Canon equipment and I am interested to hear what you are using for your long lens? I don't imagine the Sony 100-400 lens with their 2X could come anywhere near the quality of a Canon super telephoto. I imagine that you will need to manually adjust the focus with the combined maximum aperture of f/11? Even if it produces sharp images, I just don't see f/11 producing those wonderful out of focus backgrounds which seem to be part of a signature Dodds image. Please help a guy see....

Thank you, J.D. from New York

Hey J.D.,

Thank you for your great questions. This image is a portrait of a Brandt's Cormorant on the cliffs of La Jolla, California. I suspect you can see from the image that the Sony a9 with the Sony 100-400 G Master lens AND the Sony 2X tele-extender produce the same amazing quality as the lens alone. The Sony a9 does autofocus with a maximum lens and extender combination of f/11. All in all, the system continues to impress me. As for those out of focus backgrounds, there are two ways to improve your results while using smaller apertures which traditionally produce larger depth of field and more distracting backgrounds:

1. Work closer to your subject. The closer you are to your subject, the smaller the depth of field.

2. Choose a more distant background. In the case of the image above, I used the beach below the cliff as my background.

I used both techniques to produce the portrait of the Brandt's Cormorant yawning with it's spectacular blue gular skin on full display. It is so easy to get close to birds with the silent shutter of the a9!


Bald Eagle The SCREAMIN' EAGLE

Bald Eagle The SCREAMIN' EAGLE (Hailiaeetus leucocephalus, Pygarge a tete blanche, BAEA) Kachemak Bay (near Homer), Alaska ©Christopher Dodds All Rights Reserved. Canon EOS 1DXS Mark III, 500mm f/4 L IS USM and Canon 2X and 1.4X Tele-converters II. ISO 400, f/13 @ 1/400s Manual. PURCHASE A PRINT or LICENSE IMAGE FOR PUBLICATION HERE.

Here's an old favorite from my 2009 Eagles Galore Photo Tour. Posting today, as I prepare for my back-to-back Saint Paul Island and Coastal Brown Bear Boat charter in Alaska.

To me, apart from the incredible detail in this image, I really like the way we can see all of that detail in the mouth. I avoided the deep shadows of harsh light by working on an overcast day (with snow changing to rain and sleet), and avoided using a flash (which would have also created some pretty strong and distracting shadows). My collapsible 22" white reflector did a fantastic job of illuminating the inside of the Eagle's mouth (I won't mention the brand, just get the cheapest one available; the bigger it is, the softer the light).

Bald Eagle FREE SPIRIT

American Bald Eagle FREE SPIRIT (Hailiaeetus leucocephalus, Pygarge a tete blanche, BAEA) Kachemak Bay (near Homer), Alaska ©Christopher Dodds All Rights Reserved. Canon EOS 1DX, 100-400mm f/4.5-5.6 L IS II USM @312mm. ISO 320, f/5.6 @ 1/3,200s Manual. Full Frame. PURCHASE A PRINT or LICENSE IMAGE FOR PUBLICATION HERE.

Yet another Bald Eagle from my Bald Eagles Galore Photo Tour in March. Having so many Eagles fising so close to us provides some great opportunities to photograph them during their acrobatic approaches. Here's the top of a cartwheel dive in nice light.

Do notice the exposure is an equivalent to Sunny 16, less a third of a stop to preserve all of the details in the white feathers. Read more about the Sunny 16 rule HERE.

Be sure to book your EPIC Bald Eagles Galore Photo Tour spot before it's too late; March 2017 dates are live. Get more information HERE.

Bald Eagle ALOFT

American Bald Eagle ALOFT (Hailiaeetus leucocephalus, Pygarge a tete blanche, BAEA) Kachemak Bay (near Homer), Alaska ©Christopher Dodds All Rights Reserved. Canon EOS 1DX, 100-400mm f/4.5-5.6 L IS II USM @300mm. ISO 1600, f/5.6 @ 1/2,500s Manual. Full Frame. PURCHASE A PRINT or LICENSE IMAGE FOR PUBLICATION HERE.

Here's an immature Bald Eagle from my Bald Eagles Galore Photo Tour in March. Although I was making portraits of this first year Eagle, I was ready for any action by using a higher ISO and the resulting higher shutter speed; being prepared for the extra-ordinary while photographing the ordinary!


Least Auklet Portrait and Visitags

Least Auklet Portrait (Aethia pusilla, Starique minuscule, LEAU) Saint Paul Island, The Pribilof Islands in the Bering Sea, Alaska. Image Copyright ©Christopher Dodds. Canon EOS Canon EOS 1DX, 600mm F4 L IS II, 2X Extender III, Canon 25mm Extension Tube II. Jobu Designs Algonquin Tripod & Jobu Jr. 3 ISO 3,200s, f/13 @ 1/160s Manual exposure. PURCHASE A PRINT or LICENSE IMAGE FOR PUBLICATION HERE.

Here's another image from my hugely successful Saint Paul Island Photo Expedition. Just love getting to within minimum focusing distance of the seabirds that call Saint Paul Island home.

Simply amazing just how quickly the July 2015 trip is booking; do have a look at the workshop details HERE

Canadian Wildlife and Nature Photographer and Canon Northern Explorer of Light Christopher Dodds photographing owls in the Canadian winter (Feb,. 2014). Photographed with a prototype of the new Jobu Designs Algonquin Tripod & Jobu Jr. 3, Canon 200-400mm f/4-5.6 with built-in tele-extender, 600mm f/4 IS L II, Tamrac Expedition 9X camera bag and two Canon EOS 1DX camera bodies. Photo copyright and courtesy of Michael J. Lang (thanks, Michael)

I shared this image of me from my Winter Snowy Owl Photo Expeditions some time last winter. It has become the subject of many emails asking where I got the yellow name tag. I love my bright yellow luggage tags and have at least enough so every bag gets one. These really do ensure there is no confusion if another similar bag shows-up on the luggage carousel at the airport. There is a clear pocket on the inside for your contact details (where you should indicate your email address and mobile number). These tags are simply bombproof! Get yours at www.visitag.com

Shoot Vertical

Parakeet Auklet DORSAL VIEW (Fratercula cirrhata, Macareux huppé, TUPU) Saint Paul Island, The Pribilof Islands in the Bering Sea, Alaska. Image Copyright ©Christopher Dodds. Canon 1DX, 600mm F4 L IS II USM Handheld. Full Frame. ISO 800 f/4.5 @ 1/4,000s Manual Mode. PURCHASE A PRINT or LICENSE IMAGE FOR PUBLICATION HERE.

Here's another image from my Saint Paul Island Expedition; A Parakeet Auklet against the pastel Bering Sea. Shooting small birds in flight while holding the camera vertically is quite a challenge; shooting over the top of a cliff while pointing down and looking at the Bering Sea below adds a whole new dimension and is not for the faint of heart. As always, practice is the key to success and best done in excess well before your departure to any exotic location.

Hip to be Square

Atlantic Puffin SQUARE PORTRAIT (Fratercula arctica, Macareux moine, ATPU) Mingan Archipelago National Park Reserve of Canada, Réserve de parc national du Canada de l'Archipel-de-Mingan, Quebec, Canada. Image Copyright ©Christopher Dodds. Canon EOS Canon EOS 1DX, 600mm F4 L IS II, 2X Extender III, Canon 25mm Extension Tube II, Canon 12mm Extension Tube II, Canon 1.4X Extender III. Jobu Designs Algonquin Tripod & Jobu Jr. 3 ISO 3,200s, f/16 @ 1/200s Manual exposure & manual focus. PURCHASE A PRINT or LICENSE IMAGE FOR PUBLICATION HERE.

The forecast was dismal; mostly rain and high winds for the three day Puffin trip, with a heavy rainfall warning in effect for our last day. I didn't sleep much the night before the workshop; I was too excited to get back to the island, but worried the high winds would sabotage our safe boat landing once there. As is often the case, the forecast was wrong. We had an awesome time and I had an awesome group of passionate photographers.

This image was made when an Atlantic Puffin flew-in and sat almost right beside me while I sat on the seaweed covered rocks as the tide went out. I quickly added both extension tubes and both tele-extenders to my 600mm lens and began manually focusing the monster rig. I just love getting close and personal with Puffins!

Hip to be Square

Always remember to think about the aspect ratio of the image when you first open it in your RAW converter; avoid always using the same aspect ratio and remember that many social media outlets make best use of the square format. Use whatever aspect ratio works best for the image, rather than the the aspect ratio of the original capture.

2015 Luxury Live on the Island Puffins Galore

Be sure to email me to join the wait list for my 2015 luxury trip! The lighthouse and the keeper's home have been totally restored and we will be sleeping on the island within feet of the Puffins, Razorbills and Guillemots. A gourmet chef will prepare our meals and we will have the island all to ourselves during the golden hours. Be sure to be among the first to know all of the details as soon as they are released by emailing me your co-ordinates to chris@chrisdoddsphoto.com

Northern Fur Seal Pups of Saint Paul Island

Northern Fur Seals NEW FRIENDS (Callorhinus ursinus, L’otarie à fourrure du Nord) Saint Paul Island, The Pribilof Islands in the Bering Sea, Alaska. Image Copyright ©Christopher Dodds. Canon 1DX, 600mm F4 L IS II , 2X Teleconverter III, Jobu Designs Algonquin Tripod & Jobu Jr. 3 ISO 4,000 f/8 @ 1/1,6000s Manual Mode.  PURCHASE A PRINT or LICENSE IMAGE FOR PUBLICATION HERE.

Here's a couple of Northern Fur Seal pups from my Saint Paul Island workshop. Seals only have one baby at a time, so these two are neighbors meeting for the first time. They are fascinating to watch, and their calls sound very much like a barn full of baby sheep. I shot this image with my Canon 600mm f/4 IS II and 2X Teleconverter wide open at f/8 to isolate the subjects from the volcanic rocks, and used a shutter speed of 1/1,600 of a second to be sure to freeze the rapidly vibrating mouth and teeth while they were calling.

How to Stack Extenders for Mega Reach

Atlantic Puffin CLOWN OF THE SEA (Fratercula arctica, Macareux moine, ATPU) Mingan Archipelago National Park Reserve of Canada, Réserve de parc national du Canada de l'Archipel-de-Mingan, Quebec, Canada. Image Copyright ©Christopher Dodds. Canon EOS Canon EOS 1DX, 600mm F4 L IS II, 2X Extender III, Canon 25mm Extension Tube II, Canon 12mm Extension Tube II, Canon 1.4X Extender III. Tripod & Jobu Jr. 3 ISO 3,200s, f/16 @ 1/200s Manual mode & manual focus. PURCHASE A PRINT or LICENSE IMAGE FOR PUBLICATION HERE.

After spending so much time with Atlantic Puffins, I've come to realize that few portraits of them truly reflect their true character. I love getting close and making portraits that truly represent my subject, in this case these comical and animated seabirds or Clowns of the sea.What do you think, did I suceed?

How to stack extenders

The idea is to use my super-telephoto 600mm f/4 IS II with both the 1.4X and 2X (version III) Extenders (or tele-converters). In order to physically connect everything together, you need to add at least an extension tube between both extenders; I use both the Canon 25 and 12mm Extension tubes (version II) connected together because they reduce the minimum focusing distance of the lens and allow me to get even closer to my subject. As far as I can tell from the images, it does not matter which order I install the extenders.


There are a few technical considerations:

  • A sturdy tripod and tripod head are required
  • Working at these extreme focal lengths so close to your subject will severely limit the depth of field, so do remember to stop-down.
  • All of this stacked equipment does cost some light, so remember to add 1 & 1/3 stop if you are shooting in manual mode.
  • Although we have some pretty amazing cameras, the only way to focus this monster is fully manual.

Design Images with Visual Impact

Thick-billed Murre or  Brünnich's Guillemot VERTICAL PORTRAIT (Uria lomvia, Guillemot de Brünnich, TBMU) Saint Paul Island, The Pribilof Islands in the Bering Sea, Alaska. Image Copyright ©Christopher Dodds. Canon 1D MK IV, 500mm F4 L IS , 2X Teleconverter III & , Tripod & Jobu Jr. 3 ISO 800 f/16 @ 1/320s Manual Mode. Fill flash Canon Speedlite 580EX II with Better Beamer @ -1/3. PURCHASE A PRINT or LICENSE IMAGE FOR PUBLICATION HERE.

Here's a couple of images from my recent Saint Paul Island Photo Safari / Workshop. We arrived there as spring was late emerging from the worst winter anyone can remember and there were shaded areas at the bottom of cliffs where the snow had not melted yet. Although I generally don't like bright white backgrounds in images, I decided to make an exercise of designing some images with white backgrounds; there is a certain quality to the white out-of-focus snow that's much more appealing to me than that of a bright & backlit white sky.

I really like getting close and designing intimate portraits with big glass, so I installed my 500mm f/4 and a 2X extender and moved so close that I had to back away to the lens' minimum focusing distance. Once set-up on my tripod and Jobu Jr. 3 gimbal tripod head, I installed my Jobu off-camera flash bracket and my Canon 580 EXII flash.

Designing these tight, almost high-key portraits can be challenging, but careful attention to balancing all of the images' elements can be quite rewarding. Be sure to spend time studying the colours, tones and textures, (or, perhaps, the lack of colours tones and textures), the positive and negative space and the lines, shapes and where they lead the eye. Look for angles and perspective, and try to visualize how changing them by moving your angle of view will impact, help or hinder your image's design.

Black-legged Kittiwake PORTRAIT CALLING (Rissa tridactyla, Mouette tridactyle, BLKI) Saint Paul Island, The Pribilof Islands in the Bering Sea, Alaska. Image Copyright ©Christopher Dodds. Canon 1D MK IV, 500mm F4 L IS , 2X Teleconverter III & , Tripod & Jobu Jr. 3 ISO 800 f/16 @ 1/500s Manual Mode. Fill flash Canon Speedlite 580EX II with Better Beamer @ 0. PURCHASE A PRINT or LICENSE IMAGE FOR PUBLICATION HERE.

Be sure not to overlook the creative element of your exposure values; should you use an equivalent exposure with slower shutter speed and larger depth-of-field?, or will a shallow depth-of-field with higher shutter speed blurr the background (or foreground) and draw the viewer in for a closer look at the subject?

No matter where you are, what your subject; stop and think a little about designing the image and not taking the picture.

Shooting birds in flight in snow and FirstPass New Version Released

 Great Grey Owl SNOWFLIGHT (Strix nebulosa, Chouette Lapone) Bracebridge, Ontario, Canada. Image Copyright ©Christopher Dodds All Rights Reserved. Canon EOS 1D Mark II, 100-400mm @ 250mm. ISO 640, f/9 @ 1/640s Manual Exposure and manual focus. Full Frame. CLICK HERE TO PURCHASE A PRINT or LICENSE AN IMAGE FOR PUBLICATION.

Tips for birds in-flight in the snow

  • Stop down, or close the aperture when shooting in snow to maximize the effect of the big snowflakes; use a larger depth-of-field to keep as many snowflakes as possible sharp. I find F/9 works well during heavy snowfalls with large snowflakes.
  • Place your subject against the dark background of coniferous trees  to help define the snowflakes.
  • Use manual focus for more precise results; Most Auto-focus systems focus on the nearest, large snowflakes.
  • Leave some breathing room for your subject - you have probably invested a lot of time to get out in that perfect storm; make sure you include it in the image and avoid shooting too tight.

FirstPass Image Editing Software Evolves

I first told you about FirstPass image editing software for the Mac back in November and wanted to pass on the news that a new version is available with tons of new features:

✔ New image information panel 
✔ Image information panel now shows image histograms 
✔ Image information panel can be activated from image browser using right click menu 
✔ Ratings can be applied to multiple files at the same time using right click context menu 
✔ Improved memory management and performance 
✔ Fix for an issue related to caching optimization

This software has evolved into a fast, feature rich, must-have image editing dream for Mac using photographers! Be sure to purchase your copy before the scheduled price increase on February 1, 2012; it's going up to only $18.99, but you can get your copy for only $9.99 now:

Check out FirstPass in the CANADIAN APPLE STORE HERE

Check out FirstPass in the US APPLE STORE HERE

Cold Weather Clothing Tips for Photographers

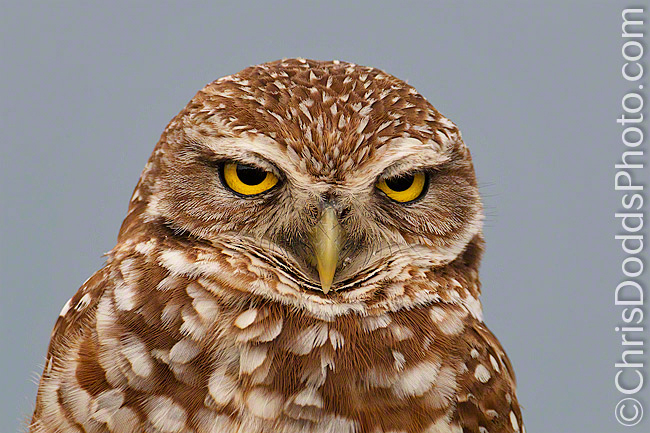
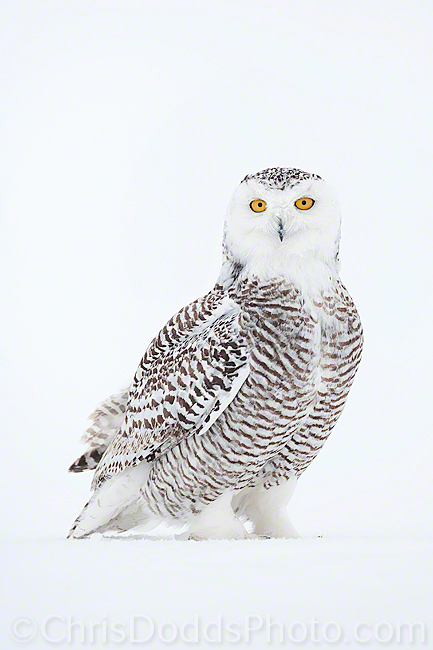
 Snowy Owl Stance (Bubo scandiacus, Harfang des neiges, SNOW) Ontario. Image Copyright ©Christopher Dodds All Rights Reserved. Canon EOS 1DsMKIII, 500mm F4 IS, Tripod with Tripod & Jobu Jr. 3 with Think-Tank Photo Hydrophobia 300-600. ISO 400, F6.3 1/1,600s Manual mode. CLICK HERE TO ORDER A PRINT OR LICENSE IMAGE FOR PUBLICATION.
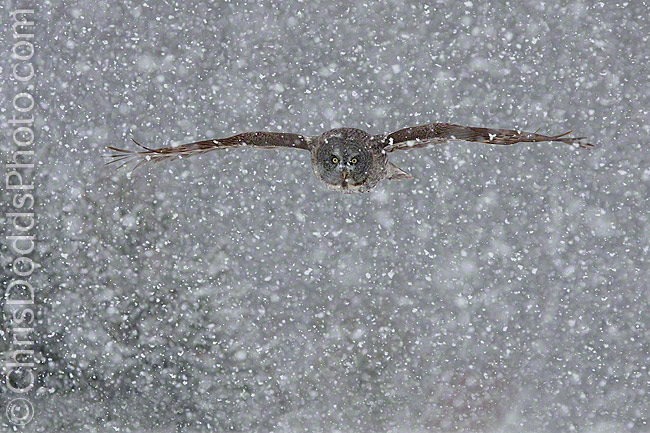
Winter Owl Report

Just wanted to pass on my thoughts about the coming winter owl season. There's been good movements of our favorite winter owls so far and they have already started to establish their winter feeding grounds. All of the indications are pointing to a great winter owl season. I still have some limited space available on my Snowy Winter Owl Prowl Photo Safari / Workshops.

Cold Weather Clothing Tips for Photographers

Photography in the winter often entails staying warm while staying still in the freezing cold for long periods of time and foregoing any warmth from physical exertion. In the deep cold, when you are not exerting yourself, what you want is loft and insulation; remember that loose fitting clothing offers much more insulation and warmth than tight fitting layers that are so compressed that they actually loose the ability to keep you warm. Synthetics wick chilling moisture away from your skin, are light for travel and dry much quicker than any natural fabrics (Just remember: Cotton Kills!).

Tops: I start with a base layer Double Wicked Lite T Long Sleeve Shirt (remember that cotton traps moisture next to your skin, but synthetics wick moisture away from your skin), followed by a good mid weight fleece Zip Neck Sweater .

Bottoms: Full Length Base Layer with either Nylon zip-off pants or Microchill Fleece Pant if it’s really cold.

Outer wear: Expedition weight bib Gore-tex pants and Canada Goose Parka for the woods (extremely durable and branch resistant), or Expedition weight Down Parka (Really warm and light – perfect for travel).

Feet: As I’ve already mentioned, nature photographers spend a huge amount of time waiting for the image, so it’s extremely important to understand that boot manufacturers rate their boots with the assumption of moderate activity; there is a huge difference in just how warm a boot is when walking or standing for any length of time. I start with a good pair of Warm Socks and add a loose fitting Sorel Boot (I’ve tried so many winter boots, and there’s nothing like the durability and warmth of my Sorels). MICROspikes Pocket Traction System prevent accidental (and sometimes expensive and damaging) wipeouts.

Hands: Keeping your hands warm is quite a challenge; here’s my secret: I start with a loose fitting pair of Thin Liner Gloves which never come off my hands. I place Hand Warmers into the palm of the liner gloves, and when it’s really, really cold, I slip another into the wristband which warms the blood as it travels to my fingers. My choice for outer layer is the Black Diamond Mercury Mitts; be sure to buy a size, or two, larger than normal; this allows you to move your fingers around inside the gloves. The extra room, and fine leather palm of the Mercury Mitts allows me to use most of my camera’s buttons and dials – it takes a little practice, and seems clumsy, but better a little awkward than frozen.

Head: Remember that most heat loss occurs through your head and get a warm Beanie hat (or Touque as we say in Canada) . I often use a Balaclava when it’s really cold to protect my face from the the cold and windchill.

Camera: As for your camera gear, you should pack rain protection in case you are blessed with wet snow, or rain. I am thrilled with my Think-Tank Photo Hydrophobia 70-200 Flash and my Think-Tank Photo Hydrophobia 300-600 V2.0. Unlike the old days, little precaution is required before for your newer generation digital camera bodies are exposed to arctic conditions. Today’s pro camera bodies easily handle the cold weather and recent advances in battery technology easily allow a full day of photography on one charged battery. Consumer and prosumer cameras will also work well, but you should have an extra battery, or two, tucked away in an inside pocket keeping warm. Moving between extreme cold and warm temperatures when going indoors, or out, does cause some condensation; just leave your camera in it’s bag for a couple of hours while it comes to room temperature. Although I won’t remove a lens until my camera warms to room temperature, I don’t fuss much with my professional, sealed cameras; they’ve been from warm to cold and back again thousands of times. It’s good practice to remove the memory card when you are finished shooting and put it in a safe and zippered pocket; this prevents any warm moist air from entering your camera when you get home (or to your hotel), and keeps your images safe if your camera is stolen from you vehicle if you stop for coffee, hot chocolate or to warm-up at a restaurant.

Second Annual Photo Geek Christmas Party

I have just visited to Hudson Village Theater to do a pre show audio & video test and am thrilled to be presenting at such an awesome venue! There is still limited space available, be sure not to miss this show and support such a worthy cause!

Our sponsors have dug deep and collectivly offered thousands of dollars of prizes for this great event! Jobu Designs (makers of my favorite Gimbal Head - the Jobu Jr. 3), FirstPass Image downloader & Editor, Think-Tank Photo, Cotton Carrier, DigiMarc for Images and Tiffen have all jumped on-board and offered tons of prizes to show their suppoort for my Second Annual Photo Geek Christmas Party.

It's not too late to join me, Canadian nature photographer Christopher Dodds, on November 30, 2011 at 7:30 PM at the Hudson Village Theatre (28 Wharf Road, Hudson, QC   J0P 1H0) for an hour and a half long slideshow presentation to benefit this great cause which is so close to my heart. The show is designed to be entertaining and informative to all; nature lovers and photographers alike. Stories of adventure, natural history facts and information are all on the menu and this show is designed to offer helpful tips & techniques sure to improve your photography efforts with everything from a camera phone, point & shoot camera or professional SLR camera system. Over one hundred of my images will be projected, many unseen.  Everyone is welcome!
Hurry! Only 148 seats. Tickets are only $15.00 each and are available for advance purchase only - every penny is collected by, and goes to Le Nichoir. Please call or email Le Nichoir (communication@lenichoir.org 450-458-2809) to secure your tickets, or make a donation if you can't make it (be sure to tell them it's on behalf of Chris' Photo Geek Christmas Party) Major credit cards and cheques accepted. Finger food and hors d'oeuvres are included and there will be a cash bar (please drink responsibly).
There will be ample time to mingle, meet my friends and contacts and share some of your images with others, so feel free to bring prints, iPads or laptops with your favourite images to share. I hope to see you there and PLEASE SPREAD THE WORD!

Read more about it HERE

Better Bird Photography Portraits

Parakeet Auklet Portrait (Fratercula cirrhata, Macareux huppé, TUPU) Saint Paul Island, The Pribilof Islands in the Bering Sea, Alaska. Image Copyright ©Christopher Dodds. Canon 1D MK IV, 500mm F4 L IS , 2X Teleconverter III & Canon Extension Tube EF 25 II, Tripod & Jobu Jr. 3. Full Frame. ISO 400 f/14 @ 1/200s Manual Mode. Fill flash Canon Speedlite 580EX II with Better Beamer @ -1&2/3. PURCHASE A PRINT or LICENSE IMAGE FOR PUBLICATION HERE.

Better Bird Photography Portraits

Bird photographers are often guilty of spending all of their time photographing the action and drama of birds in flight, and often skip the investment of the time required to create great portraits. I sell far more static portraits than action, or "birds-in-flight" images. Don't get me wrong; Birds-in-flight are my favorite challenge, just remember to diversify your images by going for portraits as well. It can be quite rewarding to see and study the intricate details revealed in a good portrait - check-out the unique (and cool) bill of this Parakeet Auklet. Here's a few tips to help you out next time you are out and about with your camera.

  • Try to get closer your subject without disturbing it. This one sounds easy, but wild birds are wild, take your time and avoid walking or crawling directly at your subject. Take your time and make regular stops to let your subject accept you.
  • Use a long lens and extender to help you get close without disturbance, and to take advantage of the long focal length to help blur the background and isolate the subject. I often add an extension tube to get even closer.
  • Try to choose an interesting background. Finding an interesting background will help you stand-out among the many. In this Parakeet Auklet portrait, I carefully chose the out of focus lichens as my background to set it apart from the typical blue sky of a clear day, or the white, or high-key, background of a cloudy day.
  • Invest in the composition. Carefully compose your portrait so that it is visually pleasing. Try to avoid a boring compositions with centred subjects. Compose a full frame image in the camera - to get the most pixels on your subject and as a challenge to get better and make better image in the camera.
  • Wait for the pose and head angle. All to often, I see portraits that resemble snap shots. This is often the result of poor head angle or a bad pose. I try to get the subject and it's head parallel to my sensor for most head shot type portraits, but do sometimes strive for the head-on look; the latter often in overcast conditions to avoid harsh shadows.
  • Choose your light. On clear days, choose the golden hours of sunrise or sunset to get the soft warm tones without harsh shadows. Be sure to point your shadow directly at the bird when the sun rises and gets harsher, and be sure the near side of the face is illuminated and there is a catch-light in the eye. Bright, cloudy and overcast conditions are great for digital portraits; there's no shadows to worry about, and we can photograph all day long. Avoid flash when the light is golden, but do try to add a kiss of fill flash when its overcast.
  • Be sure the image is sharp and properly exposed. Sounds easy enough, but try to remind yourself to use good long lens technique, a good tripod head and a sturdy tripod.


Second Annual Photo Geek Christmas Party

More prizes have arrived from these great sponsors! Jobu Designs (makers of my favorite Gimbal Head - the Jobu Jr. 3), FirstPass Image downloader & Editor, Think-Tank Photo, Cotton Carrier and DigiMarc for Images have all jumped on-board and offered tons of prizes to show their suppoort for my Second Annual Photo Geek Christmas Party. I expect other sponsors to make offerings and encourage contributions - email me if you would like to donate and promote your product chris(at)chrisdoddsphoto(dot)com

Join me, Canadian nature photographer Christopher Dodds, on November 30, 2011 at 7:30 PM at the Hudson Village Theatre (28 Wharf Road, Hudson, QC   J0P 1H0) for an hour and a half long slideshow presentation to benefit this great cause which is so close to my heart. The show is designed to be entertaining and informative to all; nature lovers and photographers alike. Stories of adventure, natural history facts and information are all on the menu and this show is designed to offer helpful tips & techniques sure to improve your photography efforts with everything from a camera phone, point & shoot camera or professional SLR camera system. Over one hundred of my images will be projected, many unseen.  Everyone is welcome!
Hurry! Only 148 seats. Tickets are only $15.00 each and are available for advance purchase only - every penny is collected by, and goes to Le Nichoir. Please call or email Le Nichoir (communication@lenichoir.org 450-458-2809) to secure your tickets, or make a donation if you can't make it (be sure to tell them it's on behalf of Chris' Photo Geek Christmas Party) Major credit cards and cheques accepted. Finger food and hors d'oeuvres are included and there will be a cash bar (please drink responsibly).
There will be ample time to mingle, meet my friends and contacts and share some of your images with others, so feel free to bring prints, iPads or laptops with your favourite images to share. I hope to see you there and PLEASE SPREAD THE WORD!

Read more about it HERE

How to photograph birds in flight in low light

Tufted Puffin In Flight #1 (Fratercula cirrhata, Macareux huppé, TUPU) Saint Paul Island, The Pribilof Islands in the Bering Sea, Alaska. Image Copyright ©Christopher Dodds. Canon EOS 1DMKIV, 70-300mm f/4-5.6 L IS USM @300mm. ISO 1,600, f/5.6 @ 1/3,200s Manual Mode Full Frame. PURCHASE A PRINT or LICENSE IMAGE FOR PUBLICATION HERE.

Photographing birds in flight in low light is quite challenging; it's not easy. I love photographing seabirds, and that often means shooting small, and often erratically moving targets; fast and unpredictable little fliers from the top of coastal cliffs in bad weather. The biggest problem to overcome is our need to always grab our longest lens and our reluctance to shoot wide open at high ISO (for Canon users, anyway). I recently had a discussion with a photographer who told me he didn't need a camera capable of shooting 10 fps (frames per second); he timed the wingbeats and only took one frame at a time. Well, let's just say that was one photographer who had a couple of good birds in flight images in his portfolio, but Florida Great Blue Herons are tame, huge, fly slowly and do have predictable wingbeats. What I want to share today is how I succeed (more, or less) at shooting bullets that move at 55 MPH with 100-400 wing beats per minute; I'm talking, of course, about photographing Puffins in flight. I was fortunate to photograph all three North American species of Puffins this summer, on both the East, and west coast. In June I hosted my annual Puffins Galore (and so much more) workshop for the Atlantic Puffin, and then I photographed the Horned and Tufted Puffins of Saint Paul Island (more images to come soon).
Tufted Puffin In Flight #2 (Fratercula cirrhata, Macareux huppé, TUPU) Saint Paul Island, The Pribilof Islands in the Bering Sea, Alaska. Image Copyright ©Christopher Dodds. Canon EOS 1DMKIV, 70-300mm f/4-5.6 L IS USM @300mm. ISO 1,600, f/5.6 @ 1/3,200s Manual Mode Full Frame. PURCHASE A PRINT or LICENSE IMAGE FOR PUBLICATION HERE.

First of all, get over your phobia of shooting wide open and using a high ISO. You are going to need a shutter speed of at least 1/2,500 of a second, but I prefer 1/3,200 of a second to freeze the fast action; this usually means using an ISO of at least 1,600 and an aperture of at least f/5.6 (always in manual mode). I try to get as close as possible in low light and low contrast conditions; I try to use the shortest lens possible, while trying to fill the frame. Using only the centre auto-focus point only usually helps the autofocus system lock onto your subject, but it's going to take more than relying on your camera to acquire focus. I generally try to pick-up repetitive flight patterns; I try to predict where the bird I am trying to shoot will fly and pre-focus on something near there so the auto-focus system doesn't have to spin the lens much to acquire sharp focus. Once locked-on to my subject, it's all up to me to keep the focus point on the subject and hit the stutter button at 10 fps; the best way to be able to do that is practice; over, and over again.
Tufted Puffin In Flight #3 (Fratercula cirrhata, Macareux huppé, TUPU) Saint Paul Island, The Pribilof Islands in the Bering Sea, Alaska. Image Copyright ©Christopher Dodds. Canon EOS 1DMKIV, 70-300mm f/4-5.6 L IS USM @300mm. ISO 1,600, f/5.6 @ 1/3,200s Manual Mode Full Frame. PURCHASE A PRINT or LICENSE IMAGE FOR PUBLICATION HERE.

I decided to post three sequential, full frame images of Tufted Puffins from a recent trip to Saint Paul Island (The Pribilof Islands), Alaska to demonstrate that it is possible to pull off what seems like the impossible. I left my tried, tested and true Canon EF 300mm f/2.8L IS II USM Telephoto Lens at home, instead opting for my favorite new 70-300mm f/4-5.6 L IS USM and threw it on my Canon EOS 1DMKIV. I set-up my exposure in manual mode and checked the histogram to make sure the blacks from the wet rocks below the cliffs I was standing on weren't blocked-up against the left edge to minimize noise, and carefully made sure I had no over-exposed whites on the right edge to ensure the most detail in the whites. Once sure of my exposure, I watched for the Puffins flight path and pre-focused on a rock where I thought the bird would fill the frame. Now pre-focused on the rock, I saw the bird fly in and followed it until it started to fill the frame, partially depressed the shutter button to activate the auto-focus system and hit the trigger at its maximum capture rate of 10 fps. Truth be told; I waited a fraction of a second too long for this sequence, and ran the risk of clipping the Puffin's wing-tips, but it worked-out fine with three action shots that I liked enough to keep (No, I won't teach you how to reconstruct the wingtips if you clip them, but I will teach you how to capture the image right, in the camera - smile).

Which of the three images here is your favorite & why? Leave a comment and you could win a free copy of the new Mac editing software FirstPass.

Second Annual Photo Geek Christmas Party

Great news! Jobu Designs (makers of my favorite Gimbal Head - the Jobu Jr. 3), Think-Tank Photo, Cotton Carrier, have all jumped on-board and offered tons of prizes to show their suppoort for my Second Annual Photo Geek Christmas Party. I expect other sponsors to make offerings and encourage contributions - email me if you would like to donate and promote your product chris(at)chrisdoddsphoto(dot)com

Join me, Canadian nature photographer Christopher Dodds, on November 30, 2011 at 7:30 PM at the Hudson Village Theatre (28 Wharf Road, Hudson, QC   J0P 1H0) for an hour and a half long slideshow presentation to benefit this great cause which is so close to my heart. The show is designed to be entertaining and informative to all; nature lovers and photographers alike. Stories of adventure, natural history facts and information are all on the menu and this show is designed to offer helpful tips & techniques sure to improve your photography efforts with everything from a camera phone, point & shoot camera or professional SLR camera system. Over one hundred of my images will be projected, many unseen.  Everyone is welcome!
Hurry! Only 148 seats. Tickets are only $15.00 each and are available for advance purchase only - every penny is collected by, and goes to Le Nichoir. Please call or email Le Nichoir (communication@lenichoir.org 450-458-2809) to secure your tickets, or make a donation if you can't make it (be sure to tell them it's on behalf of Chris' Photo Geek Christmas Party) Major credit cards and cheques accepted. Finger food and hors d'oeuvres are included and there will be a cash bar (please drink responsibly).
There will be ample time to mingle, meet my friends and contacts and share some of your images with others, so feel free to bring prints, iPads or laptops with your favourite images to share. I hope to see you there and PLEASE SPREAD THE WORD!

Read more about it HERE

Second Annual Photo Geek Christmas Party

 American Bald Eagle SNOWFLIGHT (Haliaeetus leucocephalus, Pygargue à tête blanche, BAEA) Kachemak Bay, Alaska ©Christopher Dodds All Rights Reserved. Canon EOS Canon EOS 1DsMKIII, 500mm F4 L IS  ISO 800, f/6.3 @ 1/1,600s Manual mode. Full Frame. Click HERE to order a print or license image for publication.

Here's a favorite Bald Eagle image from my last Eagles Galore Photo Safari Workshop in Kackemak Bay, Alaska. I love being out in bad weather; this one hand-held from a boat in a blizzard. Fun times! Modern digital cameras have multiple, user selectable, auto-focus zones; here, I selected a point on the left of center, as I knew the Eagle was flying from my left and I wanted some space in the frame for it to fly into as a compositional element. Give it a try next time you are out with your camera.


I'm hosting my second annual PHOTO GEEK CHRISTMAS PARTY!

It's a PARTY with a CAUSE!


Le Nichoir Wild Bird Rehabilitation Centre was founded in 1994 as a non-profit organization (#894112358RR001) and is located in Hudson, Quebec. Le Nichoir is a licensed centre, part of a community of North American rehabilitators, supported by the International Wildlife Rehabilitation Council (IWRC) and the National Wildlife Rehabilitators Association (NWRA). Their mission is to conserve wild birds as part of our natural heritage.
Le Nichoir provides proper care and treatment for injured or orphaned wild birds and releases them back into their natural habitat. Le Nichoir also provides advice and information about wild birds and their environment through educational programs and annual public events. In 1995 Le Nichoir received 478 birds. Today, it is the largest rehabilitation centre for songbirds in Canada. They admit more than 1400 wild birds and receive 5000 telephone calls each year. There is no charge asked for any of their services, but they need our help! It costs about $6,000.00 each for the six wildlife biology students who work tirelessly for the summer at minimum wage. Officially, I hope to raise $1,500.00, but secretly, I'd love raise $3,000.00, so please help this worthy cause!

Join me, Canadian nature photographer Christopher Dodds, on November 30, 2011 at 7:30 PM at the Hudson Village Theatre (28 Wharf Road, Hudson, QC   J0P 1H0) for an hour and a half long slideshow presentation to benefit this great cause which is so close to my heart. The show is designed to be entertaining and informative to all; nature lovers and photographers alike. Stories of adventure, natural history facts and information are all on the menu and this show is designed to offer helpful tips & techniques sure to improve your photography efforts with everything from a camera phone, point & shoot camera or professional SLR camera system. Over one hundred of my images will be projected, many unseen.  Everyone is welcome!
Hurry! Only 148 seats. Tickets are only $15.00 each and are available for advance purchase only - every penny is collected by, and goes to Le Nichoir. Please call or email Le Nichoir (communication@lenichoir.org 450-458-2809) to secure your tickets, or make a donation if you can't make it (be sure to tell them it's on behalf of Chris' Photo Geek Christmas Party) Major credit cards and cheques accepted. Finger food and hors d'oeuvres are included and there will be a cash bar (please drink responsibly).
There will be ample time to mingle, meet my friends and contacts and share some of your images with others, so feel free to bring prints, iPads or laptops with your favourite images to share. I hope to see you there and PLEASE SPREAD THE WORD!

Color management & i1 Photo Pro mini-review

Atlantic Puffin Portrait (Fratercula arctica, Macareux moine, ATPU) île aux Perroquets, Réserve de parc national du Canada de l'Archipel-de-Mingan, Quebec, Canada. Image Copyright ©Christopher Dodds All Rights Reserved. Canon EOS 1DMKIV, 800mm f/5.6 L IS, Canon Extension Tube EF 12 II & Canon Extension Tube EF 25 II Tripod & Jobu Jr. 3. Think-Tank Photo Hydrophobia 300-600. ISO 800, f/5.6 @1/500s Manual mode. Full Frame. CLICK HERE TO PURCHASE A PRINT or LICENSE IMAGE FOR PUBLICATION.

Color Management & i1 Photo Pro Mini-review

Achieving consistent color from camera to monitor to print and projector is easier than ever with X-Rite's new and improved X-Rite i1Photo Pro . I have owned a GretagMacbeth Eye One Photo since I switched to digital with the purchase of my Nikon D1X (2001). It seems like a lifetime ago now. I realized that I wanted my prints to mach my screen, and my projected images to match my prints. So much has changed since then; I switched to Canon when they released the EOS 1D Mark II and GretagMacbeth was bought by X-Rite.

I was thrilled to learn recently that X-Rite had released the all-new X-Rite i1Photo Pro and was offering upgrade kits to existing users. I quickly got an upgrade for review and am delighted. The heart of the system; the spectrophotometer remains best in class, so it's easy to see why you need only upgrade the software, a few accessories and the bonus is finally having a proper case to keep everything together and safe.

With X-Rite i1Photo Pro you can quickly and easily create custom profiles for cameras, monitors, digital projectors and RGB printers, ensuring color accuracy from capture to output. With the new i1Profiler software, which combines the best features of its predecessors i1Match, ProfileMaker and MonacoPROFILER software, users can choose between a 'basic', wizard-driven interface, or an 'advanced' user-driven interface to create high quality, precise, custom color profiles.

With an all-new user interface, i1Profiler offers an unprecedented level of flexibility to address the needs of a photographer's workflow. i1Profiler seamlessly combines the ease of use of the wizard driven interface found in the basic mode, and the flexibility of the menu driven user interface found in the advanced mode. Whether a novice, expert or somewhere in between, i1Profiler easily adapts to any skill level and workflow needs, while maintaining the ability to produce outstanding profile quality results.

All-in-all, I don't think there is a better color management solution on the market for a photographer wanting to deliver consistent color results over various output mediums and devices.

Be sure to support this site and order yours here: X-Rite i1Photo Pro Professional Color Management for Photographers

HALF is TWICE as good - JOBU Jr 3

Burrowing Owl PORTRAIT  (Athene cunicularia, Chevêche des terriers, BUOW) Cape Coral, Florida. Image Copyright ©Christopher Dodds All Rights Reserved. Canon 1D MK IV, 500mm F4 L IS, 2X Teleconverter III & Canon 25mm Extension Tube. Jobu Jr. 3 & tripod. ISO 400, F11 @1/320s Manual mode. CLICK HERE TO PURCHASE A PRINT or LICENSE IMAGE FOR PUBLICATION

HALF is TWICE as good!

I was sitting here, in front of my computer, thinking of concepts to help remind people how to make better images, when it suddenly dawned on me: HALF is TWICE as good! Well, it’s no brilliant marketing slogan, but as a concept, I think it works.

Take half the pictures, but spend twice the time composing each one; your images will, most likely, be twice as good. It's a simple principle; make the image, instead of taking the picture.

Take half the number of trips, and spend twice as much time photographing in each place; sounds simple enough, right? But imagine how much more you will learn about the place, the culture, your subject and it’s behavior. If you are shooting landscapes, you will learn about the weather, the light and how the light interacts with the scene. If you are shooting wildlife, then you will develop an intimate knowledge of your subject, it’s behavior and it’s habits. Guess what? You will probably make images that are; you guessed it, twice as good!

Keep half the pictures and those you keep will be twice as good? Well, I’m not certain that this one is true, but I am always telling people to edit, edit, edit! People tend to take so many pictures these days, and I cringe every time someone wants to show me pictures from a trip, birthday or event; they want me to sit there and see all of them! For crying out loud people: keep the best and trash the rest!

My new LOVE: Meet JR.

I confess: I’ve been using the Jobu JR. 3 Compact Gimbal Head since April, and although I got one to reduce space and weight while travelling on aircraft, I haven’t been able to use anything else since! As you all know, I have owned, and used, a Wimberley gimbal head forever. I have tried many other makes and models of gimbal head that are smaller and lighter, but never found anything that I could even settle for. The Jobu Jr. 3 was designed for smaller lenses like the 70-200mm f/2.8, 300mm f/2.8, 100-400mm and 400mm DO, etc., but I have been using mine exclusively since I left for Texas in early April; It works remarkably well with my 500mm F4 IS L, even when working with the 1.4 or 2X extenders! The level of customer service, after sale support and engineering expertise from Jobu is unmatched in the industry today!

At HALF the size and less than HALF the weight of the Wimberley Head II (23 ounces or .65 kilograms VS. 60 ounces or 1.4 kilograms), the Jobu Jr. 3 has become my main tripod head!

I have also developed a love for their one piece flash bracket, so be sure to check that out as well.

I'm thrilled to announce that I am an official distributor of the Jobu line, and have forged a terric partnership with them. Jobu heads, flash brackets and assorted items will be available for you to test-drive and purchase on all of my Canadian workshops, presentations and lectures.

Workshop updates & FREE JOBU JR.3!:

This is a tough business, I have had a few people cancel at the last minute due to illness recently, leaving some new openings is what were full workshops.

Gannets Galore on Bonaventure Island June 15-17, 2011 - 2 spots due to illness.

Puffins Galore July 1 to 3, 2011 - 2 spots due to illness.

Puffins Galore July 5-7, 2011 - 1 spot due to illness

When it's Bright; Work Tight - American Oystercatcher

American Oystercatcher PORTRAIT  (Haematopus palliatus, Huîtrier d'Amérique, AMOY)  Fort DeSoto Beach, Tierra Verde, Florida. Image Copyright ©Christopher Dodds All Rights Reserved. Canon 1D MK IV, 500mm F4 L IS, 2X Teleconverter III & Canon 25mm Extension Tube. ISO 400, F10 @1/800s Manual mode. CLICK HERE TO PURCHASE A PRINT or LICENSE IMAGE FOR PUBLICATION

When it's bright; work tight!

Let's face it; as much as we might like it, the light isn't always soft and golden. Those times I find myself out with my camera in bright, harsh light, I always work close with big glass to make the best of what light there is. The American Oystercatcher is a spectacular bird, one that's hard to stay away from when on a beach with my camera. I arrived on the beach early to scout out what was worth my time, and discovered the most co-operative pair of Oystercatchers standing against strong, sand laden winds. I immediately noticed their beaks were covered with sand, but also saw that I could manage to get a nice background by getting down low, and including the out of focus grass covered dune in the background. Sand, like snow, reflects a lot of light back into the shadowed areas of the image, reducing contrast and opening-up details that otherwise would be lost. Rather than passing up the shot, I worked what was there.

Later that same day, I rediscovered the same birds I had worked earlier, this time presenting with the sand rinsed off their beaks, and in spectacular light.


American Oystercatcher SUNSET PORTRAIT  (Haematopus palliatus, Huîtrier d'Amérique, AMOY)  Fort DeSoto Beach, Tierra Verde, Florida. Image Copyright ©Christopher Dodds All Rights Reserved. Canon 1D MK IV, 500mm F4 L IS, 1.4X Extender III & Canon 25mm Extension Tube. ISO 400, F10 @1/500s Manual mode. CLICK HERE TO PURCHASE A PRINT or LICENSE IMAGE FOR PUBLICATION

American Oystercatcher SUNSET SURF  (Haematopus palliatus, Huîtrier d'Amérique, AMOY)  Fort DeSoto Beach, Tierra Verde, Florida. Image Copyright ©Christopher Dodds All Rights Reserved. Canon 1D MK IV, 500mm F4 L IS, 1.4X Extender III . ISO 400, F10 @1/500s Manual mode. CLICK HERE TO PURCHASE A PRINT or LICENSE IMAGE FOR PUBLICATION

Histogram, Details and Viveza 2.0

Northern Gannets PREENING (Morus Bassanus, Fou de Bassan, NOGA) Parc national de l'Île-Bonaventure-et-du-Rocher-Percé, Bonaventure Island, Quebec. Image Copyright ©Christopher Dodds All Rights Reserved. Canon EOS 1DsMKIII, 500mm F4 L IS,  Tripod & Wimberley Head II. ISO 250, F20 @1/320s Manual mode. CLICK HERE TO PURCHASE A PRINT or LICENSE IMAGE FOR PUBLICATION

Chris, I am a huge fan of your work and consider it the very best bird photography out there; bar none! I have been a photographer for 30 years, and wonder if you would share how you achieve such amazing details in the whitest feathers; the details that seem impossible for me to capture. I am always blown-away when I visit your works, and I delight in every moment on your site. Many thanks and keep up the great work - Art W.

Art, thank you for your kind words. I will try to keep my answer simple.

The key to getting the most out of your digital camera is exposing the image correctly, as you probably know. I expose “to the right”, but make a huge effort not to have any data touching the right side of the histogram.

With only a little experience, a quick glance at the histogram can tell you if the exposure is correct, and give you and idea of the general appearance of the image; are the highlights blown? Is there enough shadow detail? – It’s all in the histogram.

 The histogram is a tool available on most digital cameras. It is a graph, which maps the luminosity (or brightness) values of your image, from black at left to white at right. The number of pixels at any given value are represented by the height of that value’s column. Once accustomed to reviewing the histogram, analyzing the data contained in it becomes second nature. It is the only way to know if you have exposed your image properly.

I’ll save you the boring science and details, but the idea of exposing to the right is a theory that capitalizes on the fact that the right side of the histogram contains more data than the left; there is more data in the whites, than in the blacks – much more. By overexposing the image slightly, and adjusting its brightness (or exposure) while converting the RAW image after capture, there is more data or details in the image. Conversely, if you were to underexpose an image and try to brighten the image after capture, then you would introduce noise, rather than detail, which was not captured in your RAW file. You have to be very careful not to push the whites up against the right of the histogram, or you risk loosing detail.

A good workflow post capture is another critical key to maximizing any detail contained in the RAW image. I typically use Photoshop to adjust contrast, boost saturation and add a little sharpness. My master .tiff is not created until I use Nik Software's Viveza 2. Viveza 2 is powerful engine that (among other things) adds targeted tonal contrast to any whites via the structure slider – be careful, it’s easy to overdo the adjustment.


Image of Histogram of the PROPERLY EXPOSED image above on the camera's LCD screen - The data is to the right of the histogram, but does not show any sign of over-exposure; there is no data touching the right edge of the graph. 


Histogram of the same image when opened in Adobe Camera Raw for conversion without any adjustments.