Atlantic Puffin Portrait in the fog

Atlantic Puffin PORTRAIT in the fog (Fratercula arctica, Macareux moine, ATPU) Mingan Archipelago National Park Reserve, Quebec, Canada. Image Copyright ©Christopher DoddsSony Alpha a9 Mirrorless camera & Sony FE 600mm f/4 G Master OSS Lens  with Sony FE 2X Teleconverter @1,200mm ISO 1,600, f/8 @ 1/400s Manual exposure. Full Frame.

Here's another Atlantic Puffin portrait from my recent PUFFINS GALORE DELUXE WORKSHOP. We woke to fog on several mornings and there were Puffins perched everywhere. We used the park information signs as blinds, and were able to spend hours making portraits at just about point blank range. After making the standard tight head shots, I always explore more interesting poses while working at minimum focusing distance with an extremely limited depth of field.

Brown Bear Cub Portrait


Coastal Brown Bear Spring Cub PORTRAIT (Ursus arctos) Hallo Bay, Katmai National Park, Alaska. Image Copyright ©Christopher DoddsSony Alpha a7R III Mirrorless camera & Sony FE 400mm f/2.8 G Master OSS Lens  with Sony FE 2X Teleconverter @800mm ISO 1,000, f/8 @ 1/400s Manual exposure.

Another spring cub from my recent Coastal Brown Bear boat trip in Katmai National Park, Alaska. Getting down low below eye level makes for a much more intimate portrait. Not always easy when the subject is in long grass, so having this cub stand on the edge of it's day bed looking directly at us for a fraction of a second was a gift - smile.

Great Grey Owl Portrait a la Sony a9 and 400mm f/2.8 G Master lens with 2X teleconverter

Great Grey Owl PORTRAIT (Strix nebulosa, Chouette Lapone, GGOW) ©Christopher Dodds  Sony Alpha a9 Mirrorless Camera & Sony FE 400 f/2.8 GM OSS with Sony FE 2X Teleconverter ISO 3,200, F5.6 @ 1/3,200s Manual Exposure mode. Join me for my winter owl workshops this January/February to learn More CLICK HERE.

In case you missed it, I wrote a mini-review of the new Sony FE 400 f/2.8 GM OSS in a recent blog post HERE.

Here's a portrait of a Great Grey Owl with the Sony Alpha a9 Mirrorless Camera & Sony FE 400 f/2.8 GM OSS with Sony FE 2X TeleconverterIt has been rather wet and rainy lately. The dehaze filter in Photoshop worked well to negate the heavy rain and ground fog which kept most people inside - smile.

Join me for my winter owl workshops this January/February to learn More CLICK HERE.

Parakeet Auklet PORTRAIT

Parakeet Auklet PORTRAIT (Aethia psittacula, Starique perroquet, PAAU).  Saint Paul Island, The Pribilof Islands in the Bering Sea, Alaska, USA. Image Copyright ©Christopher DoddsSony Alpha a9 Mirrorless Camera & Sony FE100-400 F4.5-5.6 G Master OSS with 2X Tele-extender @ 800mm. Full frame image. ISO 2,000, f/11 @ 1/2,500s Manual exposure mode.

Black and White Portrait of a Northern Gannet

Northern Gannet B&W PORTRAIT (Morus bassanus, Fou de Bassan, NOGA) From my Gannets Galore Workshop on Bonaventure Island at Parc National de l'île Bonaventure-et-du-Rocher-Percé, Quebec, Canada. Image Copyright ©Christopher Dodds. Sony Alpha a9 Mirrorless Camera & Sony FE100-400 F4.5-5.6 G Master OSS @ 400mm and minimum focusing distance. Full frame image. ISO 800, f/5.6 @ 1/4,000s Manual exposure mode.

Atlantic Puffin Portrait a la Sony a9 and Sony 100-400 G Master Lens

Atlantic Puffin PORTRAIT (Fratercula arctica, Macareux moine, ATPU) From my DELUXE PUFFIN WORLKSHOP in Mingan Archipelago National Park Reserve of Canada, Réserve de parc national du Canada de l'Archipel-de-Mingan, Quebec, Canada. Image Copyright ©Christopher Dodds. Sony Alpha a9 Mirrorless Camera & Sony FE100-400 F4.5-5.6 G Master OSS @ 400mm @ minimum focusing distance. Full frame image (top to bottom; left and right cropped to square aspect ratio). ISO 400, f/16 @ 1/200s Manual exposure mode.

VERO

I have download the new media sharing app Vero; It's kind of like Instagram, but without the advertining. Anyway, I am learning the ropes and do hope you join my network at VERO. I don't seem to be able to locate a specific URL which would point to my page, so please do search for me, Christopher Dodds, and join my network to see what all the fuss is about:

Bald Eagle STARE

Immature American Bald Eagle STARE (Hailiaeetus leucocephalus, Pygarge a tete blanche, BAEA) Kachemak Bay (near Homer), Alaska ©Christopher Dodds All Rights Reserved. Canon EOS 1DX, 100-400mm f/4.5-5.6 L IS II USM @400mm and Canon EF 25mm Extension tube II. ISO 400, f/13 @ 1/400s Manual. PURCHASE A PRINT or LICENSE IMAGE FOR PUBLICATION HERE.

I always carry extension tubes so I can physically connect both my Canon Extender EF 1.4X and 2X (Version III) when I want a really close image, they also reduce the minimum focusing distance when I get really close. During my Bald Eagles Galore Photo Tour in March, I used the new Canon 100-400mm II lens for most of the trip. When this immature Bald Eagle landed right beside me, I instinctively crouched-down, and attempted a really close portrait, but realized that the bird had landed slightly within the minimum focusing distance of the lens; it was closer than 38.4" or 980mm (do note this is the distance from the sensor, not the front element of the lens). I quickly added my Canon  EF 25mm Extension Tube to be able to focus without moving away from the inquisitive Eagle.

Creating Intimate bird portraits

Crested Auklet Portrait (Aethia cristatella, CRAU) Saint Paul Island, The Pribilof Islands in the Bering Sea, Alaska. Image Copyright ©Christopher Dodds. Canon 1DX, 600mm F4 L IS II , 2X Teleconverter III & 25mm Extension Tube, Jobu Designs Algonquin Tripod & Jobu Jr. 3 ISO 2,500 f/16 @ 1/500s Manual Mode.  PURCHASE A PRINT or LICENSE IMAGE FOR PUBLICATION HERE.

Here's an intimate portrait (of what has to be my favorite bird) from my recent Saint Paul Island Workshop; the Crested Auklet. Getting close and isolating the subject against the dark cliffs requires lots of patience, but the real secret is simply approaching the cliff edge slowly so they don't flush before you even know they are there. Always remember to use a small enough aperture to maximize the depth of field, which is extemely narrow at the lens/extender/extension tube minimum focusing distance. Choose your shutter speed to freeze the birds sudden movements and any feathers blown around by the wind if there are any.

Using a sturdy tripod with a good tripod head and micro-calibrating your camera are, of course, the foundation to crisp and sharp images.

Bird Photography Quick Tip ANGLE OF VIEW

Razorbill VERTICAL PORTRAIT (Alca troda, petit pingouin, RAZO) Mingan Archipelago National Park Reserve of Canada, Réserve de parc national du Canada de l'Archipel-de-Mingan, Quebec, Canada. Image Copyright ©Christopher Dodds. Canon EOS Canon EOS 1DX, 600mm F4 L IS II, 2X Extender III, Canon 25mm Extension Tube II, Canon 12mm Extension Tube II, Canon 1.4X Extender III. Tripod & Jobu Jr. 3 ISO 2,500s, f/16 @ 1/250s Manual mode & manual focus. PURCHASE A PRINT or LICENSE IMAGE FOR PUBLICATION HERE.

Quick Tip

Here's a simple Razorbill portrait which also uses the same technique as described in my last post. Want to know the simplest, but most often missed trick to creating engaging and intimate portraits in nature? Simply get down to, or below, your subject's eyes; it's a simple and effective way to connect the subject to the viewer.


TESTIMONIALS


I found Chris via the strong images on his web site.
 
Having now taken two of his photo workshops, I have seen a significant improvement in my images due to improved capture and post processing techniques.  Having taken many other wildlife photo workshops, Chris stands out for his top notch instruction. His workshops provide many excellent photo opportunities.
 
If you are serious about your photography and want to get better, Chris can help you in many ways.  He is willing and able to explain what he is doing and why he is doing it.  He emphasizes not only the vision but also the execution in the field and the post processing.  
 
It was fun shooting with and learning from Chris.  I give a hearty recommendation to anyone considering a photo workshop with Chris, a recommendation I plan to follow.

Carl Zanoni Connecticut, USA


I want to thank you again for one of the best photo workshops I have ever attended.  The trip to Northern Quebec to photo Puffins was truly an adventure.  I was very impressed with the planning you put into ever aspect of the tour.  Everything ran smoothly and the opportunity to photograph these amazing birds was an experience I will not soon forget.  I also appreciate the time you spent with each of us to make sure we got the best possible result from whatever equipment we were using.  Your technique for reducing noise while maximizing detail when shooting at high ISO's was particularly helpful.  No one had ever explained the science behind this and now it makes a lot of sense.  This trip was everything I had hoped for and I look forward to joining you again in the future.

Chuck Raines Camarillo, California

Polar Bear Portrait - Bear Safety


Polar bear PORTRAIT (Ursus maritimus, Ours Blanc) at Cape Tatnam Wildlife Management Area (south of Wapusk National Park) along the shores of the Hudson Bay in northern Manitoba. Image Copyright ©Christopher Dodds. Canon 1D mark IV, 500mm F4 L IS , 2X Teleconverter III, Tripod & Jobu Jr. 3 (with Deluxe Swing-arm upgrade) ISO 1,600 f/8 @ 1/1,000s Manual Mode. PURCHASE A PRINT or LICENSE IMAGE FOR PUBLICATION HERE.

Here's a portrait of a Polar Bear from my recent wet and muddy adventure to the remote shores of the Hudson Bay. We spent considerable time finding a spot that offered some autumn colors in the background, and were thrilled with the results of our efforts.

There's been a lot of talk about recent photo encounters gone wrong that have resulted in deaths. Please use caution when approaching wild animals; I wouldn't dream of going close to Polar Bears without an expert guide to look out for me and the bear I am photographing. Even though I have spent countless hours studying bears, am totally comfortable with them and understand their body language, I still hire an expert. It's just a matter of common sense.

Tufted Puffin Safari Workshop Update


Tufted Puffin PORTRAIT (Fratercula cirrhata, Macareux huppé, TUPU) Saint Paul Island, The Pribilof Islands in the Bering Sea, Alaska. Image Copyright ©Christopher Dodds. Canon 1D MK IV, 500mm F4 L IS , 1.4X Teleconverter III & 25mm Extension Tube, Tripod & Jobu Jr. 3 ISO 400 f/9 @ 1/400s Manual Mode. Fill flash Canon Speedlite 580EX II with Better Beamer in manual mode. PURCHASE A PRINT or LICENSE IMAGE FOR PUBLICATION HERE.


Upcoming workshops:  http://bit.ly/X7GaVv

Better Bird Photography Portraits

Parakeet Auklet Portrait (Fratercula cirrhata, Macareux huppé, TUPU) Saint Paul Island, The Pribilof Islands in the Bering Sea, Alaska. Image Copyright ©Christopher Dodds. Canon 1D MK IV, 500mm F4 L IS , 2X Teleconverter III & Canon Extension Tube EF 25 II, Tripod & Jobu Jr. 3. Full Frame. ISO 400 f/14 @ 1/200s Manual Mode. Fill flash Canon Speedlite 580EX II with Better Beamer @ -1&2/3. PURCHASE A PRINT or LICENSE IMAGE FOR PUBLICATION HERE.

Better Bird Photography Portraits

Bird photographers are often guilty of spending all of their time photographing the action and drama of birds in flight, and often skip the investment of the time required to create great portraits. I sell far more static portraits than action, or "birds-in-flight" images. Don't get me wrong; Birds-in-flight are my favorite challenge, just remember to diversify your images by going for portraits as well. It can be quite rewarding to see and study the intricate details revealed in a good portrait - check-out the unique (and cool) bill of this Parakeet Auklet. Here's a few tips to help you out next time you are out and about with your camera.

  • Try to get closer your subject without disturbing it. This one sounds easy, but wild birds are wild, take your time and avoid walking or crawling directly at your subject. Take your time and make regular stops to let your subject accept you.
  • Use a long lens and extender to help you get close without disturbance, and to take advantage of the long focal length to help blur the background and isolate the subject. I often add an extension tube to get even closer.
  • Try to choose an interesting background. Finding an interesting background will help you stand-out among the many. In this Parakeet Auklet portrait, I carefully chose the out of focus lichens as my background to set it apart from the typical blue sky of a clear day, or the white, or high-key, background of a cloudy day.
  • Invest in the composition. Carefully compose your portrait so that it is visually pleasing. Try to avoid a boring compositions with centred subjects. Compose a full frame image in the camera - to get the most pixels on your subject and as a challenge to get better and make better image in the camera.
  • Wait for the pose and head angle. All to often, I see portraits that resemble snap shots. This is often the result of poor head angle or a bad pose. I try to get the subject and it's head parallel to my sensor for most head shot type portraits, but do sometimes strive for the head-on look; the latter often in overcast conditions to avoid harsh shadows.
  • Choose your light. On clear days, choose the golden hours of sunrise or sunset to get the soft warm tones without harsh shadows. Be sure to point your shadow directly at the bird when the sun rises and gets harsher, and be sure the near side of the face is illuminated and there is a catch-light in the eye. Bright, cloudy and overcast conditions are great for digital portraits; there's no shadows to worry about, and we can photograph all day long. Avoid flash when the light is golden, but do try to add a kiss of fill flash when its overcast.
  • Be sure the image is sharp and properly exposed. Sounds easy enough, but try to remind yourself to use good long lens technique, a good tripod head and a sturdy tripod.


Second Annual Photo Geek Christmas Party

More prizes have arrived from these great sponsors! Jobu Designs (makers of my favorite Gimbal Head - the Jobu Jr. 3), FirstPass Image downloader & Editor, Think-Tank Photo, Cotton Carrier and DigiMarc for Images have all jumped on-board and offered tons of prizes to show their suppoort for my Second Annual Photo Geek Christmas Party. I expect other sponsors to make offerings and encourage contributions - email me if you would like to donate and promote your product chris(at)chrisdoddsphoto(dot)com

Join me, Canadian nature photographer Christopher Dodds, on November 30, 2011 at 7:30 PM at the Hudson Village Theatre (28 Wharf Road, Hudson, QC   J0P 1H0) for an hour and a half long slideshow presentation to benefit this great cause which is so close to my heart. The show is designed to be entertaining and informative to all; nature lovers and photographers alike. Stories of adventure, natural history facts and information are all on the menu and this show is designed to offer helpful tips & techniques sure to improve your photography efforts with everything from a camera phone, point & shoot camera or professional SLR camera system. Over one hundred of my images will be projected, many unseen.  Everyone is welcome!
Hurry! Only 148 seats. Tickets are only $15.00 each and are available for advance purchase only - every penny is collected by, and goes to Le Nichoir. Please call or email Le Nichoir (communication@lenichoir.org 450-458-2809) to secure your tickets, or make a donation if you can't make it (be sure to tell them it's on behalf of Chris' Photo Geek Christmas Party) Major credit cards and cheques accepted. Finger food and hors d'oeuvres are included and there will be a cash bar (please drink responsibly).
There will be ample time to mingle, meet my friends and contacts and share some of your images with others, so feel free to bring prints, iPads or laptops with your favourite images to share. I hope to see you there and PLEASE SPREAD THE WORD!

Read more about it HERE

The Fundamentals of Photography: Understanding the Light Meter

Siberian (Amur) Tiger Portrait Panthera tigris altaica (Tigre de L'Amour ou Tigre de Sibérie). CAPTIVE ANIMAL. Image Copyright ©Christopher Dodds  www.chrisdoddsphoto.com All Rights Reserved. Canon EOS 1DsMKIII, 500mm F4 IS, 2X II Tele-converter Gitzo 1325 Tripod with Wimberley Head II. ISO 800, F8 @ 1/160s Manual mode. Ambient exposure using hand-held Sekonic L-358 Light Meter. Full Frame. CLICK HERE TO PURCHASE A PRINT or LICENSE IMAGE FOR PUBLICATION.

The in-Camera Light Meter:

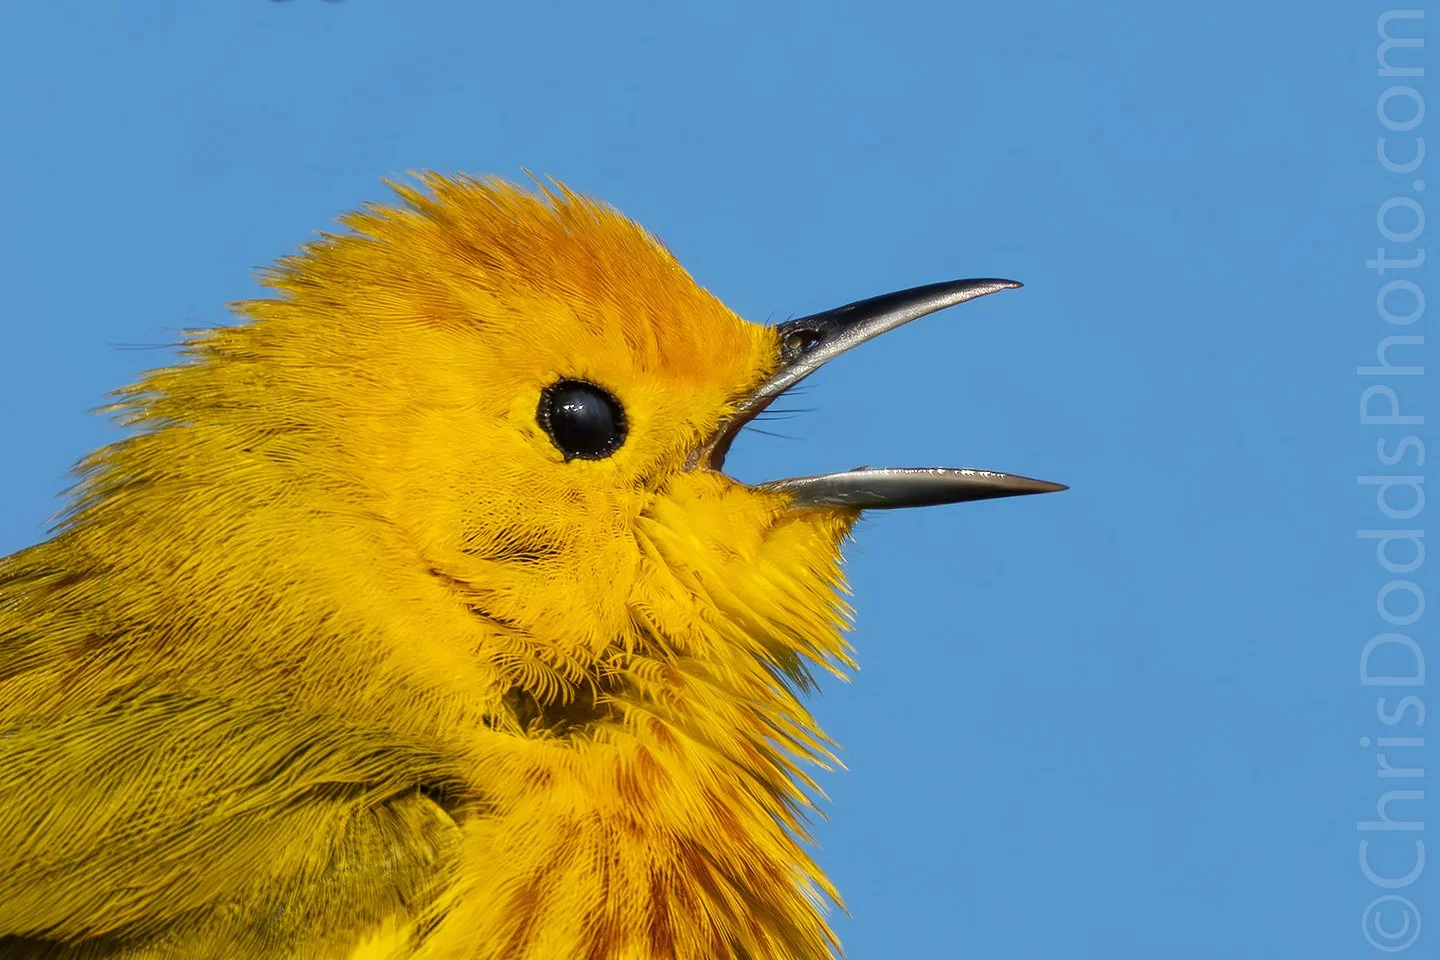
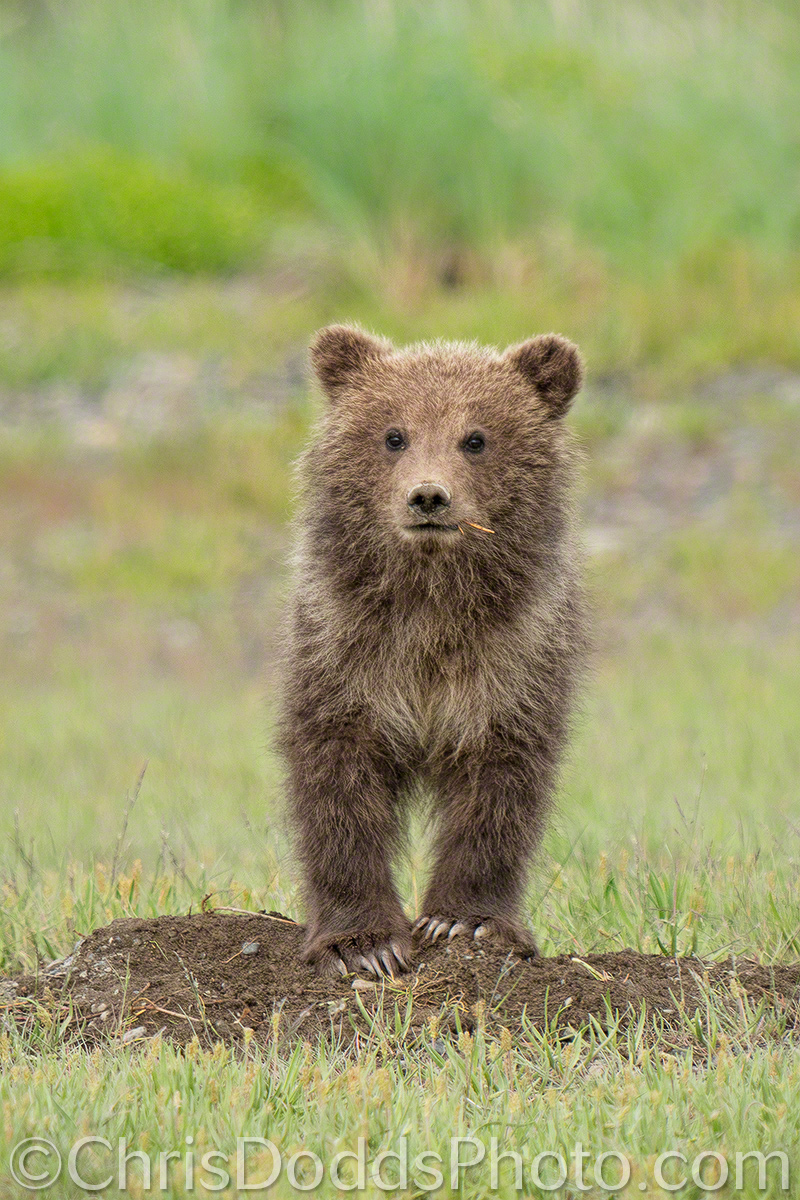
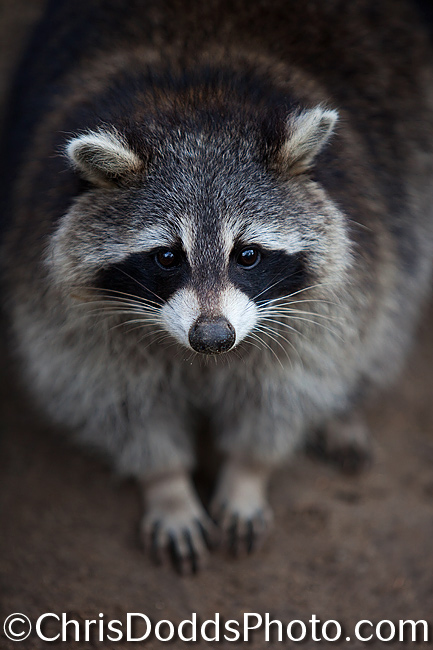
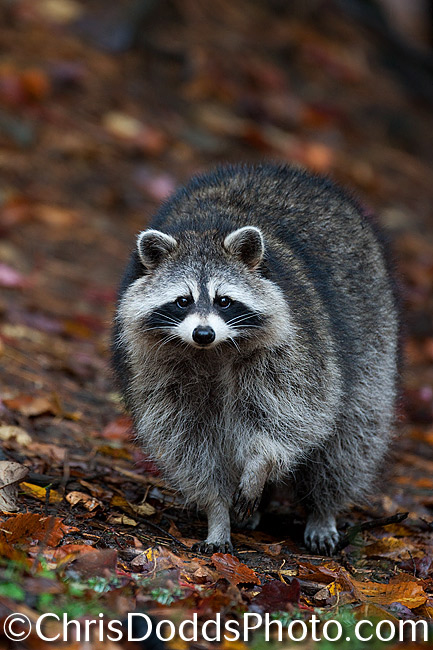
Pretty much all digital cameras sold today include a built-in REFLECTIVE light meter. The volume of light measured by a reflective light meter varies relative to the color (or reflectance) of the subject, the background (and the subjects distance from it) and the chosen metering mode (or pattern); A Snowy Owl in a bright, snowy field reflects more light than a black bear on a dark, wet rock. Think of it this way: pure white reflects nearly all of the light that strikes it, and pure black reflects virtually none of the light that strikes it.
Left to it’s own devises, a digital camera in one of it’s automatic modes (Program, Aperture Priority or Shutter Priority) will use it’s built-in computer  processor and programmed algorithms to determine the appropriate exposure settings such as shutter speed, f-stop (or aperture) and ISO to render the scene at what it thinks should be 18% grey, or a mid-tone (exactly mid way between the blackest black and the whitest white). The problem is a simple one; most cameras assume that everything they photograph reflects 18% of the light that falls onto them. Not everything we see or photograph is a mid-tone; with this method, we need to compensate to achieve the correct exposure for anything that is not a mid-tone; The Snowy Owl in a Snowy field we talked about earlier would be about two stops under-exposed, so we need to add about two stops of light to the metered reading to achieve the correct exposure. The black bear on the dark, wet rock will be about two stops overexposed, so we have to remove about two stops of light from the metered reading to achieve the correct exposure. A picture of the green grass on your front lawn is a middle tone and requires no compensation to achieve the correct exposure.
The problem gets much bigger when your subject starts to move from one colored background to another, or, moves closer or further away; can you imagine dialing in the correct exposure compensation, on the fly, as a white bird flies from a blue sky background to a dark cliff face background as it gets bigger in the frame while flying toward you? (smile) ... I didn’t think so.

Hand-held Light Meter:

The single best teaching aid that I know of is a hand-held light meter; students wanting to learn exposure theory tend to improve the exposure accuracy of their captures almost instantly when handed a hand-held light meter.
In it’s simplest form, a light meter measures light;  We’ve discussed how your camera uses it’s meter to measure the light that is reflected from your subject, now let’s talk about how to measure the ambient light that falls onto your subject by using a hand-held light meter. If we can measure the AMBIENT light that falls onto the subject, we can successfully expose for the light (not the subject), and capture colors and tones as our eyes see them; white looks white, black looks black and middle tones still look like middle tones; just the same as our eyes see them. As long as you are in the same light as your subject, and the volume of light does not change between measurement and capture, you can take a reading and lock and load the chosen ISO, F-stop and shutter speed. Just like the sunny F/16 rule in my last post, you should still use your camera’s histogram to tweak the exact exposure to taste, and you should expose to the right and maximize that right most fifth of the histogram, as it contains 50% of the data in a digital capture. I typically add light to extract maximum detail from very dark subjects and remove light from very bright subjects, all the while ensuring I’m not clipping unrecoverable highlight detail.
On a clear day, from two hours after sunrise, until two hours before sunset, the light remains constant (provided it doesn't get cloudy, of course). If your subject flies from the blue sky to a dark cliff face, there is no need to make adjustments to your chosen exposure settings; the subject will be correctly exposed in manual mode.

A major difference between the old film days and digital is that instead of exposing for shadow detail on film, we now expose for the highlight. To ensure a correct exposure for the highlights, simply turn the meter’s dome toward the light source. To take a reading for the underside of a bird flying over your head, turn the dome toward the ground and to establish the correct reading for  a subject in the shade, point the dome toward the light source and use your hand to shade the dome. It won’t take long to learn all about light, it’s volume and the correct exposure relative to it.

There are many light meters to choose from, but I find the best value to be the Sekonic L-358 Flash Master Light Meter

Photographing the Common Raccoon with wide-open & fast lenses.

Common Raccoon  (Procyon Iotor, raton laveur) Quebec, Canada ©Christopher Dodds  www.chrisdoddsphoto.com All Rights Reserved. Canon EOS 5D Mark II, 70-200mm @ 195mm. ISO 400, F2.8 1/1000s Manual Mode.

Pro Tip: I'm amazed at the number of photographers out in the field today, and even more amazed at the inventory of professional camera gear they cart around with them. Many pay the hefty price, and carry the extra weight of fast lenses, rarely using them at their intended extremes. Try using your F2.8 lenses at F2.8, then try them at F16; while it is true that they are not quite as sharp at F2.8 than, say F4.5, or F5.6, I would bet money that you can't tell the difference with a full frame Canon 1DsIII and all of the pixels it has to offer. Try using your depth of field (or lack of one) to hide or accentuate different features, or areas, of your subject. A shallow depth of field is especially useful when photographing captive animals: I can't tell you how sick I am of looking at "snapshot" style captive images from "serious" photographers - mostly the result of too much depth of field with cluttered backgrounds.

Common Raccoon  (Procyon Iotor, raton laveur) Quebec, Canada ©Christopher Dodds  www.chrisdoddsphoto.com All Rights Reserved. Canon EOS 1DsMark III, 500mm F4 IS. ISO 800, 1/160s F4 Manual Mode.

The black mask across their eyes and ringed tails are the keys to identifying the "backyard bandit" of Southern Canada and much of the United States. Raccoons, Procyon Iotor, are amazing climbers and swimmers that den in hollow trees and spend the night foraging for food. When these masked marauders move into the suburbs, they become experts at opening garbage cans (waste bins).
Not true hibernators, Raccoons do sleep through much of the winter. By February, the mating urge sends the males on a quest regardless of the weather. Nine weeks later most females have three to six kits.

Comments welcome & appreciated.