Design Images with Visual Impact

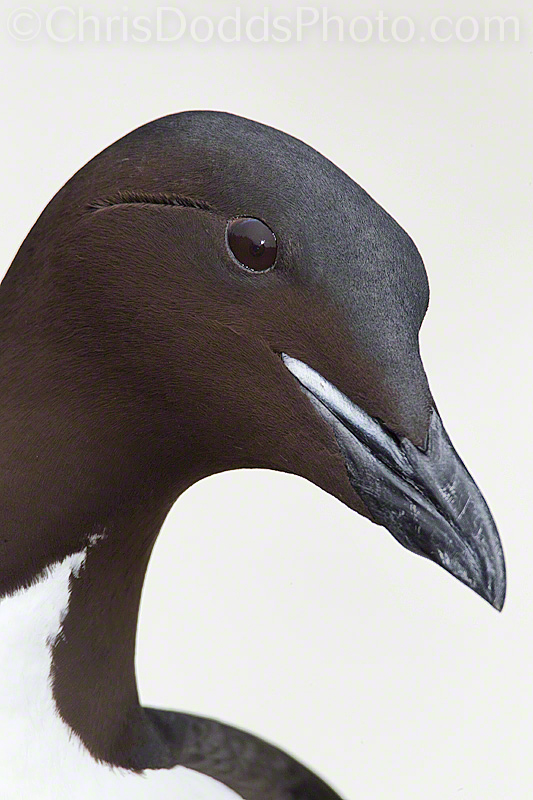
Thick-billed Murre or  Brünnich's Guillemot VERTICAL PORTRAIT (Uria lomvia, Guillemot de Brünnich, TBMU) Saint Paul Island, The Pribilof Islands in the Bering Sea, Alaska. Image Copyright ©Christopher Dodds. Canon 1D MK IV, 500mm F4 L IS , 2X Teleconverter III & , Tripod & Jobu Jr. 3 ISO 800 f/16 @ 1/320s Manual Mode. Fill flash Canon Speedlite 580EX II with Better Beamer @ -1/3. PURCHASE A PRINT or LICENSE IMAGE FOR PUBLICATION HERE.

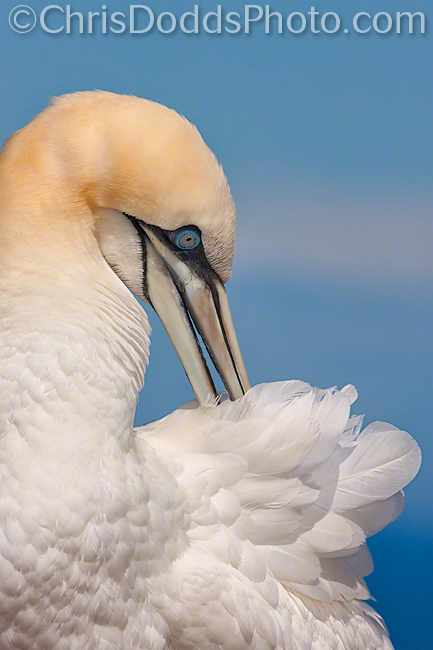
Here's a couple of images from my recent Saint Paul Island Photo Safari / Workshop. We arrived there as spring was late emerging from the worst winter anyone can remember and there were shaded areas at the bottom of cliffs where the snow had not melted yet. Although I generally don't like bright white backgrounds in images, I decided to make an exercise of designing some images with white backgrounds; there is a certain quality to the white out-of-focus snow that's much more appealing to me than that of a bright & backlit white sky.

I really like getting close and designing intimate portraits with big glass, so I installed my 500mm f/4 and a 2X extender and moved so close that I had to back away to the lens' minimum focusing distance. Once set-up on my tripod and Jobu Jr. 3 gimbal tripod head, I installed my Jobu off-camera flash bracket and my Canon 580 EXII flash.

Designing these tight, almost high-key portraits can be challenging, but careful attention to balancing all of the images' elements can be quite rewarding. Be sure to spend time studying the colours, tones and textures, (or, perhaps, the lack of colours tones and textures), the positive and negative space and the lines, shapes and where they lead the eye. Look for angles and perspective, and try to visualize how changing them by moving your angle of view will impact, help or hinder your image's design.

Black-legged Kittiwake PORTRAIT CALLING (Rissa tridactyla, Mouette tridactyle, BLKI) Saint Paul Island, The Pribilof Islands in the Bering Sea, Alaska. Image Copyright ©Christopher Dodds. Canon 1D MK IV, 500mm F4 L IS , 2X Teleconverter III & , Tripod & Jobu Jr. 3 ISO 800 f/16 @ 1/500s Manual Mode. Fill flash Canon Speedlite 580EX II with Better Beamer @ 0. PURCHASE A PRINT or LICENSE IMAGE FOR PUBLICATION HERE.

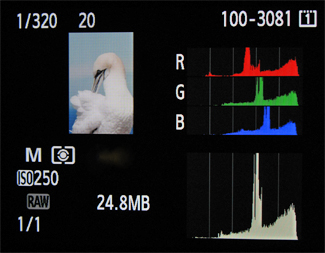
Be sure not to overlook the creative element of your exposure values; should you use an equivalent exposure with slower shutter speed and larger depth-of-field?, or will a shallow depth-of-field with higher shutter speed blurr the background (or foreground) and draw the viewer in for a closer look at the subject?

No matter where you are, what your subject; stop and think a little about designing the image and not taking the picture.

Histogram, Details and Viveza 2.0

Northern Gannets PREENING (Morus Bassanus, Fou de Bassan, NOGA) Parc national de l'Île-Bonaventure-et-du-Rocher-Percé, Bonaventure Island, Quebec. Image Copyright ©Christopher Dodds All Rights Reserved. Canon EOS 1DsMKIII, 500mm F4 L IS,  Tripod & Wimberley Head II. ISO 250, F20 @1/320s Manual mode. CLICK HERE TO PURCHASE A PRINT or LICENSE IMAGE FOR PUBLICATION

Chris, I am a huge fan of your work and consider it the very best bird photography out there; bar none! I have been a photographer for 30 years, and wonder if you would share how you achieve such amazing details in the whitest feathers; the details that seem impossible for me to capture. I am always blown-away when I visit your works, and I delight in every moment on your site. Many thanks and keep up the great work - Art W.

Art, thank you for your kind words. I will try to keep my answer simple.

The key to getting the most out of your digital camera is exposing the image correctly, as you probably know. I expose “to the right”, but make a huge effort not to have any data touching the right side of the histogram.

With only a little experience, a quick glance at the histogram can tell you if the exposure is correct, and give you and idea of the general appearance of the image; are the highlights blown? Is there enough shadow detail? – It’s all in the histogram.

 The histogram is a tool available on most digital cameras. It is a graph, which maps the luminosity (or brightness) values of your image, from black at left to white at right. The number of pixels at any given value are represented by the height of that value’s column. Once accustomed to reviewing the histogram, analyzing the data contained in it becomes second nature. It is the only way to know if you have exposed your image properly.

I’ll save you the boring science and details, but the idea of exposing to the right is a theory that capitalizes on the fact that the right side of the histogram contains more data than the left; there is more data in the whites, than in the blacks – much more. By overexposing the image slightly, and adjusting its brightness (or exposure) while converting the RAW image after capture, there is more data or details in the image. Conversely, if you were to underexpose an image and try to brighten the image after capture, then you would introduce noise, rather than detail, which was not captured in your RAW file. You have to be very careful not to push the whites up against the right of the histogram, or you risk loosing detail.

A good workflow post capture is another critical key to maximizing any detail contained in the RAW image. I typically use Photoshop to adjust contrast, boost saturation and add a little sharpness. My master .tiff is not created until I use Nik Software's Viveza 2. Viveza 2 is powerful engine that (among other things) adds targeted tonal contrast to any whites via the structure slider – be careful, it’s easy to overdo the adjustment.


Image of Histogram of the PROPERLY EXPOSED image above on the camera's LCD screen - The data is to the right of the histogram, but does not show any sign of over-exposure; there is no data touching the right edge of the graph. 


Histogram of the same image when opened in Adobe Camera Raw for conversion without any adjustments.


Snow Goose Dark Morph (Blue Goose, Chen Caerulescens, Oie des neiges) & EOS-1D Mark IV: On-Camera Tutorials

Snow Goose Dark Morph (or Blue Goose) Landing (Chen Caerulescens, Oie des neiges, SNGO) Bosque del Apache National Wildlife Refuge, Socorro, New Mexico, USA. Image Copyright ©Christopher Dodds www.chrisdoddsphoto.com All Rights Reserved. Canon EOS 1DsMKIII, 500mm F4 Lens with 1.4X II Teleconverter, tripod and Wimberley Head II. ISO 400, F5.6, 1/1600s in Manual Mode. CLICK HERE TO ORDER A PRINT OR LICENSE IMAGE FOR PUBLICATION. 

Canon EOS-1D Mark IV: On-Camera Tutorials

Canon USA has some pretty useful tutorial videos HERE that explore 13 specific features of the EOS-1D Mark IV. These instructional videos are designed to be viewed at your convenience: Watch them online, on the go, or even on your camera's rear LCD screen -- so you can follow along, every step of the way! If you only get out to shoot once in a while, and often forget how to properly use your Mark IV, then I highly recommend loading these videos onto a spare memory card for easy reference while out in the field.