
In my last post, Snowy Owl Photography: The Curse of a Sunny Winter Day, I wrote about the frustration of a sunny, bitterly cold day during one of my Winter Owl Photography Workshops in Québec and Ontario, Canada. We spent almost an hour watching a Snowy Owl sleep before it flew off to chase another owl from its winter hunting grounds.
But a sunny day can be a good day for a portrait.
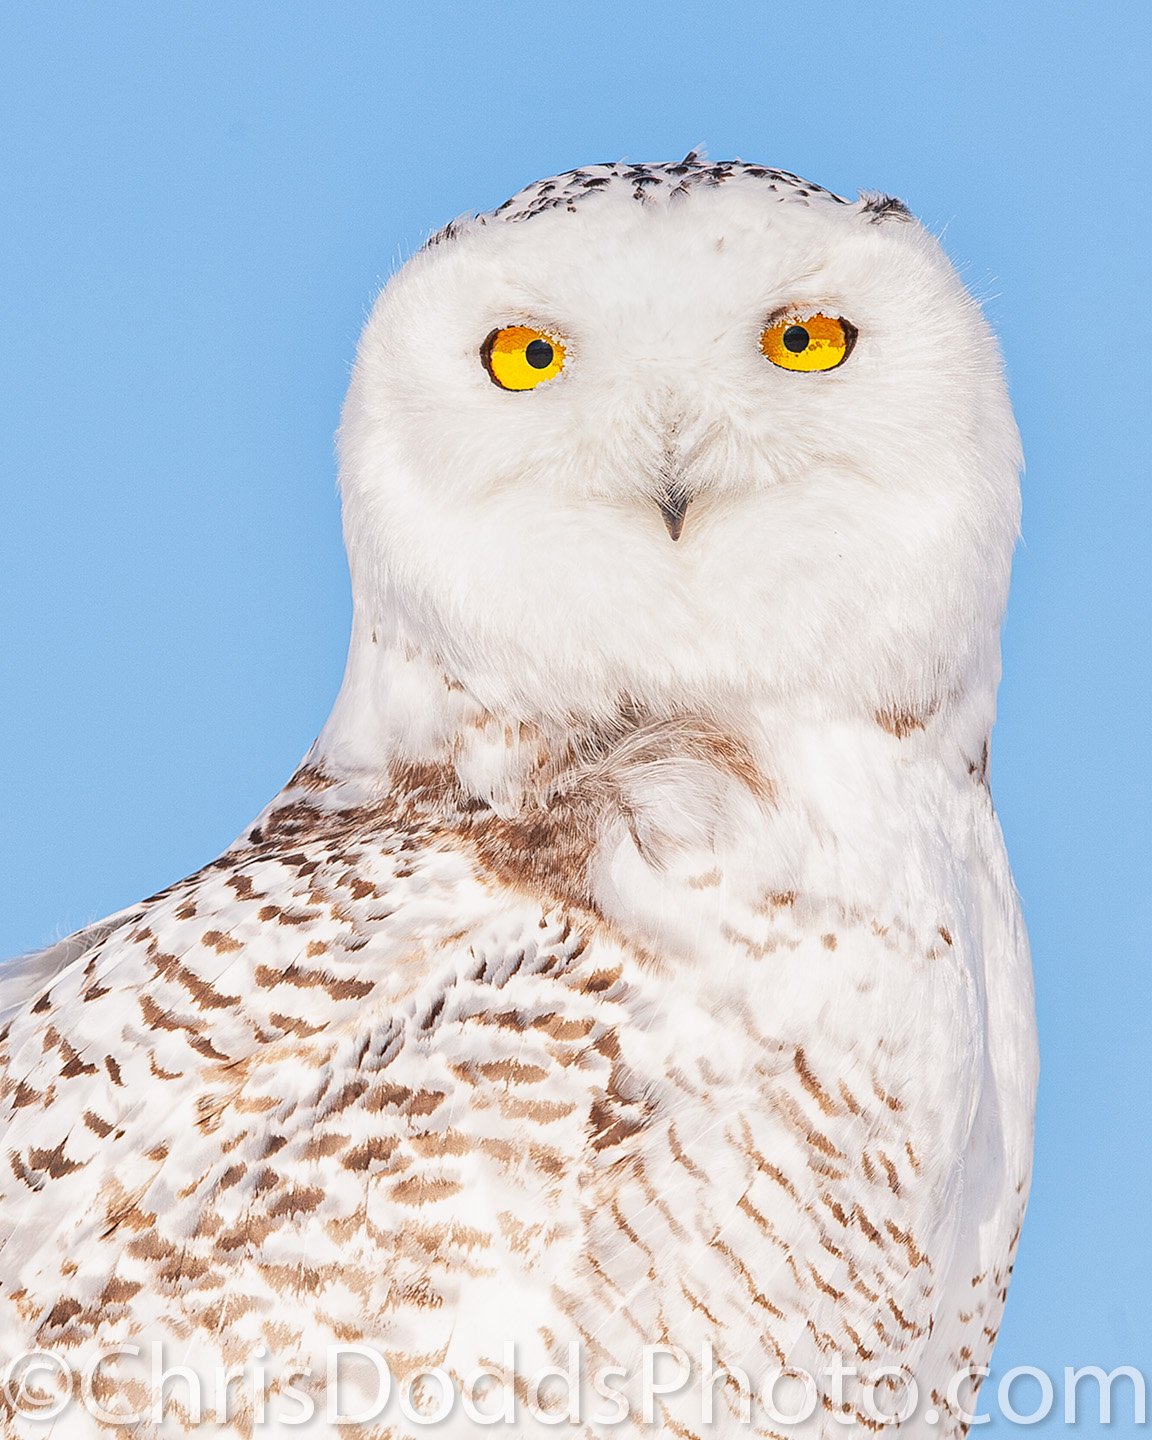
I love the ice crystals along this owl’s eyelashes and the tiny shadows they cast across its yellow eyes. Those details tell you something about the cold that a blue sky and white feathers alone cannot. The direct sunlight makes the crystals and their shadows stand out.
Point Your Shadow Towards the Owl
One of the simplest things I teach when photographing birds in direct sunlight is to watch your own shadow. With the sun behind you and your shadow pointing towards the bird, you are in a good position to make an evenly lit portrait.
The angle matters, especially around an owl’s eyes. Move too far to either side of that line and shadows can stretch across the face or leave one eye in shade. Here, both eyes receive light, while the small shadows beneath the frost add detail.
There is still some waiting involved. Your position determines the direction of the light, but the owl determines the angle of its face. A slight turn of the head can be the difference between a frame I keep and one I delete.
I establish my position at a respectful distance and wait. A portrait is never a reason to crowd an owl or try to make it look at the camera.
A Simple Background and Careful Exposure
The clean blue background leaves very little to compete with the face. The yellow eyes grab my attention first; then I notice the frost, the fine feathers around the bill and the brown markings below.
I like the nearly straight-on view of the face above the angled body. There is enough room above the head, and including the shoulder gives the portrait more than a head-and-neck view. I would not crop it any tighter.
White feathers in strong sunlight demand careful exposure. I watch the histogram and highlight warnings, then check the brightest areas closely when processing. I want the feathers to look white while retaining their fine texture. Pulling the highlights down too far can make a white owl look grey.
I made this photograph with a 600mm f/4 lens and 2× teleconverter at 1,200mm, using ISO 1,250, f/8 and 1/5,000s. That long focal length allowed a tight portrait from a respectful distance. The fast shutter speed helped keep the fine feathers sharp as wind gusts ruffled the plumage and buffeted the lens. It also left me ready if the owl suddenly took flight.
Soft light would have made a different portrait. Here, I would have missed the tiny shadows cast by the ice crystals.
It pays to look closely before wishing for different light.
Join Me for Winter Owls
Learning to read the light, choose a background and refine your position is part of what I teach during my Winter Owl Photography Workshops in Québec and Ontario, Canada. We work with the conditions we find, whether the opportunity is an owl flying over a snowy field or a portrait with frost on its eyelashes.