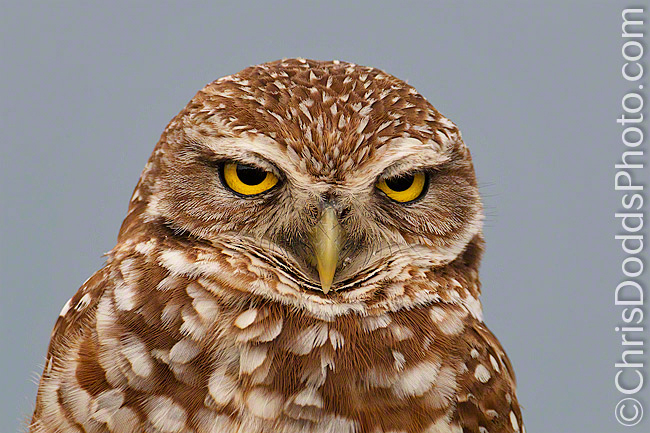
In my recent post about photographing black birds properly, Raven Intelligence in Autumn Gold: How to Photograph Black Birds Properly, Daniel asked a great follow-up question in the comments:
“What about photographing penguins?”
It’s a terrific question, because birds with a lot of white plumage create the exact opposite exposure problem.
Black birds absorb light and often require extra exposure.
White birds do the opposite — they reflect significantly more light than a mid-tone.
Understanding this difference is one of the keys to consistently getting beautiful exposures of seabirds like puffins, gannets, and penguins.
Why Cameras Underexpose White Birds
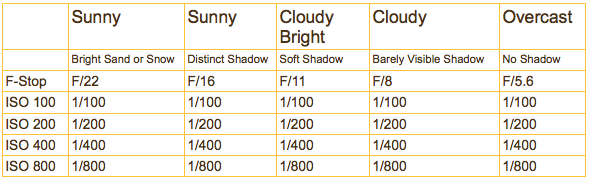
Every camera meter is calibrated to render the scene as a mid-tone (about 18% grey).
Whenever the camera is controlling exposure automatically — including when using Auto ISO — the camera meter measures the light reflected off the subject that enters the lens, and attempts to render that brightness as a mid-tone.
This applies to:
Aperture Priority
Shutter Priority
Program Mode
Manual Mode with Auto ISO
In all of these situations, the camera meter is still reading the reflected light from the subject and adjusting exposure accordingly.
But here’s the problem.
White plumage reflects about 1⅔ stops more light than a mid-tone.
So if you simply follow what the camera meter suggests, it will try to darken that white plumage toward grey — producing dull, muddy whites instead of bright, detailed feathers.
The Simple Solution
Fortunately, the fix is straightforward.
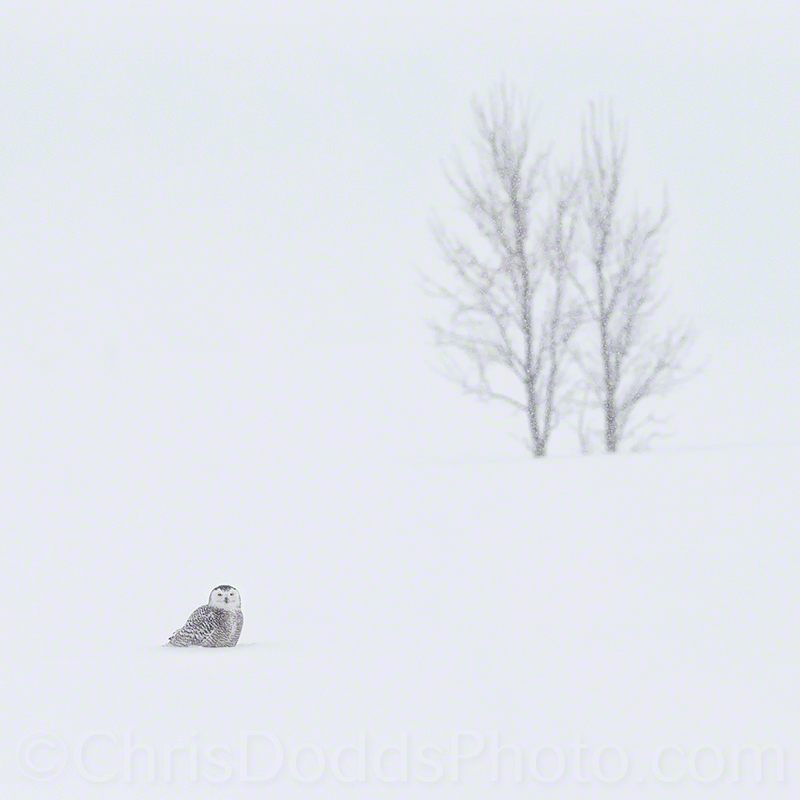
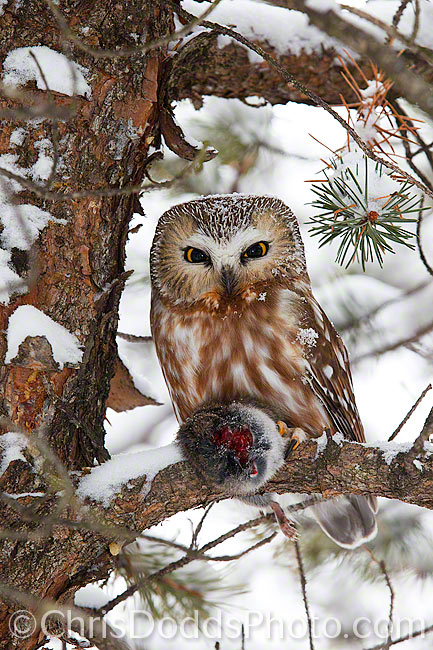
When photographing birds with large white areas — puffins, penguins, swans, gannets, or snowy owls — I follow a simple process in MANUAL EXPOSURE MODE.
First, choose the aperture you want for depth of field.
Second, select a shutter speed fast enough to freeze motion.
Then adjust your ISO until the camera meter reads +1⅔ stops.
That tells the camera the subject is supposed to be brighter than mid-tone, and the exposure falls into place beautifully.
Where to Meter
To make this work consistently:
• Use spot metering
• Meter directly from the white chest or body plumage
• Avoid darker areas such as wings or background water
This ensures the camera is measuring the brightness of the white feathers themselves.
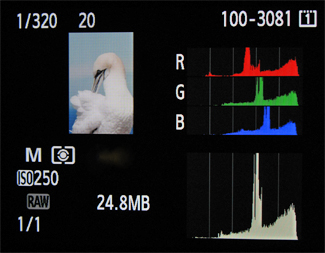
Confirming Exposure in the Field
Even with years of experience, I always double-check exposure.
After taking a frame, I quickly check two things:
1. Flashing highlights (blinkies)
to make sure important feather detail is not blown.
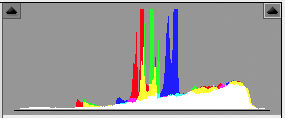
2. The histogram
For a properly exposed white bird, the whites should appear pushed toward the right side of the histogram, but not clipped.
If the histogram sits too far left, the whites will look dull and grey.
If it’s slammed against the right edge, you’ve lost feather detail.
The goal is bright whites with detail sitting just shy of clipping.
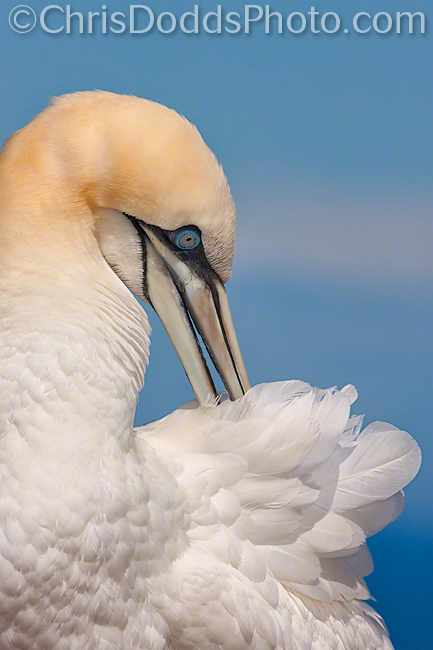
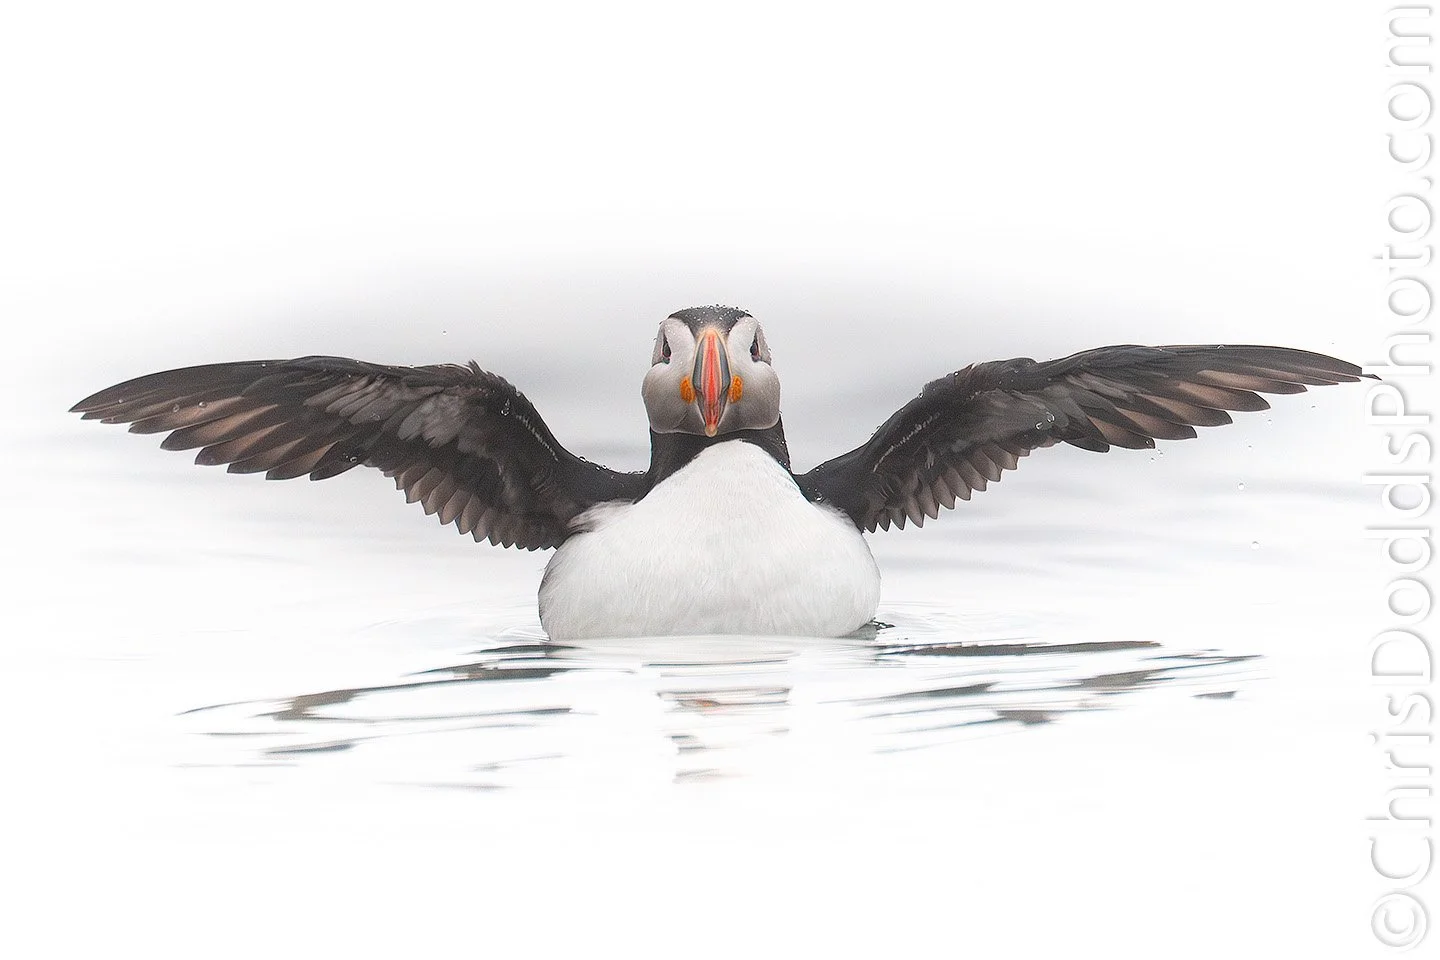
Puffins Are a Perfect Example
The Atlantic Puffin photographed above is a great example.
The bright white chest reflects much more light than the surrounding fog and water. If the camera simply averages the scene, the puffin will often be underexposed.
By metering from the white plumage and allowing the exposure to sit around +1⅔, the whites stay luminous while still preserving feather detail.
It’s a simple technique, but once you understand it, exposing white birds becomes much more predictable.
Photograph Puffins With Me on a Dreamlike Lighthouse Island
If photographing Atlantic Puffins is on your bucket list, I invite you to join me for my Deluxe Puffins Galore Photography Workshop in Quebec.
Our home for the workshop is a tiny, dreamlike lighthouse island surrounded by seabirds and dramatic ocean scenery.
We stay right on the island in the historic and fully restored lighthouse keeper’s home, and the photography is incredibly convenient — puffins and other seabirds are only about 200 meters (200 yards) from our accommodations.
There are no dangerous cliffs to climb, no long drives before sunrise, and no dependence on daily boat trips.
After a short 20-minute boat ride to the island, we remain there for the entire four days, fully immersed in photographing puffins and other seabirds.
Timed perfectly to coincide with the Puffins bringing the most fish back to their babies, which is always the most desired trophy image for photographers seeking high-visual-impact imagery!
Because everything is so close, the schedule is wonderfully relaxed. If the light gets harsh in the middle of the day, you can simply head back to the lighthouse keeper’s home for a hot shower, a nap, or some time working on your images, before heading back out for the beautiful evening light. The food is terrific, and the Puffin photography is off the charts!
You can learn more about the trip here:
👉 Deluxe Puffins Galore Photography Workshop Photo Tour
https://www.chrisdoddsphoto.com/deluxe-puffins-galore-workshop-photo-tour
If puffins are on your photography wish list, this is one of the most magical places in the world to photograph them.