Canon EF 100-400mm f/4.5-5.6L IS II USM mini-review

My friends at Canon Canada have done it again; another box with a prototype inside arrived, this time it was the new, and much anticipated, Canon EF 100-400mm f/4.5-5.6L IS II USM lens. I have an "MT" sample, which basically means that it is a pre-production sample and I can't share images from this lens. I was granted permission to post a picture of the lens, so here I am in my favourite weather conditions, with the lens on a newly released EOS 7D mark II; truly a killer, and "must have", wildlife imaging combination! (Image courtesy and copyright Julie Morrison - Thank-you!)


Despite the continual debate about it's consistent sharpness, the original Canon EF 100-400mm f/4.5-5.6L IS USM lens was almost always mounted on a second camera body and slung over my shoulder for nearly a decade. The copy I had was consistently sharp and produced many "portfolio" images, which continue to sell for publication and as prints. I see history repeating itself again, as I anticipate having the new Canon EF 100-400mm f/4.5-5.6L IS II USM lens paired with the new Canon EOS 7D mark II slung over my shoulder while out with my tripod-mounted super-telephoto lens and Canon EOS 1DX in the future.

First impressions: The lens features a completely new design with the old push-pull to zoom lens barrel replaced by a much more weather resistant and user friendly turn to zoom variable torque twist ring. The new lens collar features an easy to remove lens foot and the lens is adorned by a new lens hood with a push button lock release and a sliding window to accommodate filter adjustments (mount the window on the bottom of the lens in wet or snowy weather to keep the front element clean and dry). No detail was over-looked by the Canon engineers when redesigning this beast; it even includes an improved pinch-lock style 77mm lens cap.  It is a little heavier than its predecessor, but the improvements to design, image quality and weather sealing are, in my opinion, worth every ounce....and I did get to test the weather sealing while out in the wet snow for an extended shoot as seen in the image above (but let's not tell my friends at Canon what I do to their prototypes - smile).
It's even more of a beast if you install a Canon Extender EF1.4X III between the lens and 1.6X crop factor camera (like the 7D mark II); Yes, it still auto-focuses and offers an effective focal length of 224-896mm! Image quality is still impressive with a Canon Extender EF2X III, but the lens needs to be manually focused at a mind-blowing 1280mm equivalent.

Less apparent new features are the lens now "features one fluorite and one super UD element to help provide impressive contrast and resolution with reduced chromatic aberration across the entire zoom range. Canon’s new Air Sphere Coating (ASC) helps significantly reduce backlit flaring and ghosting, while fluorine coatings on the front and rear lens surfaces help lessen smears and fingerprints. A 9-blade circular aperture renders beautiful, soft backgrounds, and a 3 mode (standard, panning and exposure only) Optical Image Stabilizer provides up to 4 steps* of image correction." - Canon product page.

Auto-focus speed and accuracy are impressive, with zippy performance only usually expected in the most expensive optics. I haven't tested the lens for birds in flight yet, but my initial impressions are that AF acquisition time and speed are remarkably good. As I discovered way back in 2011 while testing the Canon EF70-300mmL IS USM, the new optics and coatings improve resolution and contrast, which greatly improve the already impressive new auto-focus systems in the latest Canon cameras. The minimum focusing distance has been reduced to only 3.2 feet (my test unit focuses much closer than that), making it a fantastic walk around lens for details in nature too!

As always, I don't spend my time looking at specifications or MTF charts, but I do closely examine the images and evaluate image quality for my "real life" use; big prints. The results are impressive! While important to note that I have based this mini-review on a pre-production unit, it is unlikely that image quality will change with a production model; It would be hard to make it better.

In conclusion, if you are looking for an incredibly versatile wildlife, nature, birds-in-flight, sports and action set-up that won't break your back or bank account, then the new Canon EF 100-400mm f/4.5-5.6L IS II USM lens, paired with the new Canon EOS 7D mark II and a Canon Extender EF1.4X III truly are a wildlife photographer's new secret weapon! It's a relatively compact, packable and manageable kit that I won't be caught without!

From the Canon product page:
"The EF 100-400mm f/4.5-5.6L IS II USM lens delivers a superb combination of cutting-edge performance, compact construction and brilliant resolving power that’s great for sports and wildlife photography. The lens features one fluorite and one super UD element to help provide impressive contrast and resolution with reduced chromatic aberration across the entire zoom range. Canon’s new Air Sphere Coating (ASC) helps significantly reduce backlit flaring and ghosting, while fluorine coatings on the front and rear lens surfaces help lessen smears and fingerprints. A 9-blade circular aperture renders beautiful, soft backgrounds, and a 3 mode (standard, panning and exposure only) Optical Image Stabilizer provides up to 4 steps* of image correction. The new inner focusing AF system helps ensure fast and accurate focus down to 3.2 ft. with a .31x maximum magnification. Usability enhancements include a rotation-type zoom ring with adjustable zoom torque for more precise, customizable zoom performance, a redesigned tripod mount that can be attached and detached without removing the lens from the camera, and an all-new lens hood with a side window that makes it simple to adjust specialty filters-like polarizers-without the need to remove the hood. Ruggedly constructed with advanced dust and water sealing for durability in a range of environments, the EF 100-400mm f/4.5-5.6L IS II USM lens is a stellar performer with refined controls for a wide variety of situations."


Canon Pixma Pro-1 Review

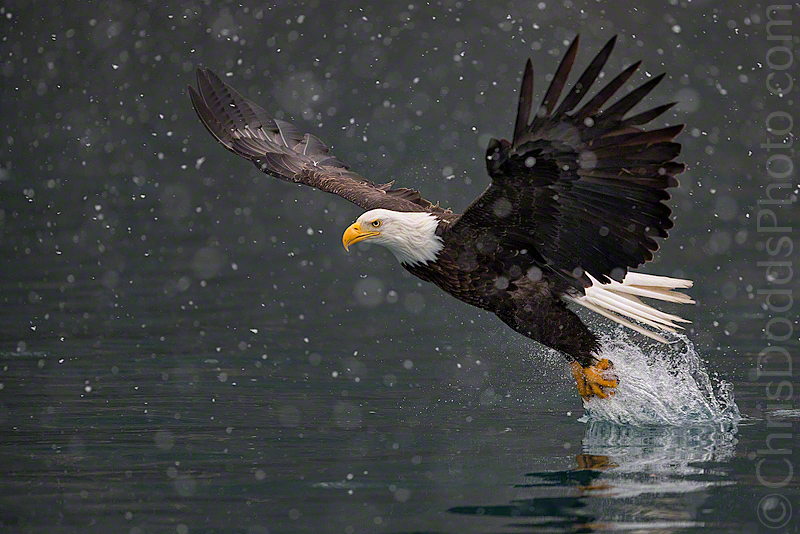
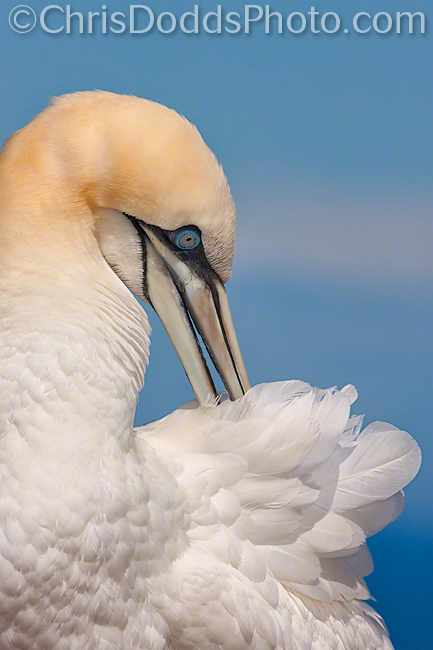
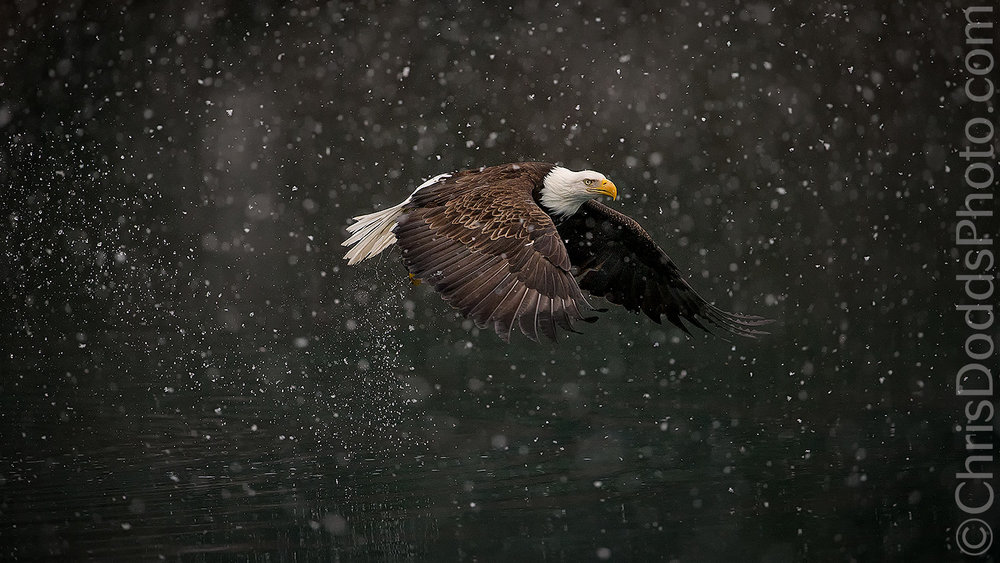
American Bald Eagle SNOWGLOBE from my Bald Eagle Photographic Expedition (Hailiaeetus leucocephalus, Pygarge a tete blanche, BAEA) Kachemak Bay (near Homer), Alaska ©Christopher Dodds All Rights Reserved. Canon EOS 1DX, EF 200-400mm F4 L IS USM with Jobu L-Bracket  Jobu Jr.3 deluxe gimbal head and Jobu Designs Algonquin Tripod ISO 6,400, f/4 @ 1/3,200s Manual mode. Click HERE to order a print or license image for publication.


Don't just post it; Print it!

I have a mission and a message; there is nothing like the printed photograph; your images deserve to be printed and hung on your living room wall, not just posted to your Facebook wall! It is simply amazing to realize just how many pictures are taken every day, and how few of those images make it to print!

It's no secret that I'm a perfectionist; I push myself to be better at my passion and craft each and every time I am out with my camera; from capture through to the print. I don't feel the image is finished until I have experienced the big picture; my own tactile response to my own work is, perhaps, the most rewarding part of the image making process to me.

As I mentioned in my Canon IPF6400 Review HERE, as a master printer, I am continuously working to master the art of the digital print. I continue to use and love my Canon IPF6400 for prints larger than 14" wide, but have now added a Pixma Pro-1 printer to my print production regime for anything up to 14" wide.

Initial impression

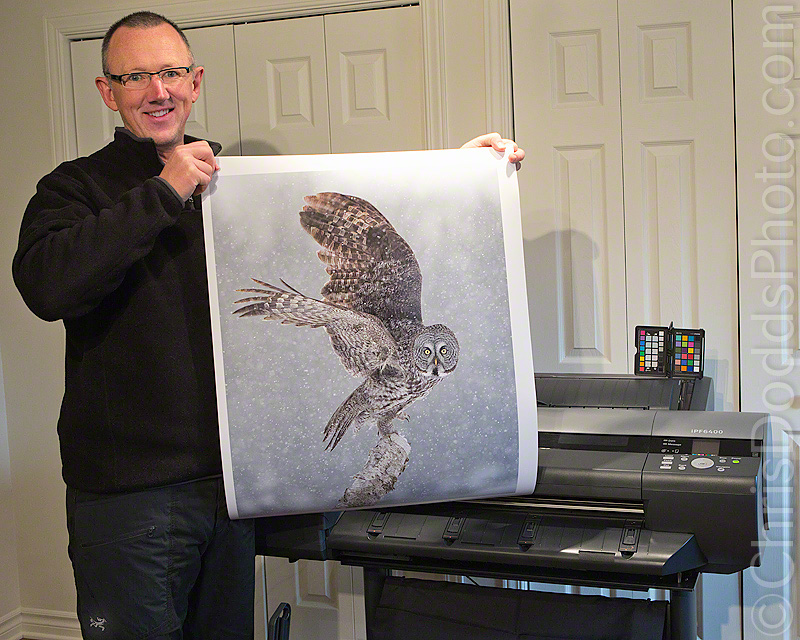
The Canon Pixma Pro-1 printer arrived and I couldn't wait to give it a try; I quickly set-up the printer and grabbed a 13" x 19" sheet of Canon Pro Platinum Photo Paper. I opened a favourite Bald Eagle image with lots of blacks in the background and I selected the canned paper profile and pressed print. No head alignment, no nozzle check, no custom paper profile: WOW, what a print! I was so impressed with the first print, I grabbed it and brought it to my Canon presentations at the Henry's show in Toronto; it blew everyone away! I was, and continue to be wowed by this printer!

As is typically the case with my reviews, I won't be listing all of the technical specs which can be found on the Canon website HERE. I will simply try to highlight my favourite features and the reasons I have added this printer  to my studio, and why I feel this is the very best printer in it's class. I will try to keep it short.

Full disclosure

My introduction to the Canon line-up of printers came after my being named the very first Canon Canada ambassador, or Canon Northern Explorer of Light, some two and a half years ago. I had been using another popular brand of LFPs (Large Format Printers). I had invested so much time figuring-out workarounds for all of their shortcomings, I was foolishly reluctant to change. Although Canon has, and does, continue to sponsor me as a Northern Explorer of Light, I am under no contractual obligation to try to sell you anything. I am simply sharing my experience and making a personal recommendation to help you avoid the frustration of choosing the right printer, and avoiding the frustration of choosing the wrong one (because, after all, I had already done that to start with - smile). This is a testament to the printer I chose for my print production.

Designed for production priced for play

The Canon Pixma Pro-1 Printer is a heavy and solid machine; it is designed to be used for production, but priced within reach of any amateur. The most important cost-saving features are that this baby has the largest ink cartridges (36ml) in its class (which lowers the cost per drop), and it doesn't need to pump gallons of ink to clean the print head every single time you go to make a print; something I had hated with my old printers. The plain truth of the matter is that I have yet to have any problems with this printer or clean the print heads; even after leaving the printer idle while away on my frequent workshops. If you are looking for a way to justify investing in this printer, it's quick, easy and simple: I seem to be averaging about CAD$2.73 per 13" x 19" print for ink plus the cost of the paper; in my case, my preferred paper is the Canon Platinum Pro Photo Paper which lists for CAD$4.00 per 13" x 19" (CAD$39.99/10 sheets). So, with a cost per print of about CAD$6.73, it doesn't take many print sales for this printer to pay for itself. By the way, for those who claim the photographic print business is dead, here's a free tip; make a few prints of your favourite images and always have them around your home and office - it is much easier to sell a print if people can see it live, and not have to wait for it.

The very best Black & White printer on the market

After carefully examining a series of black & white prints that I produced; I feel this is, by far, the very best black & white printer on the market. There are four resident black grey ink cartridges and a clear Chroma Optimizer to smooth-out the differential gloss (evens out the surface for viewing under different lighting sources and controls the amount of light reflected on your prints so your blacks appear richer, deeper, and truer). This printer produces the closest thing to an old-fashioned black & white print that I have ever seen! If you need more convincing that this is, in fact, the best black & white printer on the market, have a look at what Henry Wilhelm had to say HERE. Who is Henry Wilhelm? He and his company conducts research on the stability and preservation of traditional and digital color photographs and motion pictures. His company publishes brand name-specific permanence data for desktop and large-format inkjet printers and other digital printing devices. Wilhelm Imaging Research also provides consulting services to museums, archives, and commercial collections on sub-zero cold storage for the very long term preservation of still photographs and motion pictures. Read more about Henry Wilhelm HERE.

Immense colour gamut

The Canon Pixma Pro-1 uses the 12 ink Lucia system and those four black grey colours aren't just for black & white printing; they provide a massive boost to the overall colour gamut of the printer. I can't say I have ever seen a finer digital print!
 

The most nozzles

The print head contains over 12,000 nozzles, or 1,024 nozzles per colour. This is about five times more nozzles than it's closest competitor. Why is this important? Simply because it means that you can still produce perfect prints if some of the nozzles are clogged! Print Heads are consumables, so they do eventually start to clog; having so many nozzles means that you are still in business making awesome prints as some start to clog. More print heads equates to less clogging, less cleaning and faster printing.

Biggest ICC colour profile collection

Rather than convince you that you should only buy Canon papers, Canon has taken the high road and encourage you to try different papers with a massive array of ICC profiles for a growing collection of papers. Take a look at the largest selection of third party ICC profiles recognized by the provided printer software HERE.


Print speed

As I found with the IPF6400, the Pro-1 produces prints much faster than anything else I have found on the market.


Saves time and money

The ink travels from the cartridge to the print head in a dedicated tube which eliminates the need to flush expensive ink when switching between matte and glossy ink and back again. This feature saves time and money.

Conclusion

In conclusion, The Canon Pixma Pro-1 printer produces, in my opinion, industry leading print quality at blazing speed at a cost effective price. The colours are true, rich and vibrant and the black & white images are the best that can be produced with this technology. No matter what genre you pursue, this printer will not disappoint. The Pro-1 has earned it's place in my studio and impresses me every time I use it!

Northern Fur Seal Pups of Saint Paul Island

Northern Fur Seals NEW FRIENDS (Callorhinus ursinus, L’otarie à fourrure du Nord) Saint Paul Island, The Pribilof Islands in the Bering Sea, Alaska. Image Copyright ©Christopher Dodds. Canon 1DX, 600mm F4 L IS II , 2X Teleconverter III, Jobu Designs Algonquin Tripod & Jobu Jr. 3 ISO 4,000 f/8 @ 1/1,6000s Manual Mode.  PURCHASE A PRINT or LICENSE IMAGE FOR PUBLICATION HERE.

Here's a couple of Northern Fur Seal pups from my Saint Paul Island workshop. Seals only have one baby at a time, so these two are neighbors meeting for the first time. They are fascinating to watch, and their calls sound very much like a barn full of baby sheep. I shot this image with my Canon 600mm f/4 IS II and 2X Teleconverter wide open at f/8 to isolate the subjects from the volcanic rocks, and used a shutter speed of 1/1,600 of a second to be sure to freeze the rapidly vibrating mouth and teeth while they were calling.

THE Ultimate Bird Photography Workshop

Northern Gannets LOVING  (Morus bassanus, Fou de Bassan, NOGA ) Parc national de l'Île-Bonaventure-et-du-Rocher-Percé, Bonaventure Island, Quebec ©Christopher Dodds All Rights Reserved. Canon EOS 1D X, 70-300mm F4-5.6 L IS USM @ 277mm Hand Held ISO 800, f/7.1 @ 1/1,600s Manual mode. Click HERE to order a print or license image for publication.

The Ultimate Birds Photography Workshop

If you really want to master bird photography; birds in flight, portraits, shooting from a tripod, shooting hand held, with long lenses and short lenses, then this is your chance to join me, Christopher Dodds (Canon Northern Explorer of Light) at the very best venue I have found in the world to teach bird photography!

I have hosted thousands of photographers during my Gannets Galore workshops on Bonaventure Island and many of them have produced winning images during the workshop; some of those in world class competitions.

This is the perfect workshop for you no matter what equipment you own, or the skill level you are at. This is the perfect opportunity for the seasoned pro to take advantage of my site knowledge and logistics, or a total novice to master the skills to become a competent bird photographer. Super-telepoto lens not mandatory - you don't need a big gun to take full advantage of the Gannets of Bonaventure Island; many award winning images have been made with a 70-200mm lens! I am not satified unless you are creating images I would be happy to call my own.

Read more about my Gannets Galore workshop HERE

Thanks for a truly remarkable photographic experience on both land and water! The Zodiac rides were a wonderful way to spend the early mornings during your Gannets Galore Photo Tour. I was amazed at how close we were able to get to the birds and the seals. The nonstop action at the Gannet colony provided countless photo opportunities every second. Now I can see how you can still find it interesting and challenging even after visiting the island over 350 times. Your extensive experience photographing at the colony meant that we always knew where the best opportunities were at any given time as the wind and weather constantly changed throughout the day. And your excellent tips on exposure, technique, composition, and use of flash allowed us to take advantage of those opportunities and capture some wonderful images.
 On a logistical note, your fluency in French also proved invaluable at many points during the trip when you came to the rescue of us dumbfounded English speakers. 
Hope to see you again soon, maybe even on a June trip back to Bonaventure!

Mike Milicia Boston | MA | USA

Spring Migration Special Event with Canon Canada Northern Explorers of Light and Henry's School of imaging

Black-and-White Warbler (Mniotilta vary, Paruline noir et blanc, BAWW) Point Pelee National Park, Leamington, Ontrario. Image Copyright ©Christopher Dodds. Canon EOS Canon EOS 1DS II, 500mm F4 L IS, 2X Extender. ISO 640, f/8 @ 1/160s Manual mode. PURCHASE A PRINT or LICENSE IMAGE FOR PUBLICATION HERE.

I am thrilled to announce that Canon Canada's Northern Explorers of Light program and Henry's have teamed-up to offer you some extraordinary events during spring migration at Point Pelee National Park of Canada. The cold spring and late arrival of the warmer weather is likely to make this spring's migration epic! These events are timed to coincide with the very best birding Pelee has to offer photographers; the highest possibility of a fallout (high number of birds), before the leaves obscure our view.

Events include an hour long slideshow, portfolio reviews, half day walking tours and full day walking tours. Not only will I help you improve your bird photography technique, I will share my strategy to maximize your opportunities during spring migration at Pelee. I can help beginners leap forward on the technical side and offer site guidance to advanced amateurs and pros.

The events are open to everyone and Canon equipment is not mandatory - I will be teaching bird photography that will improve your images regardless of the brand camera you own. Henry's will have both Canon and Nikon gear on site for rent.

Check it out and register at Henry's School of Imaging HERE

Canon imagePROGRAF iPF6400 review

World Wildlife Photographer and Canon Northern Explorer of Light Christopher Dodds with Canon imagePROGRAF iPF6400. There's nothing like seeing a big print of one of your favorite images! Notice the X-Rite Colorchecker Passport in the background to help with color accuracy.

Canon IPF6400 Review

As a master printer in the traditional darkroom, I've been working hard over the last decade to master the art of the digital print; often struggling to squeeze every ounce of colour gamut out of the printer and paper I was using. I have owned more inkjet printers than I care to admit, and have spent an inordinate amount of time finding workarounds to each of their weaknesses. My quest to make the very best print has been a very long and often  frustrating journey.

It's no secret that I'm a perfectionist; I push myself to be better at my passion and craft each and every time I am out with my camera; from capture through to the print. I don't feel the image is finished until I have experienced the big picture; my own tactile response to my own work is, perhaps, the most rewarding part of the image making process to me.

Canon Canada sent me their flagship 24" Image PROGRAF IPF6400 printer back in August and I have been to the Canon LFP (Large Format Printing) Lab in Toronto for some training and product familiarization by some of the best in the business. I want to share a little about the printer with you, without re-writing the technical specification sheet (which can be found HERE); I wanted to write a hands-on review of the printer, it's extraordinary colour gamut, ease of use and the masterful prints it creates; Let's just say I have been blown-away by my first Canon LFP; this is an industry changing printer that truly is a turn-key solution for excellent prints without needing to be an expert print maker. I have finally found the perfect printer!

The unboxing and set-up was quick and easy, thanks to the single page set-up instructions. The included stand with built-in wheels makes it easy to move out of the way when not in use. The design is well though-out, with built-in paper bin and it certainly looks great in the studio/office.

The included software is, quite frankly, brilliant and easy to install and use; Canon was wise to develop a dedicated plug-in for Photoshop to facilitate easy 16 bit printing and a stand-alone software to manage print media called the MCT (Media Configuration Tool). The MCT allows you to add both custom and Canon paper types which will appear on the printer's LCD display when loading new media. Canon has made it easy to find profiles for their media HERE and compatible third party papers HERE.

The included ImagePROGRAF Layout Plug-in includes some pretty useful tools to minimize paper waste. If you print canvas and make gallery wraps, then the image expansion tool does a fabulous job of easily extending the edge of the image along the sides with choices that include black border, soft (or blurred) reflection; minimizing image loss during the wrapping process.

As a Mac user, I was disappointed to learn that the Accounting Manager was only available for the Windows platform; though more out of curiosity than needing to know the exact job cost (ink & media). This is much more useful to a print production house than a fine art studio - If you are a photographer trying to calculate exact print costs, then you are most likely not charging enough for your work!

The industry leading 12-color Lucia EX ink offers the widest colour gamut, finest detail and best print quality I have ever seen. The built-in sub-ink tanks built into the printer allow you to change ink tanks without interrupting printing and the new 330ml replacement tanks are a welcome change when doing large print runs.

The new PF-05 printheads have eliminated both clogging and banding; this, alone, is worth the investment. Optimized for speed and ink savings, the driver maintains the highest print quality while reducing ink use by ensuring fewer print head passes; resulting in a much faster print time.

Available features, upgrades and other models:

iPF 6450 - 24" Printer with built-in hard drive and optional X-Rite SU-21 spectrophotometer with automatic colour calibration and colour accuracy across multiple printers and multiple geographic locations.


iPF 8400 - 44" Printer


iPF 9400 - 60" Printer

Because these printers all use the same ink, print heads and mechanics; this review is relevant to them all.

Here is an overview of the printer from the Canon website:

The imagePROGRAF iPF6400, 24-inch large format printer was designed for professionals in the graphic, fine art, photography and proofing markets that seek the highest possible standards for quality-control and image reproduction. An incredibly large color spectrum is produced by the 12-Color LUCIA EX pigment ink set, which also provides better scratch resistance and smoother gradations. The new Multi-sensor included with this printer provides improved color density detection and allows for a full calibration to be completed within 15 minutes, with the ability to use non-Canon branded media. A new Color Calibration Management System allows for color calibration targets to be created using the iPF6450 with optional spectrophotometer and shared across all new iPFX400 12-color printers, and the included software allows for all printers on the network to be monitored from one central location. The printer supports ink tank sizes of 130ml and for the first time, 300ml, and the new sub-ink tank keeps some ink in reserve to allow for tanks to be changed without interrupting a print. In highest print mode, the order of ink application and layering is optimized to maintain the highest print quality with fewer passes, making this mode twice as fast compared to previous models.

To expand printing options and capabilities, the iPF6400 printer comes bundled with a Print Plug-in for Adobe Photoshop, Digital Photo Professional, and Microsoft Office. The enhanced Print Plug-in for Adobe Photoshop includes a new Adjustment Pattern Setting which allows for multiples of an image to be printed at once with different color values implemented and displayed. Gallery wraps for canvas prints can now be created using the new Gallery Wrap Feature. To improve versatility, the iPF6400 has a media configuration tool which allows customers to not only utilize existing Canon-branded media, but also with third party media. Designed for efficiency, reliability, and above all quality, the iPF6400 is the professionals answer to superior quality large format prints.

Disclaimer: I am a Canon Northern Explorer of Light; paid and sponsored by Canon Canada. I do not write reviews of products that I do not use every day, and do not endorse products in lieu of sponsorship or payment. This review and endorsement is strictly my personal view.

Bald Eagle Workshop and Kudos

American Bald Eagle FISHING DREAMS (Hailiaeetus leucocephalus, Pygarge a tete blanche, BAEA) Kachemak Bay (near Homer), Alaska ©Christopher Dodds All Rights Reserved. Canon EOS 1DX, 300mm F2.8 L IS USM with Jobu L-Bracket  Hand Held ISO 2,000, f/2.8 @ 1/3,200s Manual mode. Click HERE to order a print or license image for publication.

He's an Eagle fishing in a rather dreamy snowfall from my Bald Eagle Workshop last March. If you would like to have the opportunity to learn the skill set to reliably get the shot timed, framed and exposed properly, then do consider joining me for the adventure of a lifetime. I'm never completely satisfied until you get the images I would be proud to call my own. Only a few seats left! For more information or to sign-up, CLICK HERE


Montreal Camera Club Northern Explorers of Light Presentation

On Monday September 9th, 2013, I had the pleasure of making my third presentation to the Montreal Camera Club; my first visit there since becoming a Canon Northern Explorer of Light.  It was truly a great evening for me to meet-up with some old and talented friends.


Last night (Sept. 9, 2013) Christopher Dodds was our guest speaker at The Montreal Camera Club's opening meeting of our 2013-14 season. The club over the years has had many guest speakers, but last night was something extra special. We had a full house and for a little over 2 hours everyone was just hanging on to every word that was spoken and in awe of every images that was shown. I can't ever remember all the people in the hall being so quiet. It is a tribute to Christopher and his speaking ability and the way he shares his knowledge of photography and the equipment he uses. It was a great evening I wish everyone could have been there.

Thank you Canon Canada for making all this possible. I am sure that I won't be the only one to tell you that you have a gem on your Canon Northern Explorer of Light team in Christopher Dodds.

Thank you once again.


John Zimmerman Past President, Montreal Camera Club

Christopher Dodds Canon Northern Explorer of Light

Polar bear (Ursus maritimus, Ours Blanc) at Cape Tatnam Wildlife Management Area (south of Wapusk National Park) along the shores of the Hudson Bay in northern Manitoba. Image Copyright ©Christopher Dodds. Canon 1DX, 500mm F4 L IS , 1.4X Teleconverter III, Tripod & Jobu Jr. 3 (with Deluxe Swing-arm upgrade) ISO 800 f/8 @ 1/800s Manual Mode. PURCHASE A PRINT or LICENSE IMAGE FOR PUBLICATION HERE.

Canon Northern Explorers of Light

I am thrilled and honoured to share the news that I have accepted the invitation to join the Canon family and their NORTHERN EXPLORER OF LIGHT Initiative as an inaugural member. The Canon Northern Explorers of Light initiative has been founded for the purpose of educating photographers and targets professional photographers. It truly is a huge honour, and I am very grateful to be one of the founding few to be recognized by Canon as a worthy ambassador. Watch out for news from Canon and I'll be sure to let you know when their new pro website goes live over the next few weeks.

Histogram, Details and Viveza 2.0

Northern Gannets PREENING (Morus Bassanus, Fou de Bassan, NOGA) Parc national de l'Île-Bonaventure-et-du-Rocher-Percé, Bonaventure Island, Quebec. Image Copyright ©Christopher Dodds All Rights Reserved. Canon EOS 1DsMKIII, 500mm F4 L IS,  Tripod & Wimberley Head II. ISO 250, F20 @1/320s Manual mode. CLICK HERE TO PURCHASE A PRINT or LICENSE IMAGE FOR PUBLICATION

Chris, I am a huge fan of your work and consider it the very best bird photography out there; bar none! I have been a photographer for 30 years, and wonder if you would share how you achieve such amazing details in the whitest feathers; the details that seem impossible for me to capture. I am always blown-away when I visit your works, and I delight in every moment on your site. Many thanks and keep up the great work - Art W.

Art, thank you for your kind words. I will try to keep my answer simple.

The key to getting the most out of your digital camera is exposing the image correctly, as you probably know. I expose “to the right”, but make a huge effort not to have any data touching the right side of the histogram.

With only a little experience, a quick glance at the histogram can tell you if the exposure is correct, and give you and idea of the general appearance of the image; are the highlights blown? Is there enough shadow detail? – It’s all in the histogram.

 The histogram is a tool available on most digital cameras. It is a graph, which maps the luminosity (or brightness) values of your image, from black at left to white at right. The number of pixels at any given value are represented by the height of that value’s column. Once accustomed to reviewing the histogram, analyzing the data contained in it becomes second nature. It is the only way to know if you have exposed your image properly.

I’ll save you the boring science and details, but the idea of exposing to the right is a theory that capitalizes on the fact that the right side of the histogram contains more data than the left; there is more data in the whites, than in the blacks – much more. By overexposing the image slightly, and adjusting its brightness (or exposure) while converting the RAW image after capture, there is more data or details in the image. Conversely, if you were to underexpose an image and try to brighten the image after capture, then you would introduce noise, rather than detail, which was not captured in your RAW file. You have to be very careful not to push the whites up against the right of the histogram, or you risk loosing detail.

A good workflow post capture is another critical key to maximizing any detail contained in the RAW image. I typically use Photoshop to adjust contrast, boost saturation and add a little sharpness. My master .tiff is not created until I use Nik Software's Viveza 2. Viveza 2 is powerful engine that (among other things) adds targeted tonal contrast to any whites via the structure slider – be careful, it’s easy to overdo the adjustment.


Image of Histogram of the PROPERLY EXPOSED image above on the camera's LCD screen - The data is to the right of the histogram, but does not show any sign of over-exposure; there is no data touching the right edge of the graph. 


Histogram of the same image when opened in Adobe Camera Raw for conversion without any adjustments.